Valentine's Day nails 2026 mark a departure from predictable hearts and glossy reds. This year introduces precision techniques, textural complexity, and chromatic sophistication that extend well beyond February 14. The Valentine's Day nails 2026 landscape prioritizes wearability alongside visual impact, offering designs that function as statement pieces without sacrificing everyday elegance. What distinguishes Valentine's Day nails 2026 from prior iterations centers on technical execution rather than thematic decoration.
The shift reflects broader industry evolution. Magnetic finishes achieve three-dimensional effects through controlled light refraction. Chrome applications produce liquid metal surfaces with minimal texture. Translucent layering creates depth without embellishment weight. These approaches answer a persistent concern: how to celebrate the occasion without designs that feel dated by mid-February. The result offers Valentine nail art that performs as well on March dates as it does for the holiday itself.
Consider this guide a navigation tool through ten distinct trend categories shaping Valentine nails 2026. Each section addresses a specific aesthetic direction, technical approach, and styling consideration. The goal remains clarity over comprehensiveness identifying what actually defines this moment rather than cataloging every possible variation.
The State of Valentine Nails in 2026
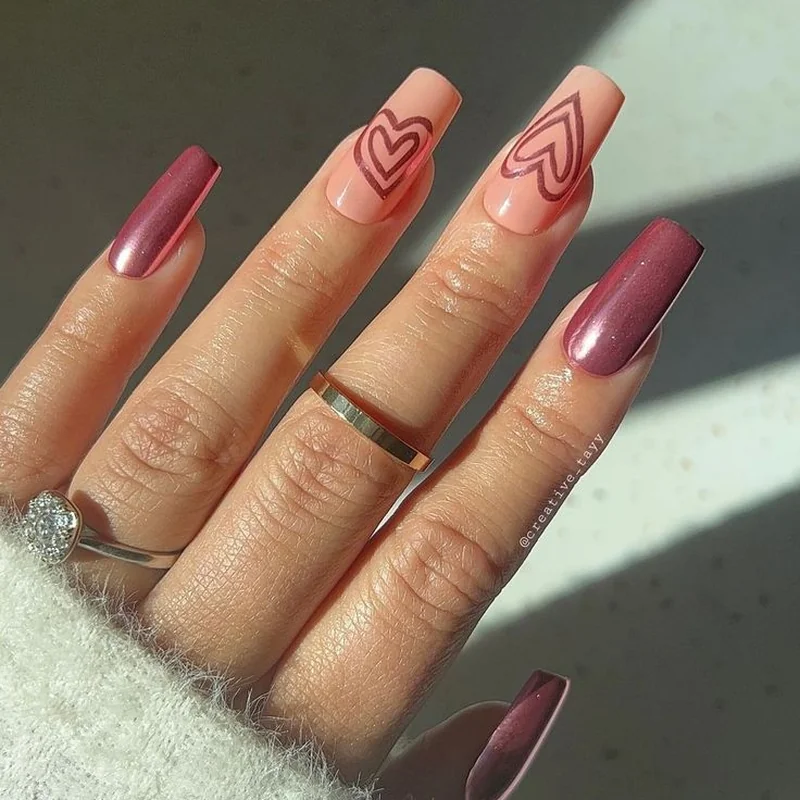
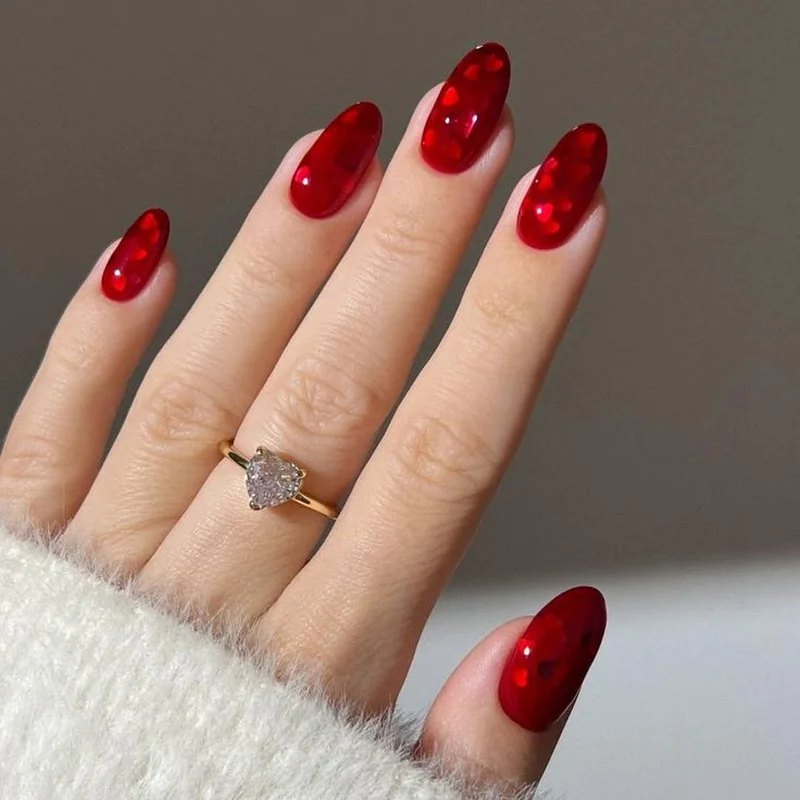
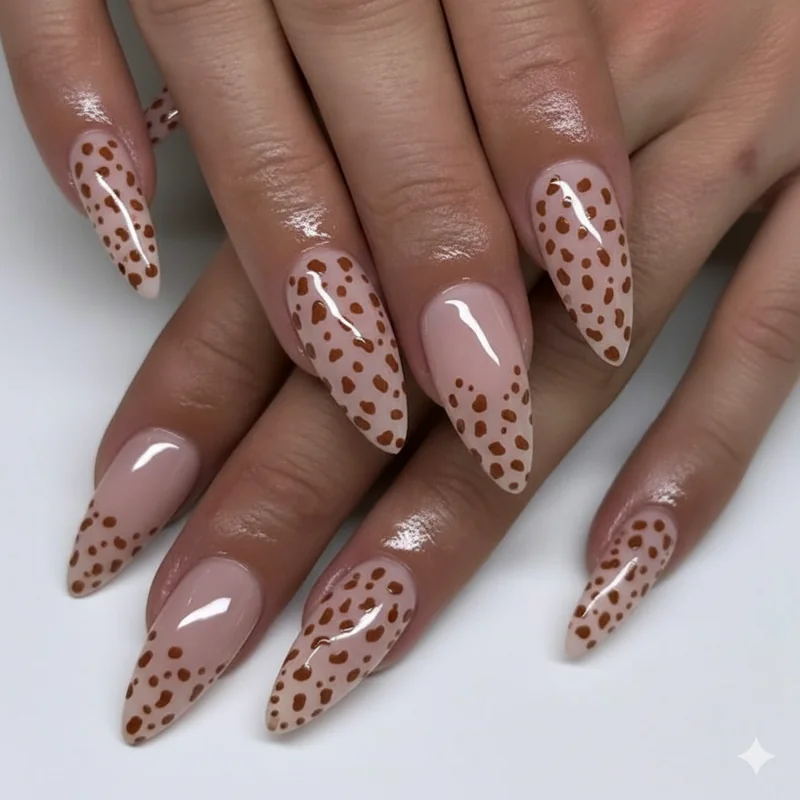
Valentine nails 2026 operate within a refined aesthetic framework. The maximalist embellishment trend that dominated 2024-2025 gives way to technique-driven design. Three-dimensional hearts remain present but appear sparingly, positioned as accent elements rather than primary features. Color palettes expand beyond traditional pinks and reds to include burgundy depths, warm tomato tones, and translucent blush overlays.
Texture plays an increased role. Industry analysis identifies velvet finishes, magnetic shimmer effects, and matte-gloss combinations as defining characteristics. These surfaces respond to light in variable ways, creating visual interest through movement rather than static decoration. The technical threshold rises achieving clean lines, controlled gradients, and dimensional effects requires either advanced DIY skills or professional application.
Duration concerns influence design selection. Valentine nails 2026 trend toward gel extensions and builder gel applications that maintain integrity through multiple weeks. Press-on sets gain sophistication, with magnetic and chrome finishes now available in pre-designed formats. The question shifts from "what looks best on Valentine's Day" to "what maintains visual appeal through month-end."
Search patterns reveal user intent evolution. Queries for "Valentine nails I can wear longer" and "modern Valentine nail designs" increase substantially. This indicates desire for designs that read as fashion-forward rather than holiday-specific. The successful Valentine manicure 2026 functions within multiple contexts: date night, professional settings, casual wear. This versatility requirement shapes every trend category that follows.
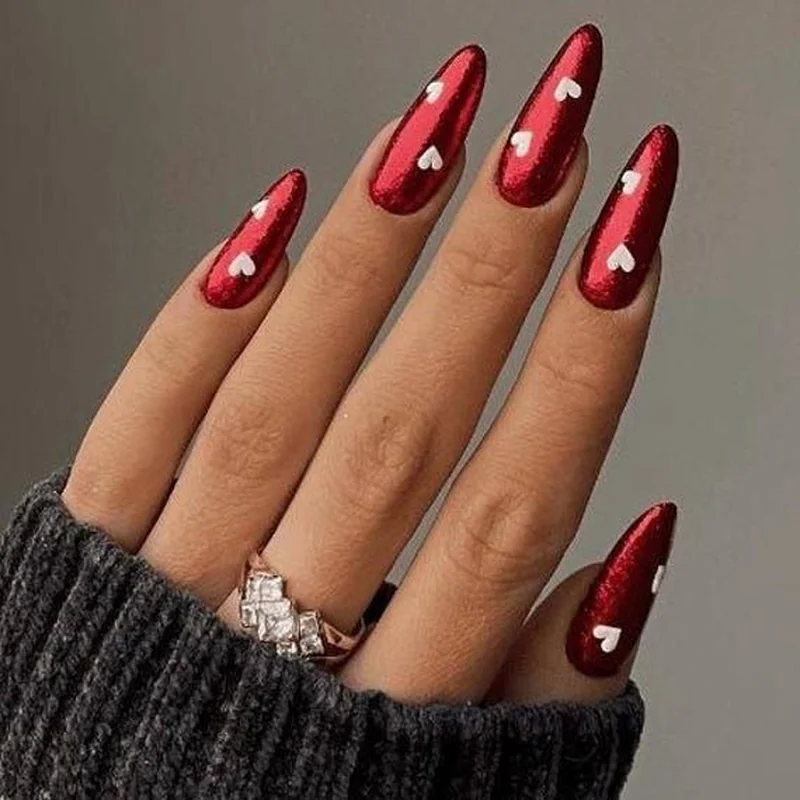
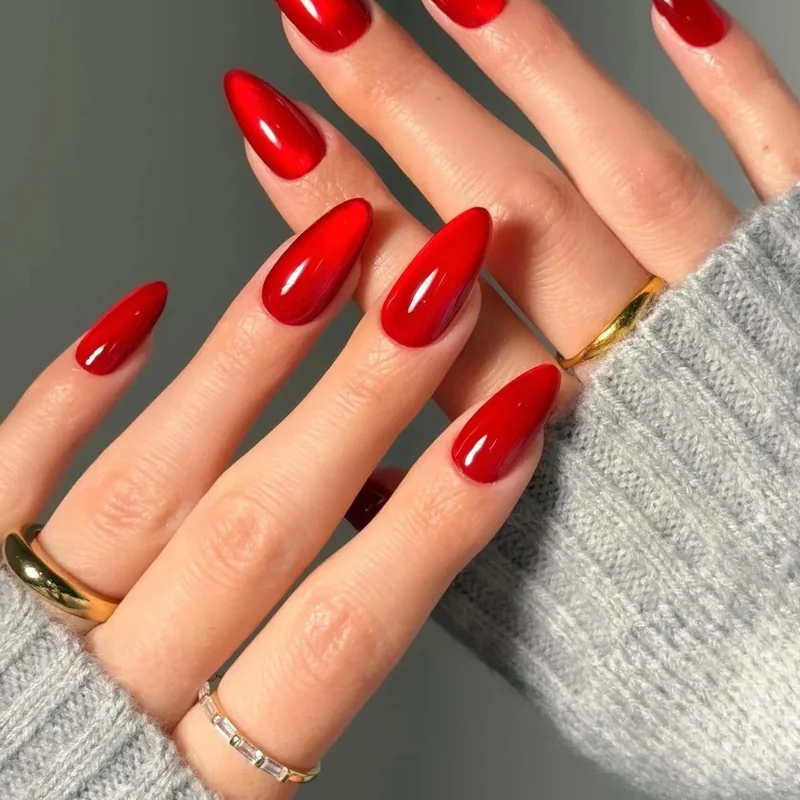
Red Chrome Valentine Nails: Molten Metal Romance
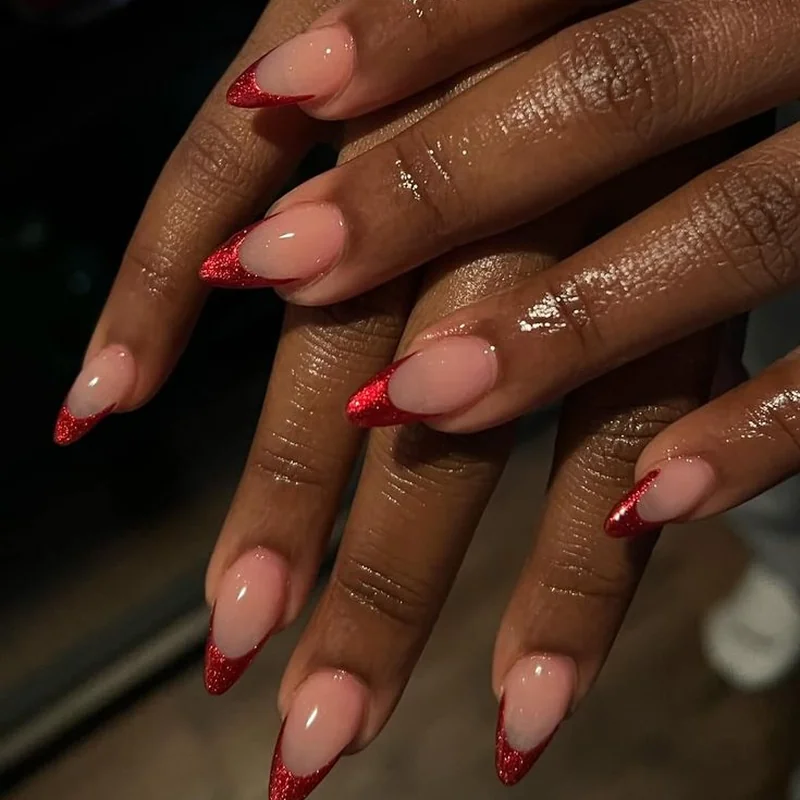
Red chrome Valentine nails deliver liquid metal surfaces that refract light into crimson and scarlet gradients. The finish achieves mirror-like reflection without traditional gloss heaviness. Application requires chrome powder buffed over gel base, creating seamless metallic coverage that responds to ambient lighting. The result reads as molten rather than painted.
What distinguishes this approach from standard red manicures centers on surface behavior. Chrome finishes shift tonally based on viewing angle appearing deep crimson in shadow, brilliant scarlet in direct light. This chromatic movement creates visual complexity from single-color application. The technique suits both long coffin shapes and short square nails, though extended length maximizes light interaction surface area.
Durability considerations matter here. Chrome powder applications require proper cure time optimization and top coat selection. Proper nail preparation ensures longevity. The metallic surface shows minimal tip wear compared to traditional polish, maintaining reflective quality through two to three weeks. For those seeking Valentine nails 2026 that transition seamlessly into March wardrobes, red chrome offers versatility through its fashion-forward rather than overtly romantic aesthetic.
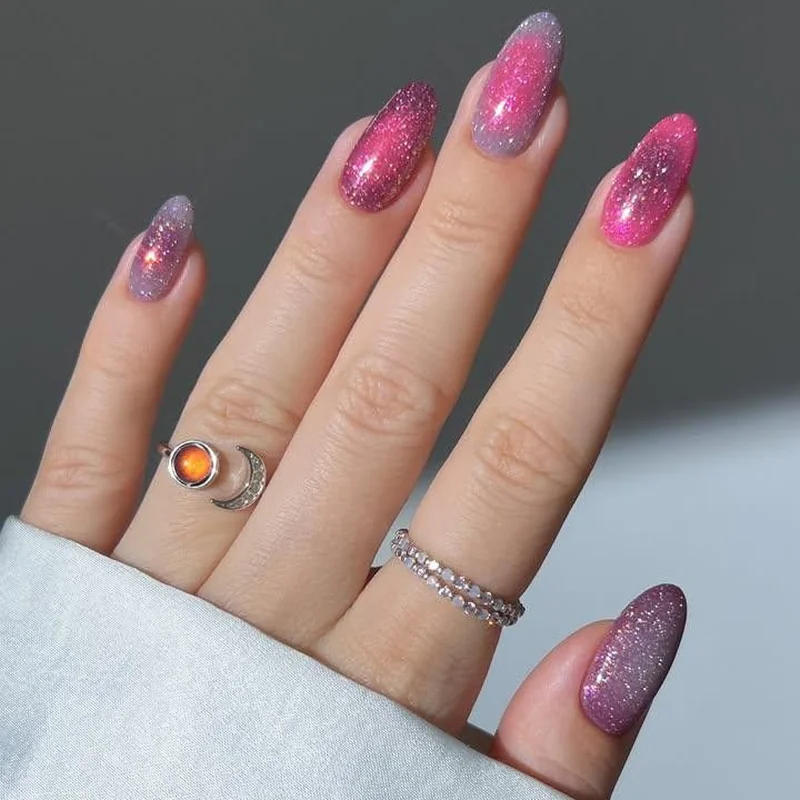
Pink Cat Eye Valentine Nails: Magnetic Dimension
Pink cat eye nails utilize magnetic gel polish containing metallic particles that align under magnet influence during cure. The process creates luminous bands that appear to float within the polish depth. Rose and blush tones dominate Valentine applications, producing soft dimensional effects without additional embellishment weight.
The appeal lies in perceived three-dimensionality achieved through purely optical means. As fingers move, the magnetic band shifts position, creating light-play that mimics gemstone chatoyancy. This effect works particularly well in natural lighting, where the shimmer reads as subtle rather than artificial. The technique addresses a common Valentine nails concern: achieving visual interest without designs that announce themselves before the wearer enters a room.
Technical execution determines outcome quality. Magnet placement during gel cure controls band width and positioning. Hold too far: diffused effect. Hold too close: concentrated narrow line. Optimal distance typically measures 2-3mm above the nail surface, maintained for 10-15 seconds during LED cure. This precision requirement makes cat eye nails better suited to salon application for most users, though practice yields consistent home results.
Duration proves exceptional. The magnetic effect embeds within the gel structure rather than sitting as surface decoration. Proper maintenance extends wear to three weeks without visible degradation. For Valentine nails 2026 that perform equally well at February 14 dinners and March 1 meetings, pink cat eye offers sophisticated versatility.
Valentine French Tip Nails: Precision Reinvented
Valentine French tip nails in 2026 abandon thick white smile lines for micro-precision colored tips. The evolution features red or pink tips measuring 1-2mm in width, applied with architectural accuracy. Some iterations incorporate heart-shaped tip curvature, transforming the classic French into subtle Valentine reference without obvious decoration.
Line precision defines this trend's success. The edge control required separates amateur from skilled application. Many salons now offer detailed guidance on achieving clean tip lines through proper brush technique and gel consistency management. The nude base remains essential neither too pink nor too beige, providing neutral canvas that allows the colored tip to carry visual focus.
Color selection extends beyond traditional whites. Crimson tips over nude base create bold contrast. Soft rose tips offer subtlety. Some applications layer translucent pink over white tip for dimensional effect. The versatility suits multiple Valentine's Day nails 2026 aesthetics from understated to statement-making.
Wear duration exceeds standard polish French tips substantially. Gel application protects the precise line work from chip damage. The design's concentrated color at the tip rather than full nail coverage means regrowth appears less obvious, extending time between maintenance appointments. This practicality combined with refined aesthetic positions Valentine French tips as particularly relevant for those balancing visual impact with low-maintenance requirements.
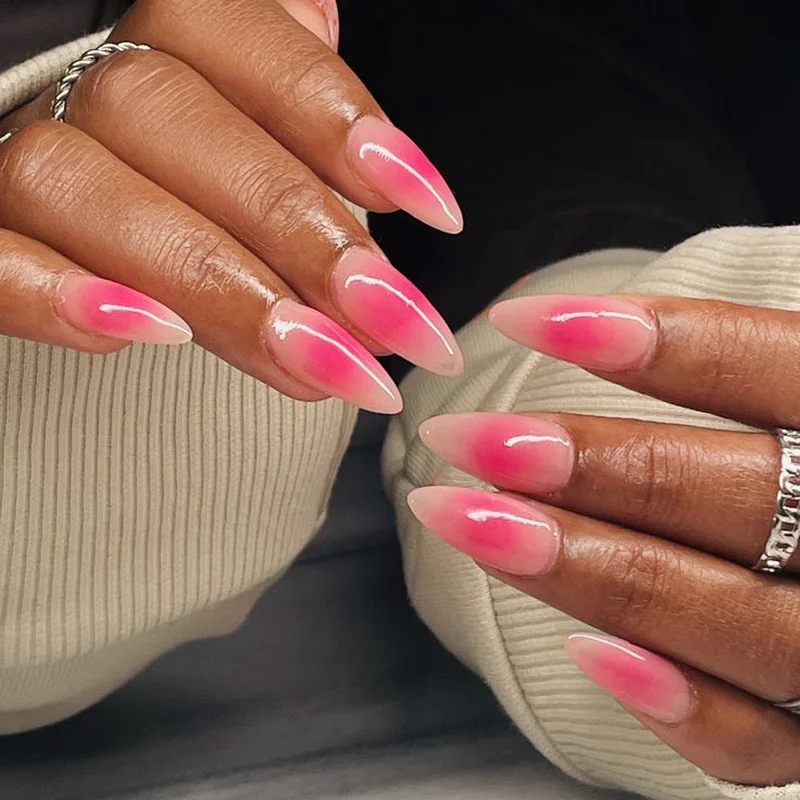
Aura Valentine Nails: Diffused Color Stories
Aura Valentine nails employ controlled gradient blending that creates ethereal color transitions from cuticle to tip. The technique differs from traditional ombré through its soft-focus quality colors appear to bleed into each other without defined boundaries. Rose transitions to blush, coral fades to dusty pink, crimson diffuses into soft red. The effect reads as watercolor rather than airbrushed.
Application requires layering multiple gel polish shades while each remains wet, allowing colors to intermingle organically. A clean brush pulls the boundaries together, creating the characteristic hazy transition. This differs from precise ombré application that maintains color distinctness even as they meet. The aura technique prioritizes dreamlike blending over defined gradient stops.
The aesthetic appeals to those seeking Valentine nails 2026 that suggest romance without literal heart imagery. The diffused quality creates visual softness that photographs exceptionally well a consideration given social media's influence on nail design selection. Multiple fingers can feature different color combinations within the same tonal family, creating cohesive asymmetry.
From a practical standpoint, the blended nature of aura nails disguises minor application imperfections better than solid color or precise art. Small inconsistencies in gradient placement read as intentional variation rather than mistakes. This forgiving quality makes aura application more accessible to advanced DIY users than techniques requiring absolute precision.
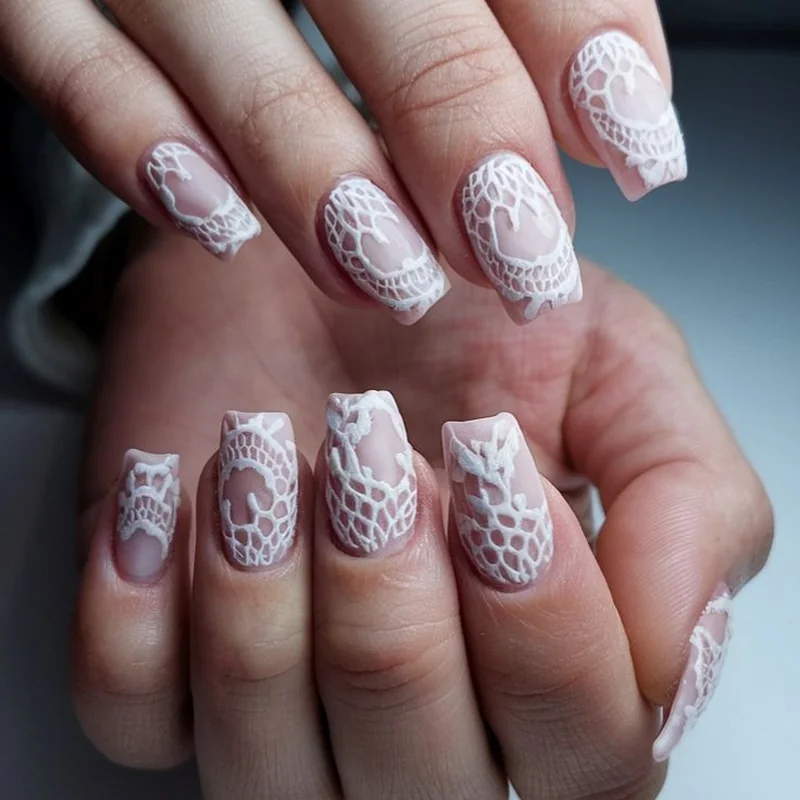
Lace Valentine Nails: Delicate Pattern Work
Lace Valentine nails feature intricate overlay patterns that mimic textile detail through fine-line nail art. The designs typically employ white, ivory, or sheer pink against nude or soft blush bases. Negative space plays crucial role the pattern creates delicate framework while maintaining significant bare nail visibility. The aesthetic recalls vintage lace rather than heavy embellishment.
Technical execution demands steady hand control and appropriate brush selection. Most lace nail art utilizes fine detail brushes or stamping plates designed specifically for intricate pattern transfer. The line work measures 0.5mm or less in width, requiring precise pressure control throughout application. This complexity positions lace nails firmly in professional territory for most users, though nail art enthusiasts with practice achieve salon-quality results.
The appeal addresses Valentine nails 2026 trend toward sophistication over obvious holiday reference. Lace patterns suggest romance through association with bridal and lingerie aesthetics rather than hearts or Cupids. This subtlety extends wearability lace nail designs function equally well at Valentine dinners, spring weddings, or professional settings where overtly decorated nails feel inappropriate.
Duration varies based on application method. Hand-painted lace requires gel top coat for protection, typically lasting two weeks before fine lines show wear. Stamped designs with proper sealing extend to three weeks. The delicate nature means any chip becomes immediately visible, making gel extension application preferable to natural nail overlay for those prioritizing longevity.
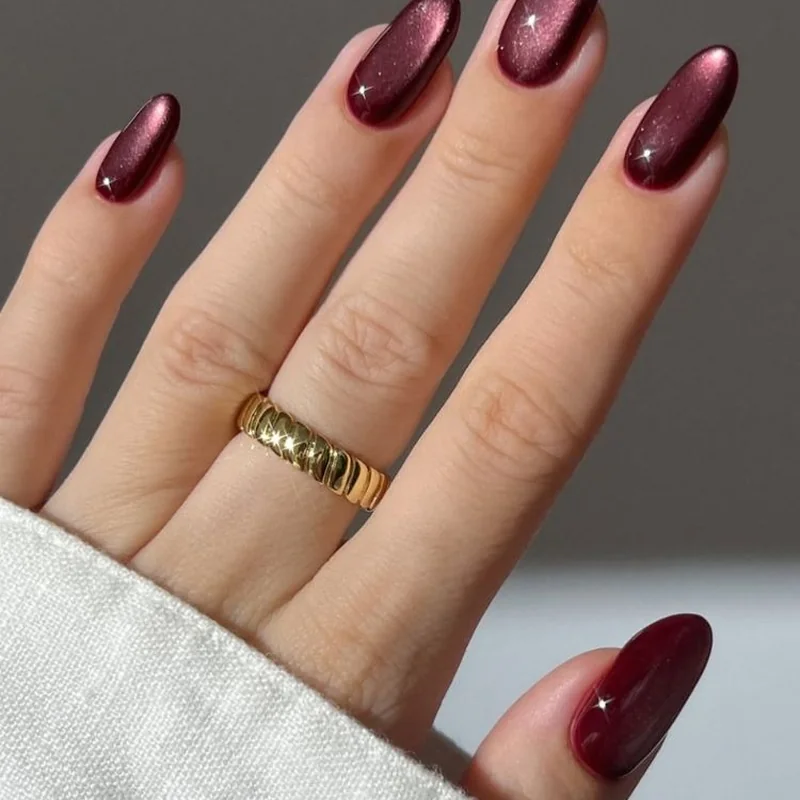
Velvet Cat Eye Valentine Nails: Texture Meets Magnetism
Velvet cat eye nails combine magnetic gel polish with matte top coat, creating a textured magnetic finish that feels silky to touch. The technique layers traditional cat eye shimmer with velvety surface treatment, producing dimensional effect visible through matte finish. Burgundy, wine, and oxblood tones dominate Valentine applications, offering deeper alternative to bright reds.
The matte-shimmer combination appears contradictory but achieves sophisticated balance. The magnetic particles create light-play beneath the matte surface, producing subtle movement rather than obvious glitter effect. This restrained quality suits Valentine nails 2026 preference for understated elegance. The velvet designation refers both to visual appearance and actual tactile quality properly applied matte top coat creates smooth, plush surface that invites touch.
Application follows standard cat eye technique with crucial final step. After curing the magnetic effect, matte top coat application requires thin, even coverage. Too thick: the magnetic shimmer disappears entirely. Too thin: the matte effect reads patchy. Proper technique reveals the magnetic band as subtle luminosity within an otherwise flat finish.
The deeper color palette suits extended wear beyond Valentine's Day. Burgundy and wine tones transition naturally into early spring wardrobes, lacking the holiday-specific quality of brighter pinks and reds. For those seeking Valentine nail designs with maximum post-holiday utility, velvet cat eye offers both seasonal relevance and longer-term wearability.
Tomato Red Valentine Nails: Warm Red's Moment
Tomato red nails bring orange-red undertones that distinguish themselves from cool-toned crimsons dominating prior Valentine seasons. The shade reads as modern rather than classic, offering fresh perspective on traditional Valentine red. The warmth suits a wider range of skin tones than blue-based reds, particularly flattering on those with warm or olive undertones.
The color shift reflects broader nail trend evolution toward warmer palettes across all seasonal collections. Tomato red appears in both cream and glossy finishes, functioning as versatile base for additional techniques. Chrome powder over tomato base creates coral-leaning metallic effect. Matte top coat transforms the shade into sophisticated rust tone. The warmth prevents the severity sometimes associated with cool reds.
From a styling perspective, tomato red coordinates naturally with Valentine's Day fashion that incorporates coral, pink, or neutral tones. The shade bridges multiple aesthetics bold enough for statement-making, nuanced enough for everyday wear. This versatility addresses the post-Valentine wearability concern, as the color reads as fashion-forward rather than holiday-specific.
Application proves straightforward compared to technique-heavy trends. Solid color coverage requires standard two-coat application with proper cure time between layers. The opacity typically surpasses cooler reds, often achieving full coverage in single coat. This ease makes tomato red accessible to DIY users seeking Valentine nails 2026 aesthetic without advanced technical requirements.