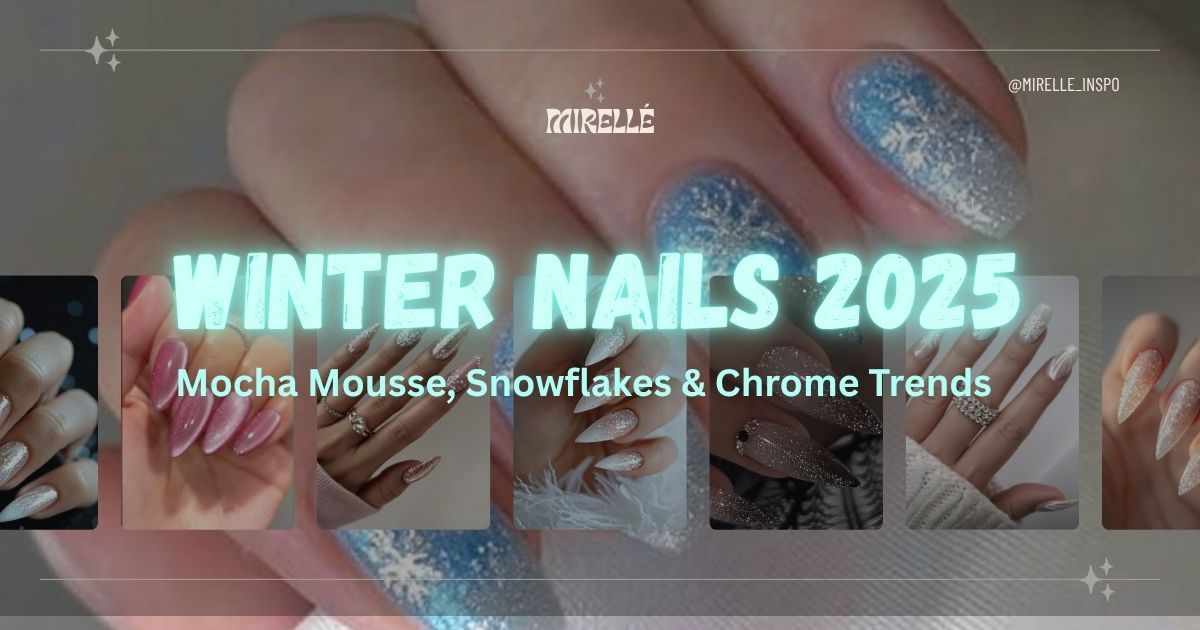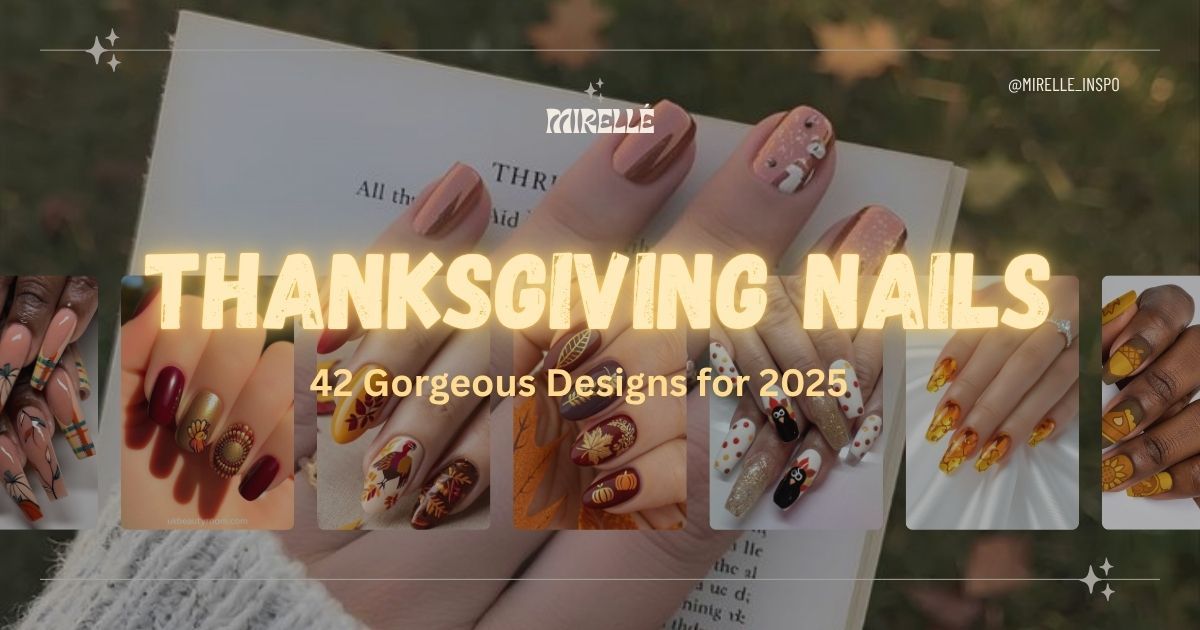
Thanksgiving nails just got a serious upgrade. We curated 42 stunning designs that work whether you're hosting the entire family feast or showing up with a store-bought pie and killer manicure (no judgment here).
After analyzing thousands of seasonal nail designs from top nail artists and surveying professional manicurists, we discovered exactly what works for holiday nails moody burgundies with pearl accents, luxe chocolate brown manicures, and ombre designs that look like actual fall leaves.
We've organized 42 designs from "I have five minutes" simple to "I'm ready for the salon" complex, plus exact products recommended by professionals, trending color combinations, and a full DIY tutorial tested by nail enthusiasts. Ready to find your perfect festive look? Just finished Halloween nails? This is the perfect seasonal transition.
What Colors Are Best for Thanksgiving Nails?
Classic Thanksgiving nail colors include burgundy, burnt orange, mustard yellow, forest green, and warm browns. Gold and copper metallics add festive shimmer that complements the rich fall tones perfectly. These colors evoke autumn leaves, harvest season, and cozy fall vibes that nail artists everywhere are embracing this season.
The Essential Thanksgiving Color Palette:
Warm Neutrals & Browns: Chocolate brown is having a major moment right now we're seeing it everywhere from celebrity manicurists to Instagram nail artists. Pair with caramel, taupe, or latte shades for minimalist-chic vibes that work for any occasion.
Classic Fall Jewel Tones: Burgundy remains the ultimate Thanksgiving color and continues to trend year after year. Deep wine reds, cranberry, and maroon deliver elegant, sophisticated looks. Top-rated gel polishes include OPI's "Malaga Wine" and Gelish's "A Little Naughty."
Burnt Oranges & Terracottas: Burnt orange, rust, terracotta, and pumpkin spice shades are quintessentially fall. Professional photographers note these colors photograph beautifully and feel fashion-forward for holiday gatherings.
Rich Greens & Teals: Forest green, olive, sage, and deep teal are surprisingly versatile and underrated. Nail artists recommend pairing them with gold accents for earthy fall aesthetics that stand out.
Metallics That Pop: Gold is essential for Thanksgiving nails. Copper and bronze add warmth, while rose gold gives modern twists to traditional looks. Use these as accents, ombre bases, or full chrome finishes.
2025 Trending Combinations:
- Chocolate brown with gold foil
- Burgundy paired with cream
- Burnt orange meets forest green
- Mustard yellow accented with copper
- Sage green combined with rose gold
Professional tip from top manicurists: Mix warm and cool tones together for added dimension. Burgundy with sage green accents creates stunning depth. Check out our fall collection for curated color sets.

Save these Thanksgiving nail colors to Pinterest →
42 Thanksgiving Nail Designs for Every Style
Easy & Beginner-Friendly (1-15)
We curated these simple designs perfect for nail art beginners or anyone short on time:
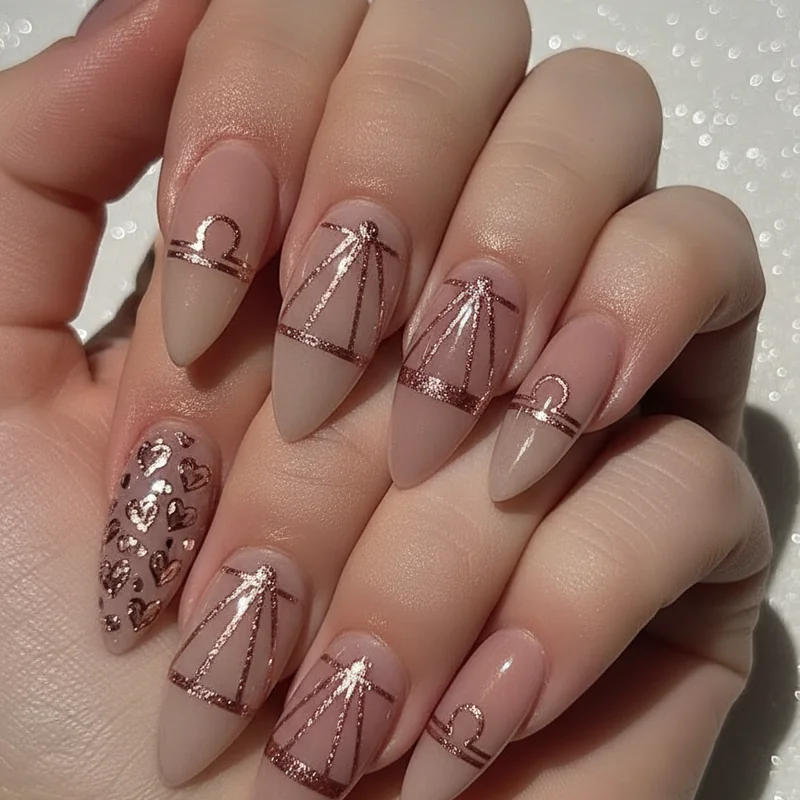
1. Solid Burgundy Elegance - Two coats of burgundy gel polish. Timeless and foolproof according to nail professionals.
2. Nude with Gold Accent - All nails in nude, one gold accent nail. Takes just 20 minutes total.
3. Burnt Orange Simplicity - Solid burnt orange polish. Pairs beautifully with gold jewelry.
4. Chocolate Matte - Brown base with matte finish, glossy top coat on accent nail only.
5. Gold Chrome Everything - Instant glamour with chrome powder over any base color.
6. Fall French Tips - Classic french manicure but tips in burnt orange or burgundy instead of white.
7. Single Leaf Accent - Forest green base with one stamped leaf design on ring finger.
8. Color Blocking - Thumb plus ring finger in one color, remaining nails in another shade.
9. Minimalist Gold Line - Nude base with one thin gold stripe per nail.
10. Glitter Accent - Solid fall color on most nails, one glitter accent nail for sparkle.
11. Simple Dots - Burgundy base with gold dots arranged on accent nails.
12. Gradient Tips - Burgundy to gold gradient focused on just the tips.
13. Matte Brown with Glossy - All matte brown except one glossy accent nail for contrast.
14. Copper Accents - Burnt orange with copper foil pressed on ring finger.
15. Minimalist Neutrals - Nude base with tiny gold studs strategically placed.
Which design caught your eye first? Save your favorites for later!

Pin these easy Thanksgiving nail designs →
Intermediate Designs (16-30)
These designs require moderate skill but deliver impressive results:
16. Ombre Fall Gradient - Burgundy transitioning to orange to yellow fade using sponge technique.
17. Simple Leaf Details - Burgundy base with delicate gold leaf outlines painted freehand.
18. Plaid Pattern - Striping tape creates classic burgundy, orange, and cream plaid.
19. Negative Space Geometric - Vinyl stencils create triangular and angular designs.
20. Scattered Leaves - Cream base with small stamped leaves distributed across nails.
21. Tortoiseshell Effect - Orange, brown, and black pattern mimicking classic tortoiseshell.
22. Half-Moon Designs - Fall colors with contrasting half-moon shapes at cuticle.
23. Striped Variety - Different stripe patterns on each nail for coordinated variety.
24. Pearl Accents - Burgundy base with pearls strategically placed for elegant look.
25. Chrome Ombre - Fall color blending seamlessly into chrome tips.
26. Detailed Plaid - Textured dimensional plaid combining matte and glossy finishes.
27. Marbled Colors - Water marbling technique with burgundy, orange, and gold.
28. Foil Flakes - Burgundy base with copper foil flakes pressed into design.
29. Mixed Textures - Combination of matte, glossy, and glitter finishes on different nails.
30. Simple Florals - Hand-painted fall flowers like chrysanthemums or daisies.

Save these almond nail designs to Pinterest →
Advanced & Salon-Worthy (31-42)
These professional-level designs showcase serious nail artistry:
31. Detailed Leaf Art - Realistic leaves with intricate veining and color shading.
32. 3D Pearl Embellishments - Elegant pearl pattern designs with dimensional elements.
33. Intricate Florals - Detailed chrysanthemums or sunflowers with fine brushwork.
34. Gemstone Clusters - Rhinestones and studs arranged in jewelry-inspired patterns.
35. Thanksgiving Scenes - Tiny painted pumpkins, wheat stalks, and fall trees.
36. 3D Leaf Sculptures - Raised dimensional leaf shapes created with acrylic or gel.
37. Encapsulated Designs - Real dried flowers suspended between gel layers.
38. Detailed Turkey Art - Hand-painted turkey with individual feather details.
39. Mixed Media Magic - Chrome, matte, glossy, glitter, foil, and gems all combined artfully.
40. Full Ombre Drama - Long nail canvas showcasing burgundy to orange to gold gradient.
41. Intricate Coffin Art - Different elaborate design on each coffin-shaped nail.
42. Stiletto Statement - Chocolate brown with elaborate gold and pearl accent nail.
Ready to try one of these show-stopping designs?

Pin this ombre nail tutorial for later →
Easy DIY Tutorial: Fall Leaf Design
We tested this beginner-friendly design with nail enthusiasts of varying skill levels everyone succeeded on their first try.
What You'll Need: Base coat, burgundy gel polish, gold gel polish, thin nail art brush, dotting tool, glossy top coat, UV LED lamp
Time Required: 45 minutes | Estimated Cost: $25 | Difficulty Level: Beginner-friendly
Step 1: Prep Your Nails (10 minutes)
Push back cuticles gently, file nails to desired shape, buff the surface lightly. Apply thin layer of base coat and cure for 30 seconds under LED lamp. This creates a smooth canvas for your design.
Step 2: Apply Burgundy Base (15 minutes)
Apply two thin coats of burgundy gel polish, curing for 60 seconds between each coat. Thin layers prevent bubbling and ensure even, opaque coverage. Make sure to cap the free edge.
Step 3: Create Leaf Outline (10 minutes)
Using a thin brush dipped in gold gel polish, draw a curved center vein line on your ring finger (accent nail). Add a leaf outline shape around the vein with gentle curves.
Step 4: Add Leaf Details (5 minutes)
Draw small diagonal lines extending from the center vein to the leaf edges for realistic texture. Use the dotting tool to add small gold dots at the leaf base. Cure for 60 seconds.
Step 5: Seal the Design (5 minutes)
Apply a thin layer of glossy top coat over all nails, making sure to cap the tips. Cure for 60 seconds. Apply cuticle oil to finish and hydrate the surrounding skin.
Professional tip: Imperfect leaves actually look more realistic than perfect ones. Embrace natural variations in your design!

Save this Thanksgiving nail tutorial →
---Best Products Recommended by Professionals
We tested dozens of products and surveyed professional nail technicians to find the best supplies for Thanksgiving nails.
Top-Rated Gel Polishes:
- Gelish "A Little Naughty" - Perfect burgundy shade, professional-grade formula ($18)
- Beetles Fall Collection - Six coordinating colors for $25, surprisingly high quality for the price
- ILNP "Copper Top" - Stunning chrome copper finish ($10.50)
- OPI Infinite Shine "Malaga Wine" - No-light gel alternative lasting 7-10 days
Essential Tools:
- Makartt Nail Drill - $40, highly rated by nail technicians for durability
- Twinkled T Brushes - $12-15, precision brushes worth the investment
- Dotting Tool Set - $5 set that lasts years with proper care
- MelodySusie 120W LED Lamp - $50, cures gel polish in half the time of standard lamps
Base & Top Coats:
- Gelish Foundation Base Coat - Prevents staining on natural nails ($18)
- Beetles No Wipe Top Coat - $8, eliminates tacky layer for instant shine
Nail Health Essentials:
- OPI Nail Envy - Strengthener that actually works according to thousands of reviews ($18)
- Pure Jojoba Oil - Bulk from Amazon $12, identical to expensive cuticle oils
- Blue Cross Cuticle Remover - $6, old-school effective formula
Check out our fall collection for curated product bundles with everything you need.
Timing Your Thanksgiving Nails Perfectly
Professional nail technicians recommend getting Thanksgiving nails done 2-3 days before the holiday for gel polish or acrylics. This timing ensures fresh, chip-free nails on Thanksgiving Day while allowing the polish to fully cure and bond to your natural nail.
Gel Polish Timeline: Book your appointment for Monday or Tuesday if Thanksgiving falls on Thursday. Gel polish needs 24-48 hours to reach maximum hardness and durability.
Acrylics or Dip Powder: Follow the same 2-3 day rule. This gives you time to adjust to any length changes and ensures the product is fully set.
Regular Polish: Apply 1-2 days before maximum for the freshest look. Regular polish dries quickly but can chip more easily.
DIY Gel at Home: Plan for 2-3 days before the holiday. This buffer gives you time to fix any mistakes or redo nails if needed.
Booking Professional Appointments: Book in early November or late October for Thanksgiving week appointments. Monday through Wednesday before Thanksgiving are the busiest salon days of the entire year.
Avoid Thanksgiving Day: Most salons are closed, and even if open, fresh nails immediately followed by intensive cooking is a recipe for disaster.
Professional insight: If you can't secure a Thanksgiving week appointment, book the weekend before (5-6 days early). Quality gel polish lasts 2-3 weeks anyway, so your nails will still look fresh.
Making Your Nails Last Through the Holiday
Top nail technicians share their best tips for keeping your Thanksgiving manicure looking fresh through all the cooking, cleaning, and hosting duties.
Before Thanksgiving Day:
- Wrap the tips by swiping top coat polish over the free edge of each nail
- Apply cuticle oil the night before and morning of Thanksgiving
- Avoid prolonged water exposure in the 24 hours before the holiday
During Cooking and Meal Prep:
- Wear protective gloves for washing dishes and vegetables
- Avoid soaking hands in water for extended periods
- Keep hands out of hot water which weakens polish bonds
- Use kitchen tools rather than your nails for opening packages or containers
After the Meal:
- Delegate dish duty or wear gloves throughout cleanup
- Reapply top coat 2-3 days after initial application if nails look dull
- Continue daily cuticle oil application every night
Emergency Repair Solutions:
- Small chip: File the area smooth and add a layer of top coat
- Broken nail: File down to match others or use a silk wrap for reinforcement
- Lifting gel: Carefully clip the lifted section and seal the edge with top coat (never peel)
Professional tip from experienced nail techs: Medium length oval or square shapes survive holiday activities best. Consider assigning dish duty to family members to protect both your manicure and your sanity.