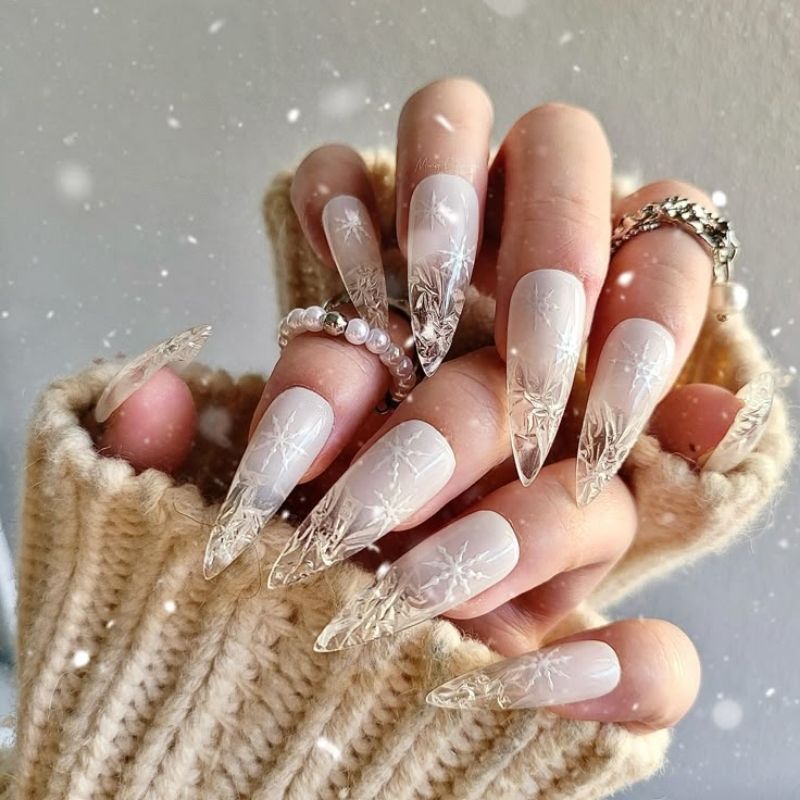
White christmas nails snowflake designs create that winter wonderland aesthetic everyone screenshots, but here's the reality check: 70 percent of white manicures turn yellow within 5 days because people skip one critical step during base coat application. The difference between pristine snow-white nails and dingy yellow disasters comes down to prevention, not polish quality.
This isn't about buying expensive white gel or avoiding certain activities. It's understanding why white polish yellows from sunscreen, self-tanner, and cleaning products, plus knowing the exact snowflake painting technique that works without artistic skills or steady hands. Once you nail the prevention methods, white christmas nails snowflake designs stay pristine through New Year.
Whether you want full winter wonderland vibes or subtle snowflake accents, these 50 designs and troubleshooting solutions solve every yellowing problem and painting challenge. No more avoiding white polish because it "never lasts."
Why White Nail Polish Turns Yellow and How to Stop It
White christmas nails snowflake designs yellow faster than any other color, and it's not because you bought cheap polish. Chemical reactions between white pigments and everyday products cause discoloration that ruins manicures within days unless you prevent it correctly.
Sunscreen chemicals are the biggest culprit. Avobenzone and oxybenzone in SPF products react with white polish creating yellow or orange stains. The reaction happens instantly on contact and penetrates through polish layers. Apply sunscreen before painting nails and let it absorb 15 minutes. Wash hands thoroughly with soap before touching white polish to remove residue that causes staining.
Self-tanner DHA turns white nails orange-brown overnight. The same fake tan chemical that browns your skin stains white polish permanently. Apply self-tanner wearing gloves always. If you already have white nails, avoid self-tanner completely or wear nitrile gloves during application and for 8 hours afterward until product fully develops and stops transferring.
Cleaning product bleach ironically yellows white polish despite being designed to whiten things. Bleach oxidizes nail polish pigments causing discoloration. Wear rubber gloves for all cleaning tasks including dishes, bathroom scrubbing, and laundry. One exposure to bleach-based cleaners ruins white manicures requiring complete removal and repainting from scratch.
UV light exposure from sunlight and tanning beds yellows white polish over time through oxidation. UV rays break down polish molecules causing color shift. Gel polish resists UV yellowing better than regular lacquer. Apply UV-protective top coat or use gel formula. Limit direct sun exposure on hands during peak daylight hours when UV rays are strongest.
Smoking causes immediate yellowing on nails near fingertips. Tar and nicotine stain white polish yellow-brown. No amount of washing removes smoke stains once they penetrate polish layers. Smokers should avoid white nail colors completely or switch to nude, pink, or darker shades that hide discoloration better than stark white formulas.
The prevention solution is simple: apply ridge-filling base coat before any white polish. Base coat creates protective barrier between natural nail oils and white pigments. Use two coats of base for extra protection. Let each coat dry completely before applying white color. This single step prevents 90 percent of yellowing problems regardless of polish brand or price point.
Easy Snowflake Nail Art Tutorial for Beginners
Snowflakes look complex but follow a simple repeating pattern anyone can master using dotting tools and toothpicks. This technique works on white christmas nails snowflake designs without painting skills or artistic ability required.
Step 1: Create center dot - Dip small dotting tool in white or blue polish. Press onto nail center creating small circle. This forms snowflake core. Let dry 30 seconds before next step to prevent smearing when adding more elements around center point.
Step 2: Add four cardinal dots - Using same dotting tool, create four dots around center in cross pattern. Place dots at 12, 3, 6, and 9 o'clock positions evenly spaced from center. These form the main snowflake arms creating plus sign shape that establishes basic structure.
Step 3: Add four diagonal dots - Create four more dots between the cardinal points forming X pattern. Place dots at approximately 1:30, 4:30, 7:30, and 10:30 positions. Now you have eight dots surrounding center creating snowflake foundation with all arms established and visible.
Step 4: Connect dots with lines - Use toothpick or thin liner brush dipped in polish. Draw thin lines connecting center dot to each outer dot creating eight arms radiating outward. Keep lines thin and delicate. Thick lines look clunky and destroy the delicate snowflake aesthetic completely.
Step 5: Add branch details optional - For more complex snowflakes, add small perpendicular lines branching off main arms. Use toothpick to create tiny dashes on each side of main lines. This step is optional but adds realistic detail making snowflakes appear more intricate and professional looking.
Step 6: Seal with top coat - Let snowflake design dry completely for 5 minutes minimum. Apply clear glossy top coat for shine or matte top coat for frosty winter effect. Seal entire nail including design edges. This preserves snowflakes and prevents chipping or smudging with daily activities.
The dotting tool method creates perfect circles every time eliminating shaky hand problems. Toothpick allows fine detail work without expensive nail art brushes. This technique scales for any nail size from tiny short nails to long coffin shapes without adjusting the basic pattern or steps.
Check our Christmas nail designs guide for more winter techniques.
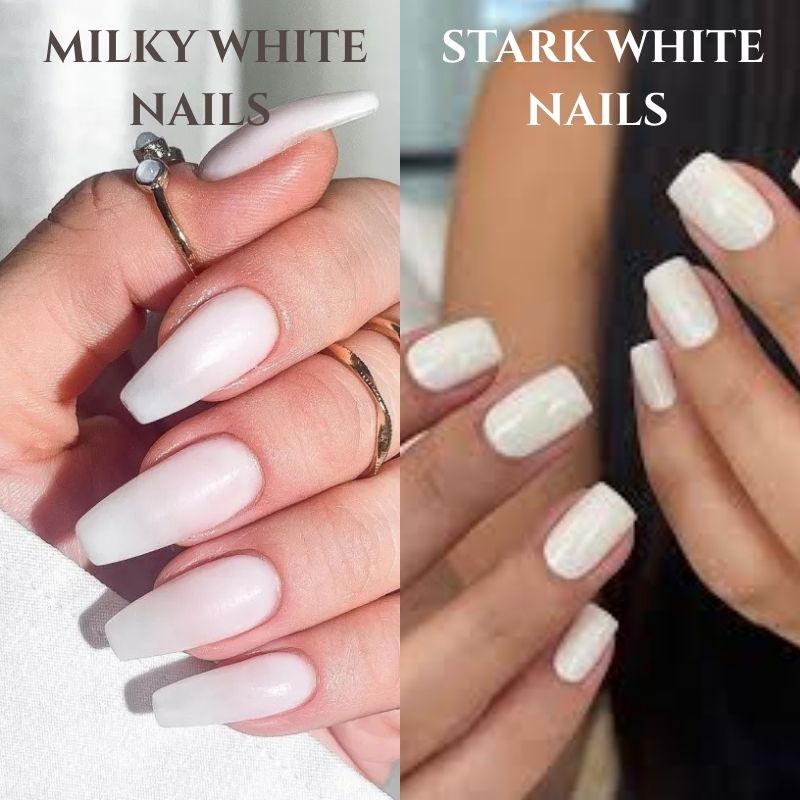
Milky White vs Stark White: Which Looks Better for Christmas
White christmas nails snowflake designs come in two distinct shades that create completely different aesthetics. Understanding the difference prevents choosing wrong white that doesn't match your vision or skin tone.
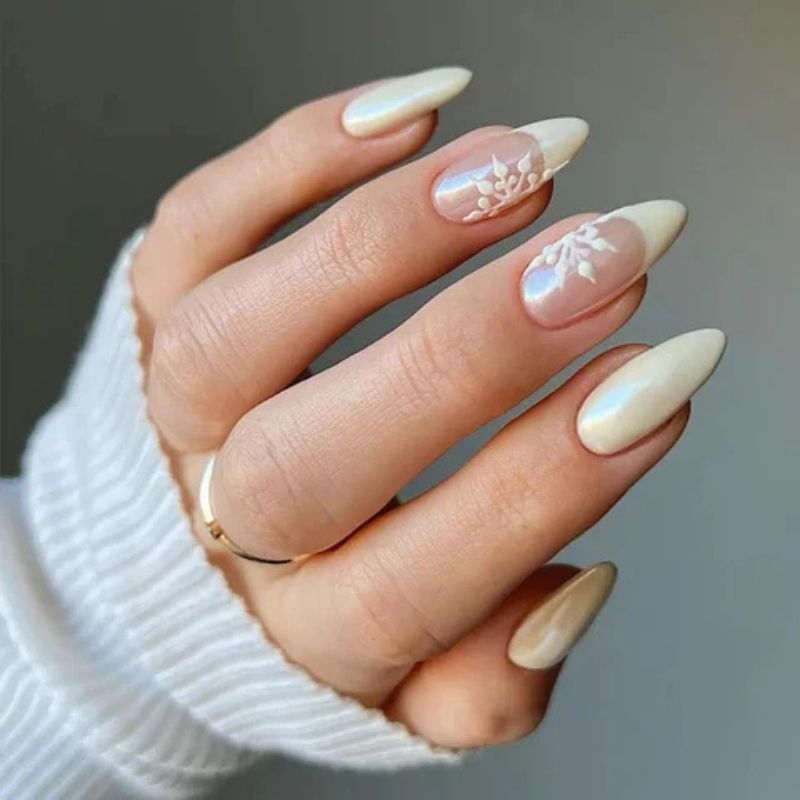
Milky white has creamy opaque finish with slight warmth. Appears soft, natural, and forgiving. Hides minor nail imperfections like ridges and discoloration. Flatters all skin tones from pale to deep. Works for both casual and formal settings. Photographs beautifully without looking overly stark or artificial in pictures and social media posts.
Stark white is bright pure white with cool blue undertones. Appears crisp, bold, and attention-grabbing. Shows every nail flaw including ridges, stains, and surface imperfections. Looks best on perfectly manicured nails only. Can appear harsh against very pale skin or ashy against deep skin tones requiring careful consideration before choosing.
For winter wonderland aesthetic: Milky white creates soft snow effect perfect for winter themes. Stark white looks like ice and frost working better for dramatic icy looks. Mix both shades using milky white as base with stark white snowflake details for dimensional contrast that adds visual interest.
For everyday wear: Milky white is more forgiving and versatile for daily activities. Stark white requires constant maintenance and shows wear faster. Milky white lasts longer looking fresh while stark white appears dingy after 3 to 4 days requiring frequent repainting or touch-ups.
For photography: Both photograph well but differently. Milky white appears natural and soft in photos. Stark white can blow out in flash photography appearing overly bright or washing out skin tones. Test both if manicure is for special event photos or professional photography sessions.
Application differences: Milky white typically covers in two coats. Stark white often needs three to four thin coats for full opacity without streaking or visible nail line showing through. Milky white is easier for beginners while stark white requires more skill and patience during application.
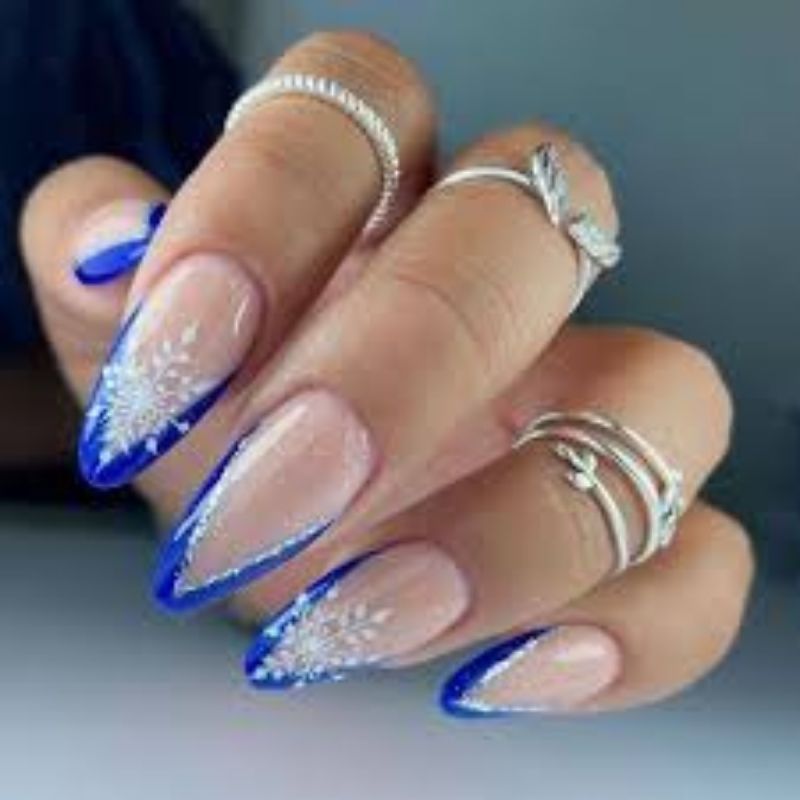
Icy Blue and White Winter Nail Color Combinations
Icy blue paired with white creates the ultimate winter wonderland palette for white christmas nails snowflake designs. These color combinations work together creating cohesive frosty aesthetic perfect for holiday season.
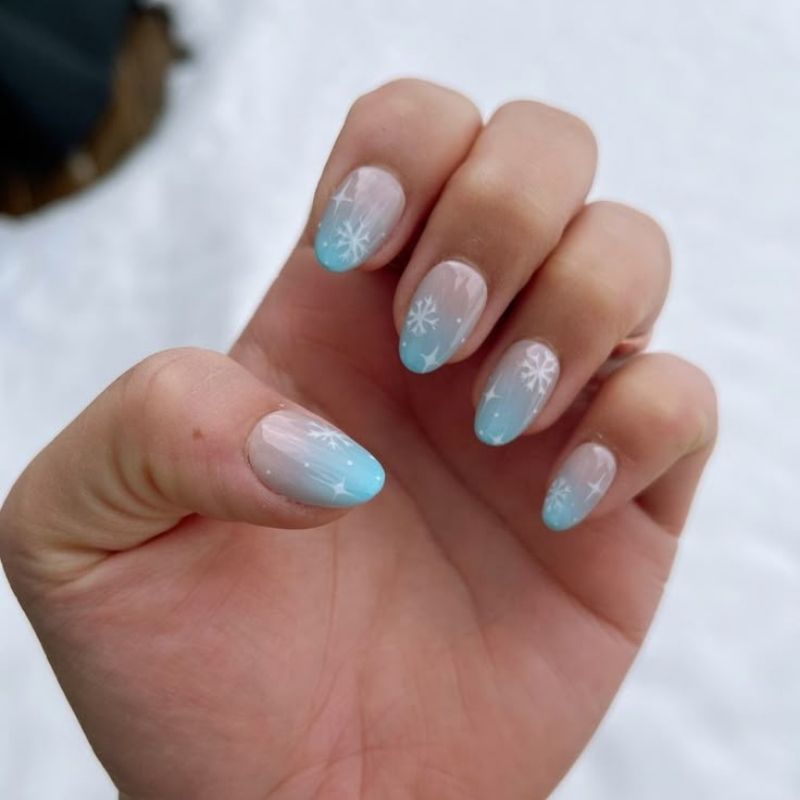
Baby blue with gray undertones creates the most realistic icy effect. Pair with milky white for soft winter look. Works beautifully as ombre gradient from white at cuticle fading to icy blue at tips. This combination flatters all skin tones and photographs naturally without appearing cartoonish or fake.
Powder blue provides slightly brighter option while maintaining winter aesthetic. Use as accent nail with white base on remaining nails. Paint snowflakes in powder blue over white background for contrast. This shade adds color without overwhelming hands or appearing too bold for conservative settings.
Periwinkle blue leans purple creating unique winter palette. Mix with stark white for dramatic contrast. Try alternating nails in each color rather than ombre. Add silver glitter accents to tie colors together. This combination feels more fashion-forward and trendy compared to traditional icy blues.
Steel blue gray creates sophisticated winter look appropriate for office environments. Pair with milky white for subtle color blocking. Paint geometric designs mixing both shades. Add matte top coat for modern minimalist winter aesthetic that works professionally while still feeling festive.
Application techniques for color mixing: Create horizontal ombre using makeup sponge. Paint vertical color blocks splitting nail half white half blue. Try reverse french tips with blue base and white tips. Marble both colors together for abstract winter effect. Each technique creates different visual impact using same color palette.
50 White Christmas Nails Snowflake Designs
Every design tested and achievable at home. No unrealistic Pinterest fails. Just winter nail art that actually works for real people with real skill levels.
Simple Minimalist Snowflakes (1-10)
1. Single Snowflake Accent - White base with one blue snowflake on ring finger only
2. Tiny Snowflake Scatter - White nails with 3 to 5 micro snowflakes randomly placed
3. Snowflake French Tips - Nude base with white tips featuring single snowflake
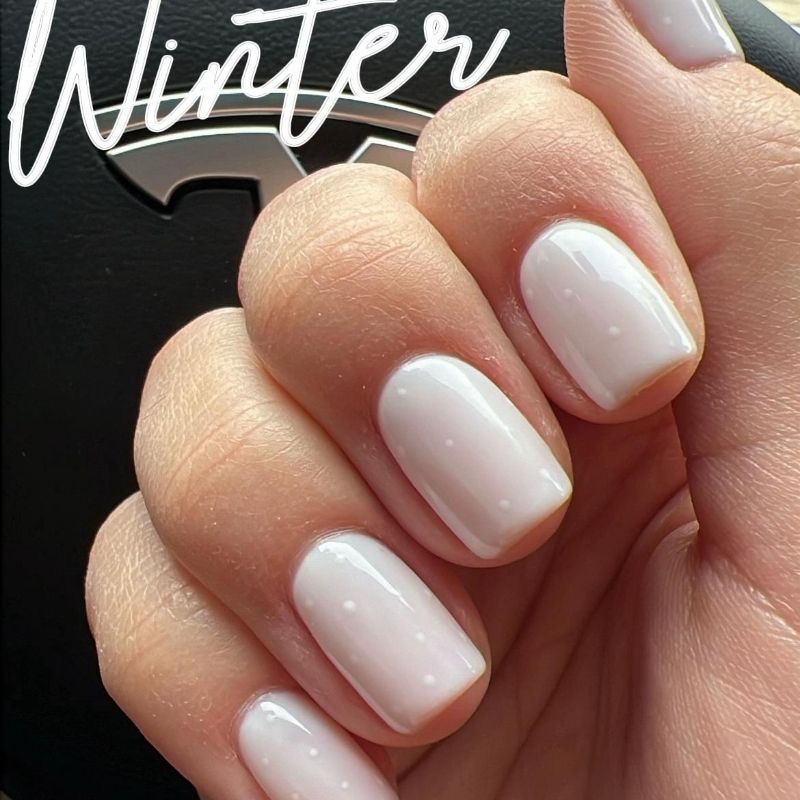
4. Milky White Solid - Pure milky white with matte top coat resembling snow
5. Snowflake Cuticle Detail - White with small snowflake near cuticle base only
6. Blue Snowflake Dots - White base with simple blue dot snowflakes using dotting tool
7. White on Blue Base - Icy blue nails with white snowflake on accent nail
8. Minimalist Line Snowflake - White with single thin-line snowflake on one nail
9. Corner Snowflake - White nails with tiny snowflake in upper corner placement
10. Negative Space Snowflake - Clear base with white snowflake on bare nail
Ombre and Gradient Designs (11-20)
11. White to Blue Ombre - Gradient from white at cuticle to icy blue at tips
12. Blue to White Fade - Reverse ombre starting blue fading to white tips
13. Horizontal Winter Gradient - Blue to white transition across all five nails
14. Glitter Ombre Tips - White base with silver glitter fade at tips only
15. Diagonal Ombre - White and blue meeting at diagonal angle per nail
16. Triple Gradient - White to silver to blue fade using three colors
17. Subtle White Fade - Milky white fading to stark white at tips
18. Shimmer Gradient - White with iridescent shimmer concentrated at tips
19. Vertical Ombre Stripe - Blue and white gradient running vertically down nail
20. Frosty Tip Fade - White with concentrated shimmer creating frosty tips
Detailed Snowflake Art (21-30)
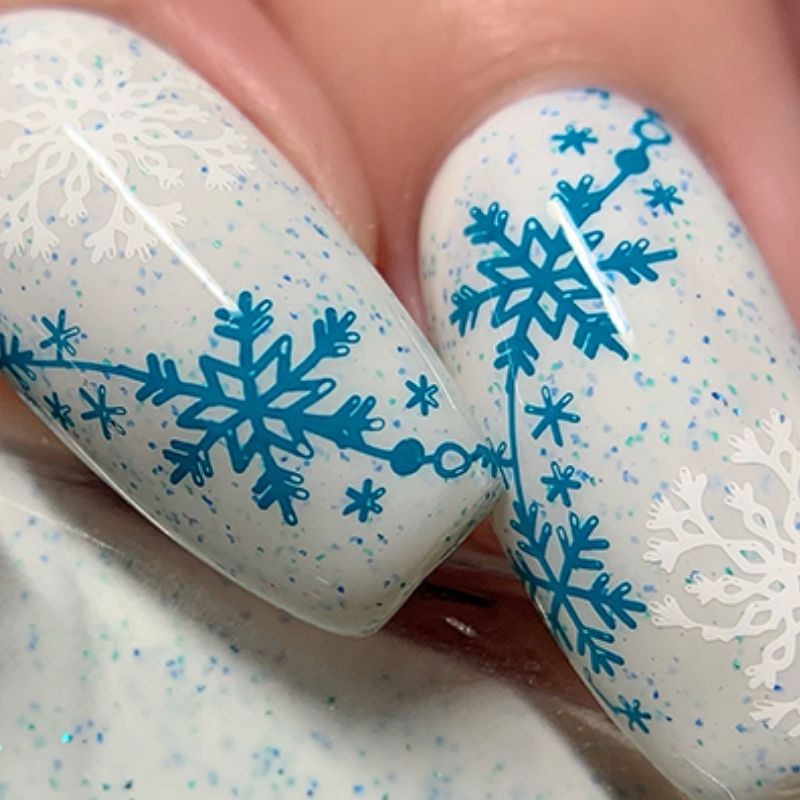
21. Intricate Multi-Arm Snowflakes - Complex detailed snowflakes with multiple branches
22. 3D Raised Snowflakes - Dimensional snowflakes using thick gel or acrylic
23. Snowflake with Rhinestone Center - Blue snowflakes with crystal center dot
24. Overlapping Snowflakes - Multiple snowflakes layered creating depth
25. Giant Statement Snowflake - Large snowflake covering entire accent nail
26. Colorful Snowflakes - White base with rainbow colored snowflake variety
27. Black Snowflake Outline - White snowflakes outlined in black for definition
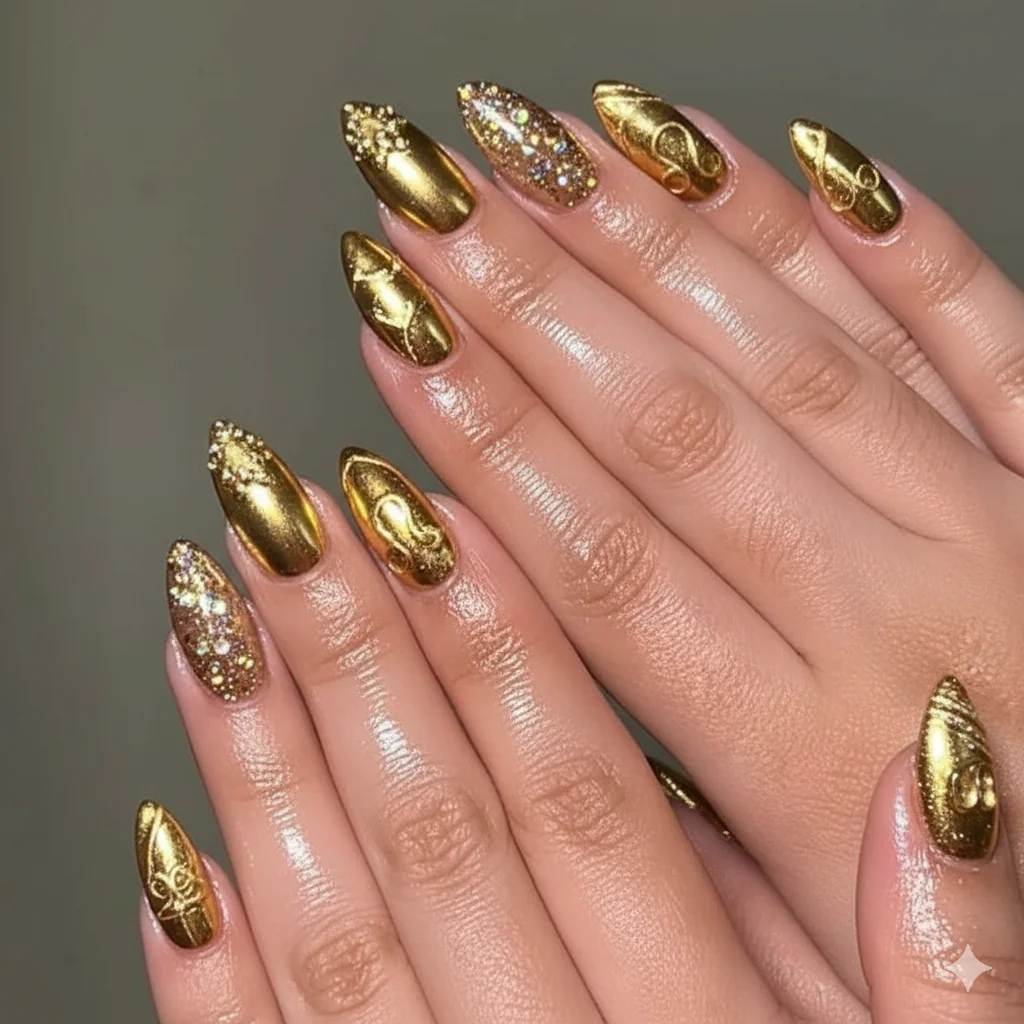
28. Gold Snowflake Luxury - White with metallic gold snowflake accents
29. Watercolor Snowflakes - Soft blended blue snowflakes painted effect
30. Stamped Snowflake Pattern - Uniform perfect snowflakes using stamping plate
Winter Scene Designs (31-40)
31. Snowfall Effect - White with various sized dots resembling falling snow
32. Snowy Mountain Tips - White peaks painted at tips over blue base
33. Winter Tree Silhouette - White base with bare tree and falling snow
34. Snowman Accent - White with simple snowman on one accent nail
35. Ice Crystal Pattern - White with angular ice crystal geometric design
36. Frosty Window - White with frost pattern resembling frozen glass
37. Snow Drift Tips - Blue base with white painted like snow accumulation
38. Aurora Borealis - White with blue green shimmer northern lights effect
39. Frozen Branch - White with delicate icy branch painted detail
40. Icicle Drip - White with dripping icicle effect painted from cuticle
Texture and Finish Variations (41-50)
41. Matte White Snowflakes - Matte white base with glossy snowflake details
42. Glossy Blue Matte White - Mix of matte white and glossy blue nails
43. Velvet Texture White - Flocking powder creates soft fuzzy snow texture
44. Chrome White Accent - White chrome mirror finish on accent nails
45. Sugar Textured - White with sugar texture powder resembling snow
46. Holographic Snowflakes - White base with holographic snowflake details
47. Pearl Shimmer - White with pearl shimmer throughout creating luster
48. Glitter Snowflake Fill - Snowflake outline filled with fine silver glitter
49. Opal Effect - White with opal shimmer shift creating iridescence
50. Metallic Silver Accents - White with metallic silver snowflake and stripe details
Browse our winter nail collection for snowflake supplies.
Snowflake Nail Art Tools and Supplies You Actually Need
Creating white christmas nails snowflake designs requires specific tools that make the difference between professional-looking results and frustrated failures. These essential supplies cost under 25 dollars total.
Dotting tools set with at least three sizes (small, medium, large). Creates perfect circles for snowflake centers and dots. Use opposite ends for different sizes. Clean after each use with acetone to prevent dried polish buildup. Invest in metal-tipped tools over plastic which break easily with repeated use and cleaning.
Thin liner brush specifically 3 to 5 millimeters wide for painting snowflake arms and connecting lines. Natural hair brushes hold more polish than synthetic. Look for brushes labeled "liner" or "detail" not "striper" which are too thick for delicate snowflake work requiring precision.
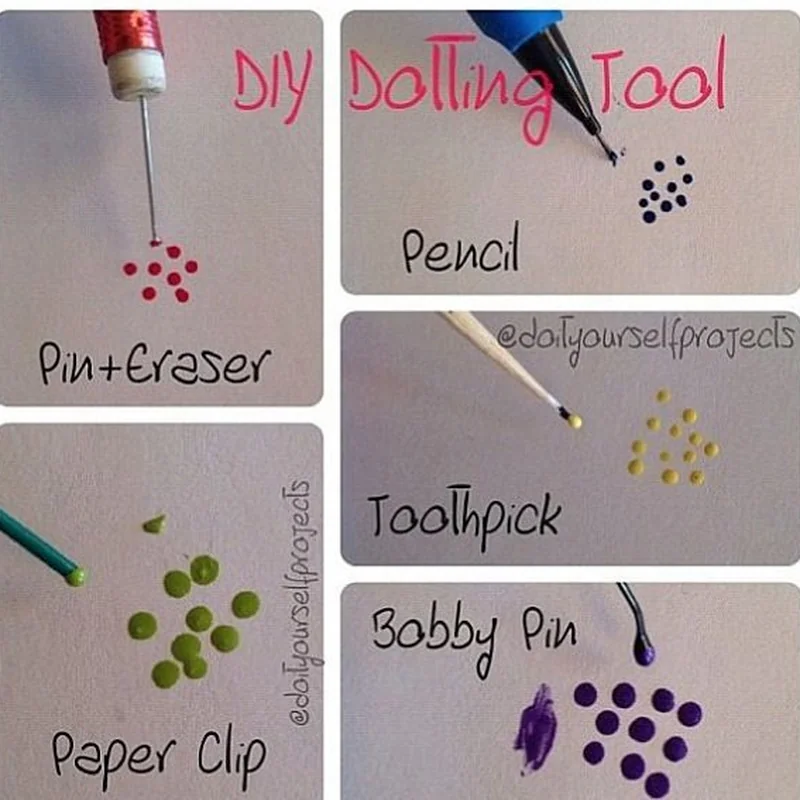
Toothpicks for finest detail work and corrections. Use pointed end for tiny lines and flat end for spreading polish. Disposable so no cleaning required. Keep box of 100 toothpicks in nail supplies for constant availability. Wooden toothpicks work better than plastic which don't absorb polish properly.
Nail decals or stickers eliminate hand-painting entirely for complex snowflakes. Apply to wet base coat or over dried polish. Seal with top coat to prevent lifting. Cut decals smaller if nails are short. One sheet contains 20 to 30 snowflakes costing 5 dollars maximum.
Stamping plate with snowflake designs creates identical perfect snowflakes across all nails. Requires stamper and scraper card. One-time investment under 15 dollars creates unlimited identical snowflakes without artistic skills needed. Works with regular or gel polish formulas.
White and icy blue polish in both regular and gel formulas. Having both allows flexibility. Gel lasts longer but requires UV lamp. Regular polish works immediately with no equipment. Buy quality brands to prevent streaking and yellowing issues requiring multiple coats and causing frustration.
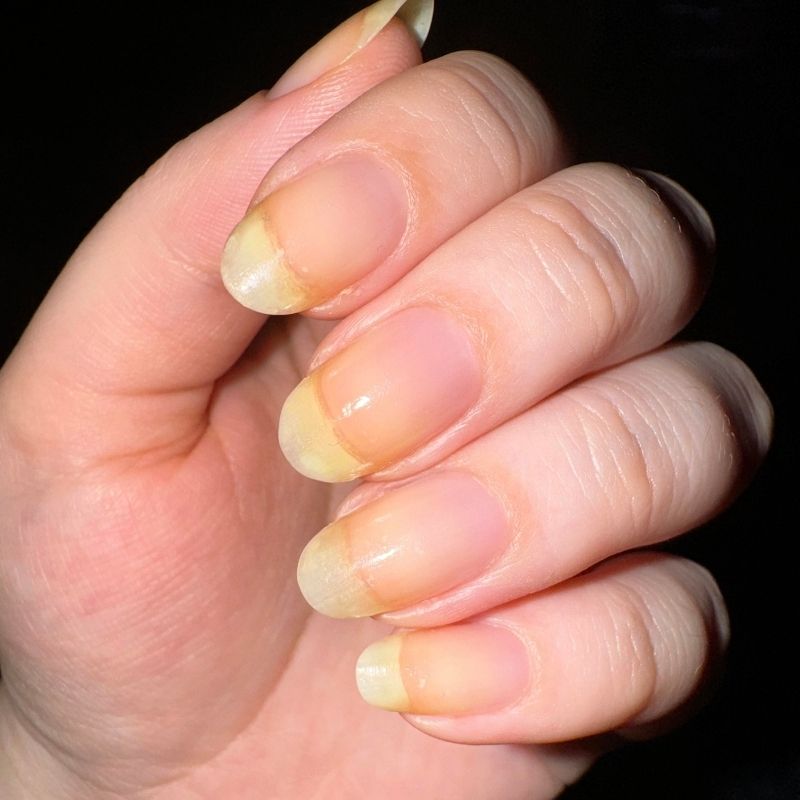
Fixing White Nails That Already Turned Yellow
Yellow-stained white christmas nails snowflake designs aren't ruined permanently. These methods remove yellowing and restore white color without complete polish removal and repainting from scratch saving time and effort.
Baking soda and lemon juice paste creates natural whitening treatment. Mix equal parts until paste forms. Apply to yellow nails and scrub gently with old toothbrush for 2 minutes. Rinse with warm water. Repeat daily until yellowing fades. Works on both regular and gel polish formulas effectively.
Hydrogen peroxide soak lifts deep stains from polish layers. Dilute 3-percent hydrogen peroxide with equal parts water. Soak yellow nails for 10 to 15 minutes maximum. Do not exceed time or you risk drying out cuticles. Rinse thoroughly and apply cuticle oil immediately afterward to restore moisture.
Whitening toothpaste method works for mild yellowing only. Apply whitening toothpaste to yellow nails. Let sit 5 to 10 minutes. Scrub with soft toothbrush using circular motions. Rinse clean. The mild abrasives and whitening agents lift surface stains without damaging polish layers underneath.
Rubbing alcohol wipe removes surface yellowing from recent contamination. Soak cotton pad in 70-percent rubbing alcohol. Wipe yellow nails thoroughly. This works immediately after contact with yellowing agents before stains set permanently. Keep alcohol wipes in purse for emergency cleaning when needed.
Buffing and repainting option for severe yellowing that won't lift. Buff yellow surface gently with fine-grit buffer removing top layer. Wipe with alcohol to clean. Apply fresh coat of white polish over buffed surface. Seal with new top coat. This saves time versus complete removal and starting over from bare nails.
Prevention after fixing: Apply UV-protective top coat to prevent future yellowing. Wear gloves religiously for all cleaning and chemical exposure. Avoid sunscreen contact with nails. Reapply top coat weekly to refresh protective barrier and maintain white color throughout wear time without recurring yellowing problems.

Creating Frosty Matte Finish on Winter Nails
Matte top coat transforms white christmas nails snowflake designs from glossy to frosty creating snow-like texture perfect for winter wonderland aesthetic. Application technique matters for smooth professional finish.
Apply regular polish first and let dry completely for minimum 10 minutes. Matte top coat over tacky polish creates texture and bubbling. Test dryness by gently touching nail side. If any tackiness remains, wait longer before matte application to prevent ruining entire manicure.
Thin even coat of matte top coat applied in one smooth stroke from cuticle to tip. Do not go back over areas or apply multiple brush strokes which creates streaking and uneven matte texture. One perfect coat beats multiple sloppy coats every time for professional results.
Do not apply second coat unless absolutely necessary for full matte coverage. Second coats often create texture problems and uneven finish. If first coat has shiny spots, let it dry fully then apply targeted second coat only to shiny areas not entire nail surface.
Cure time for matte gel is same as glossy gel top coat at 60 seconds LED or 120 seconds UV. Do not under-cure which leaves sticky residue or over-cure which can cause cracking. Set timer and follow manufacturer instructions exactly without guessing or estimating cure times.
Mixing matte and glossy creates interesting dimension on white christmas nails snowflake designs. Apply matte top coat to entire nail. Let dry completely. Use glossy top coat and tiny brush to paint only snowflake designs creating contrast. The glossy snowflakes pop against matte background making them appear three-dimensional and eye-catching.
Matte top coat longevity lasts 5 to 7 days before dulling or showing wear. Refresh by applying new layer of matte top coat over existing manicure. This restores frosty finish without removing and repainting entire design. Keep travel-size matte top coat for midweek refresh applications maintaining perfect finish.
Press-On White Christmas Snowflake Nails Alternative
Hand-painting snowflakes intimidates or frustrates despite easy tutorials. Press-on nails with pre-designed snowflakes deliver professional winter nail art with zero painting skills or artistic ability required for flawless results.
Modern press-ons come with intricate snowflake designs professionally applied. No dotting tools, no shaky hands, no correction fluid needed. Apply with nail glue in 10 minutes and get perfect white christmas nails snowflake designs lasting 10 to 14 days through holiday season without chipping or design smudging.
Measure each nail bed width before ordering press-on sets. Most brands provide sizing guides or measurement instructions. Proper fit prevents obvious fake appearance and ensures comfortable wear without edges digging into skin or nails looking too large for fingers.
File press-ons to match your natural nail length and preferred shape. Most sets come in medium to long length. Shorten by filing from underside to avoid damaging snowflake designs on top surface. Shape edges to create square, squoval, oval, or almond based on personal preference.
Application process matters for longevity and natural appearance. Buff natural nail surface lightly to create texture. Clean with rubbing alcohol removing all oils and residue. Apply thin layer of nail glue to both press-on and natural nail. Press firmly for 30 seconds minimum while counting slowly. Avoid water for 2 full hours after application allowing glue to cure completely and bond properly.
Remove press-ons safely by soaking in acetone for 15 minutes. Never peel or pop off which damages natural nail layers causing thinning and weakening. Push softened press-ons off gently with wooden cuticle stick. Apply cuticle oil and hand cream immediately. Wait 48 hours before applying next set giving nails recovery time.
Choose press-on sets with realistic snowflake details not cartoonish designs. Look for hand-painted or stamped snowflakes over decal stickers which appear cheap. Read reviews specifically mentioning snowflake detail quality and design realism before purchasing to avoid disappointment with low-quality sets.