Household Items That Replace Professional Tools
Your home contains everything needed for professional nail art. Understanding which household items substitute for expensive tools saves hundreds while delivering identical results.
The Toothpick: Your Most Versatile Tool
Wooden toothpicks create perfect dots, drag marble patterns, make flowers, draw fine lines, and clean up mistakes. The pointed end makes tiny dots and details. The blunt end creates larger dots. Toothpicks cost pennies and outperform many expensive dotting tools.
Dot technique: Dip pointed end in polish, touch to nail for perfect circles. No pressure needed capillary action creates the dot. For varying sizes, use different amounts of polish on the toothpick rather than pressing harder.
Marble swirls: Drop two colors of wet polish on nail. Use toothpick to drag through colors, creating swirled patterns. Work quickly before polish dries. The drag motion blends colors naturally without tools.
Cleanup: Wrap toothpick tip in cotton, dip in acetone, precisely clean edges without affecting surrounding polish.
Scotch Tape: The Geometric Game Changer
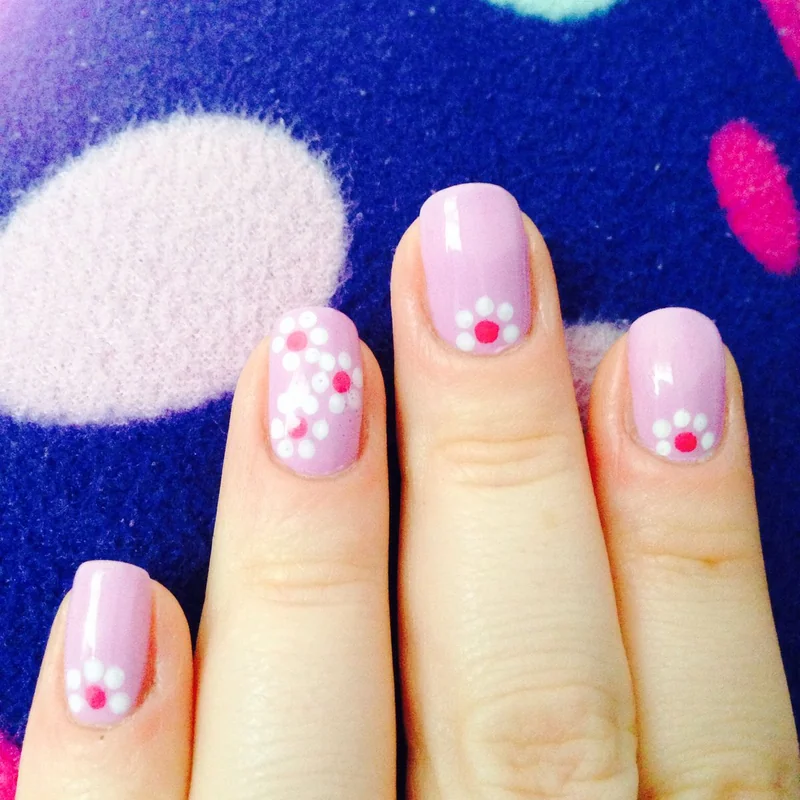
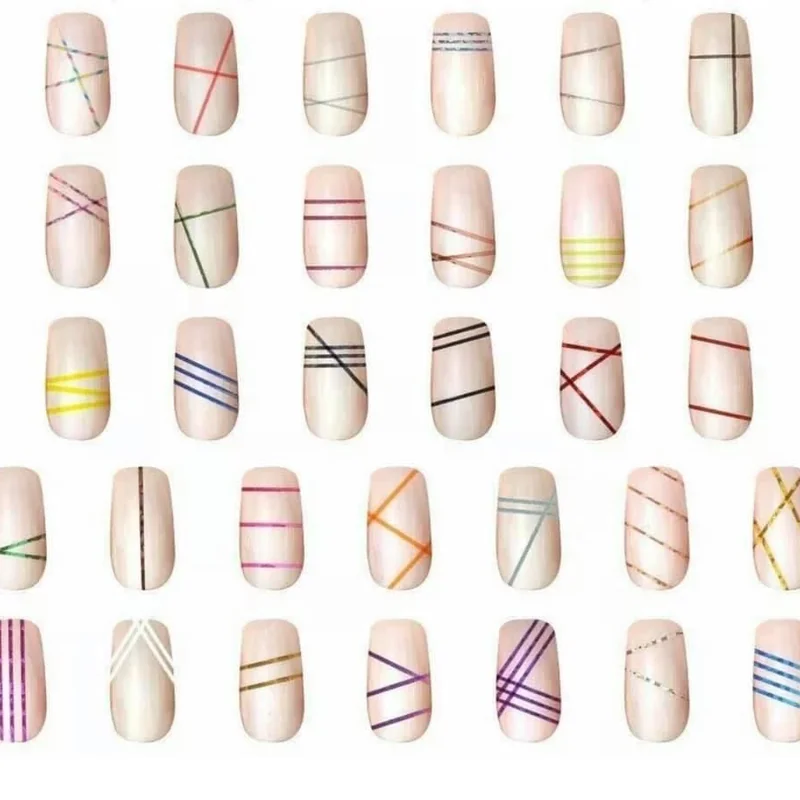
Regular scotch tape creates perfectly clean lines, geometric patterns, color blocks, and French tips without steady hands. This single item enables dozens of designs impossible to execute freehand.
Application method: Apply base color completely. Wait until totally dry minimum 5 minutes. Position tape where you want clean edges. Paint contrasting color over tape. Remove tape immediately while polish is wet waiting until dry causes peeling with the tape.
Stripe hack: Cut thin tape strips for precise lines. Position vertically, horizontally, or diagonally. Remove after painting for crisp stripes without bleeding.
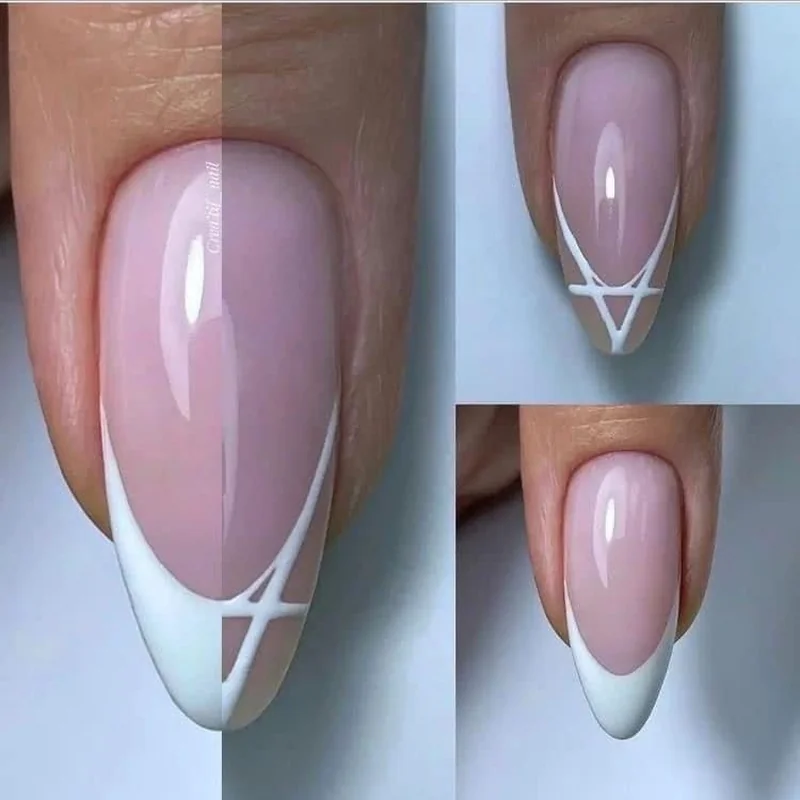
French tip perfection: Apply tape curved across nail tip, paint white above it, remove immediately. Creates salon-perfect French tips every time.
Makeup Sponge: Gradient Master
Ordinary makeup sponges or kitchen sponges cut into small pieces create professional ombre, gradient, and blended effects. Sponges produce textures impossible to achieve with brushes.
Ombre technique: Paint base color, let dry. Paint two colors side-by-side on sponge where they should blend. Dab sponge onto nail repeatedly the meeting point of colors creates natural gradient. Reapply polish to sponge between nails.
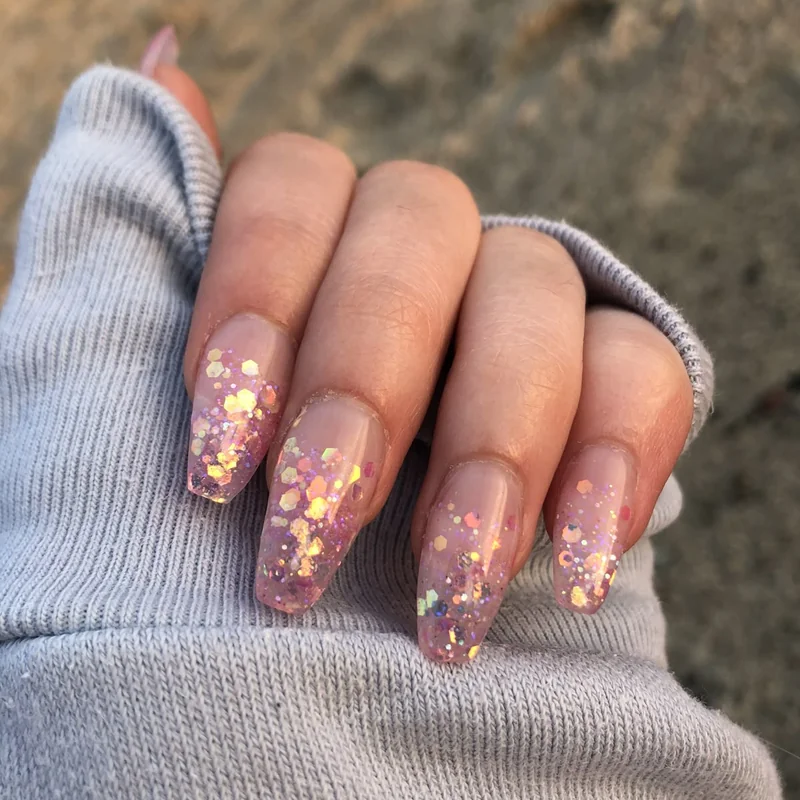
Glitter gradient: Apply base color, dry completely. Paint glitter polish onto sponge, dab heavily at tips, lighter toward middle. Creates professional fade without expensive airbrushing.
Texture effect: For abstract modern nails, dab contrasting colors randomly with sponge. The porous texture creates organic patterns automatically.
Bobby Pin: The Double Dot Wonder
Standard bobby pins create instant hearts, double dots, and paired designs. The two rounded ends pressed simultaneously make symmetrical shapes without measuring.
Heart technique: Dip both bobby pin ends in polish. Press both onto nail simultaneously at slight angle. The two dots form instant heart shape. Spacing determines heart size closer dots make rounder hearts, farther apart creates elongated shapes.
Double dots: Press both ends in line for connected double dots. Perfect for creating caterpillar designs, abstract patterns, or symmetrical accents.
Plastic Wrap: Instant Marble Texture
Crumpled plastic wrap pressed into wet polish creates instant marble, stone, or textured effects. This technique requires zero skill the plastic does everything.
Application: Paint base color, let dry. Apply contrasting color. Immediately crumple plastic wrap into loose ball, press onto wet polish, lift straight up. Random wrinkles create organic marble texture. Seal with top coat.
The Chrome Hack: Metallic Eyeshadow Alternative
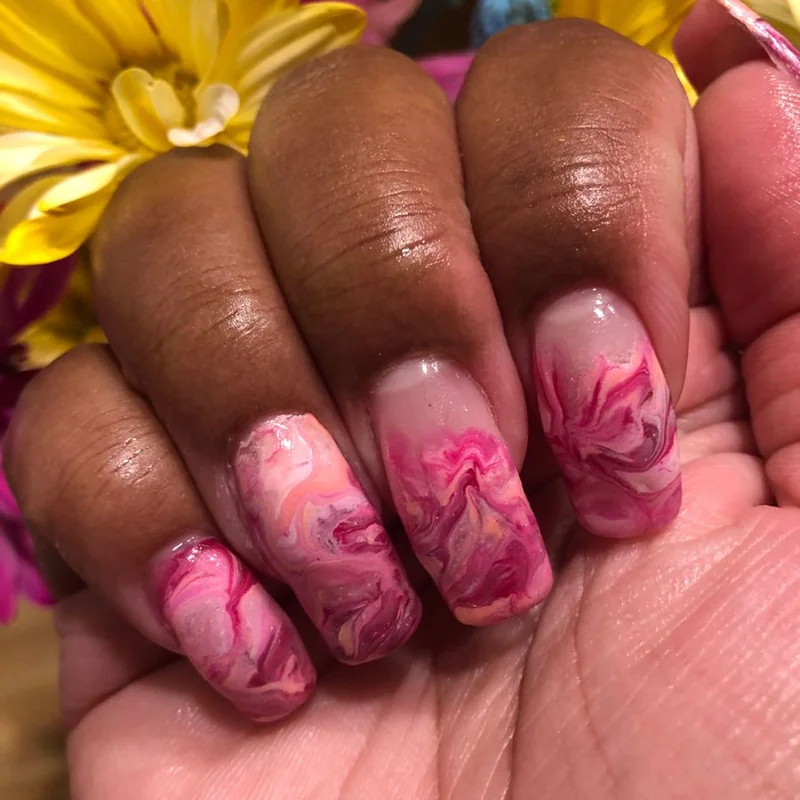
Chrome nails dominate 2026 trends, but chrome powder costs twenty-plus dollars and requires gel systems. Metallic eyeshadow achieves 70% of the effect for zero additional cost.
Method: Apply gel-style or regular top coat to bare nails. If using gel, cure it. While tacky (or immediately if using regular polish), rub metallic silver or gold eyeshadow onto nails with fingertip or small brush. The powder adheres to the tacky surface. Seal with regular top coat.
Result: Mirror-like metallic finish resembling professional chrome. Not quite as reflective as true chrome powder, but indistinguishable in photos and sufficient for trendy looks.
Color variations: Try different metallic eyeshadow shades copper, rose gold, blue, or green for varied chrome effects.
The Elmer's Glue Hack: Peel-Off Base Coat
This viral hack solves glitter removal forever. Elmer's white school glue creates peel-off base that lets you pop off entire manicures without acetone or scrubbing.
Application: Paint thin layer of Elmer's glue on bare nails, let dry completely until clear. Apply polish as normal over the glue. When ready to remove, slide orange stick under polish edge and peel entire manicure off in one piece.
When to use: Perfect for glitter polish, nail art you'll wear briefly, or when you want easy removal. Not ideal for manicures needing to last 2 weeks the polish can lift at edges.
Safety note: Elmer's glue is non-toxic and safe for nails. Don't use super glue or other strong adhesives.
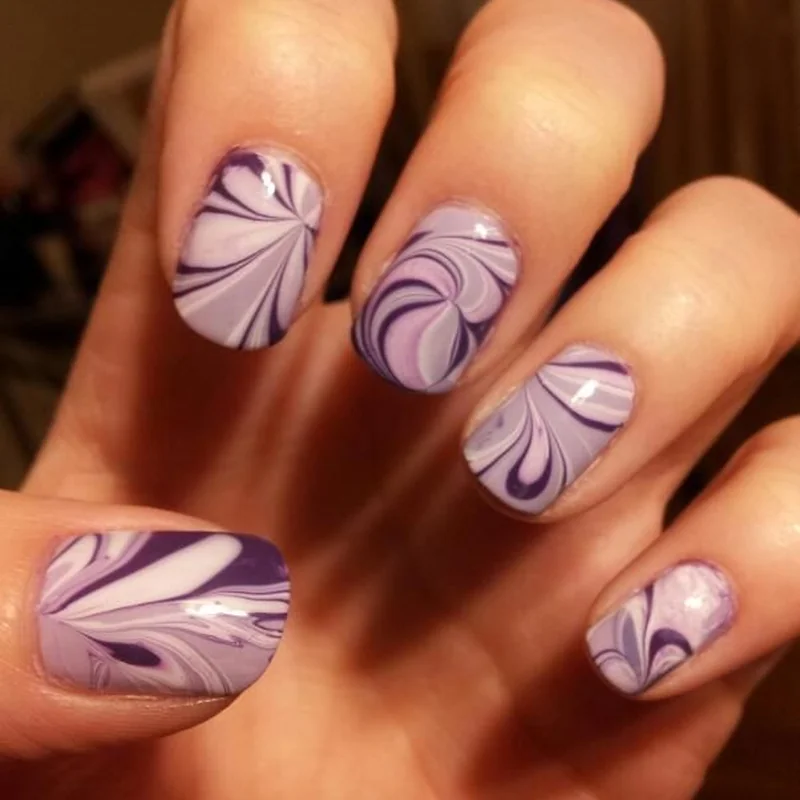
Water Marble Technique: Advanced Look, Simple Method
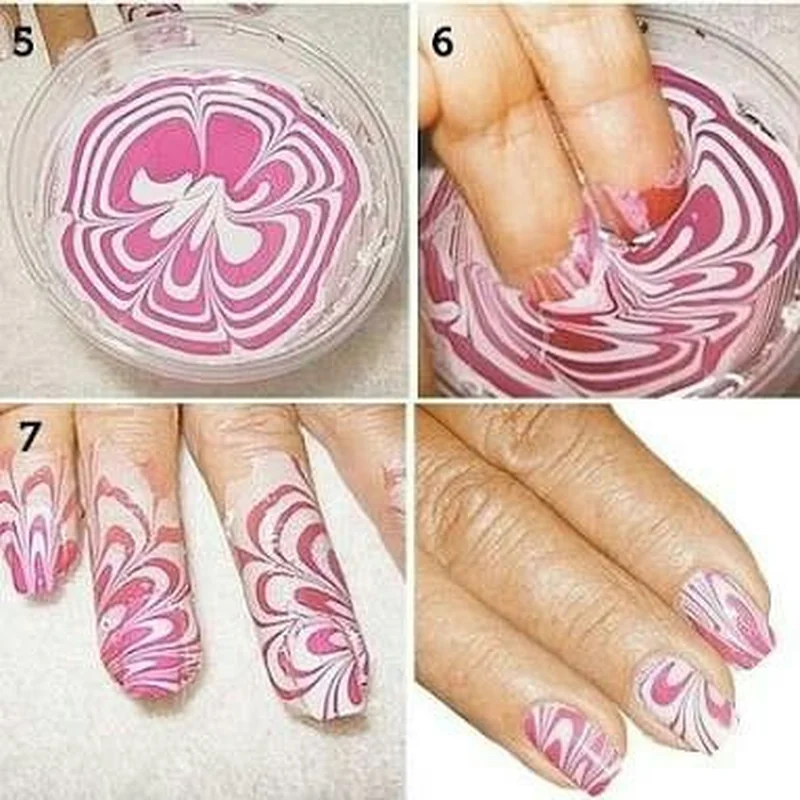
Water marble nails look impossibly complex but require only polish, water, and toothpick. This technique creates unique swirled patterns every time.
Setup: Fill small cup with room-temperature water. Select 2-3 complementary polish colors.
Execution: Drop one polish color into water center it spreads across surface. Immediately drop second color on top, then third. Each color forms a ring. Use toothpick to drag through rings from center outward, creating pattern. Work within 30 seconds before polish dries.
Application: Protect fingers with petroleum jelly or tape. Dip nail straight down through pattern. Hold underwater briefly, use toothpick to gather excess polish away from nail. Lift straight up. Clean finger, seal with top coat.
Longevity Hacks: Make Manicures Last 2+ Weeks
Professional manicures last because technicians follow specific protocols. These hacks replicate those protocols at home.
The Edge Capping Technique
The secret: Paint polish and top coat over the nail's free edge (the tip), not just the top surface. This seals edges where chipping typically starts.
Method: After painting nail top, turn finger and run brush over the edge. Do this with base coat, color coats, and top coat. Takes 2 extra seconds per nail but doubles manicure longevity.
Thin Coat Philosophy
Thick coats bubble, take forever to dry, and peel quickly. Thin coats dry faster, adhere better, and last longer.
Application: Three thin coats always outperform one thick coat. Wipe excess polish from brush before application. If color isn't opaque after first coat, add another thin layer rather than one thick layer.
Drying time: Wait 2 minutes between thin coats. They dry faster than thick coats despite applying more layers.
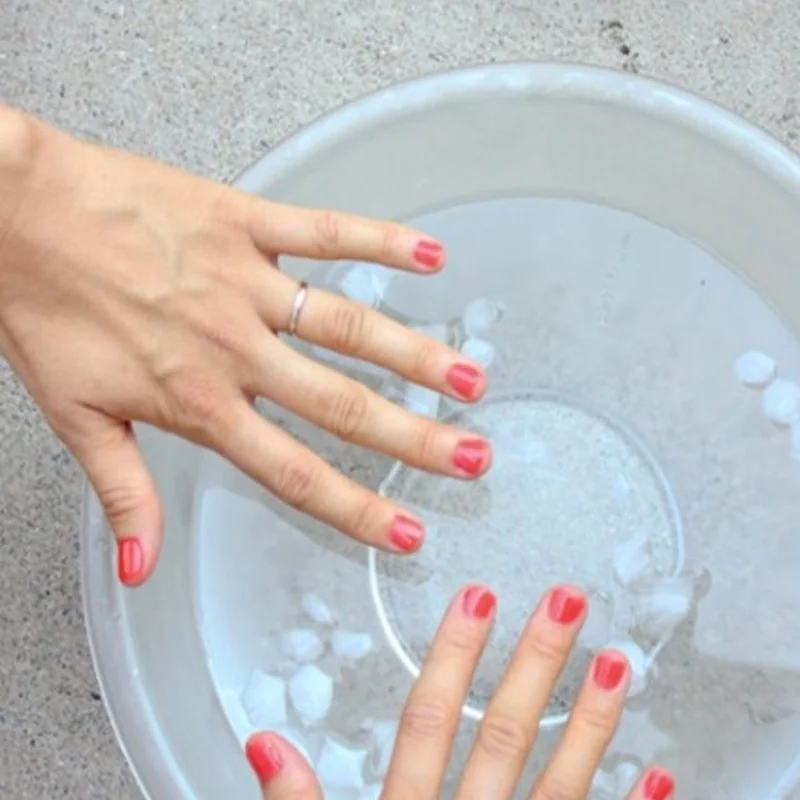
The Ice Water Trick
Speed up drying dramatically with ice water. After applying final top coat, wait 1 minute, then dip fingertips in ice water for 3 minutes. The cold hardens polish surface rapidly.
Why it works: Polish dries through evaporation. Cold temperature accelerates this process significantly. Your nails will be rock-hard in 5 minutes total rather than 20.
Cleanup Hacks: Professional-Looking Finish
Messy application around cuticles makes home manicures look amateur. These hacks create salon-clean results.
The Petroleum Jelly Barrier
Before painting nails, apply petroleum jelly or lip balm to skin surrounding nails. Paint normally polish that lands on skin wipes away effortlessly after painting. No acetone needed.
Application: Use cotton swab to apply thin layer on cuticles and skin adjacent to nails. Avoid getting it on nails themselves it prevents polish adhesion.
The Angled Brush Method
Dip small makeup brush in acetone, wipe excess on paper towel until barely damp. Use angled edge to precisely clean polish from cuticles and sidewalls. Provides control impossible with cotton swabs.
Tool: Flat eyeliner brush or concealer brush works perfectly. Keep dedicated brush for nail cleanup.
The Shower Cap Hack
For gradient or sponging techniques that create mess on surrounding skin, coat fingers with thick lotion before starting. After finishing nails, shower with hands out of spray. The steam softens excess polish, making it peel off skin easily.
Glass Nail Hack: Ultra-Glossy Translucent Look
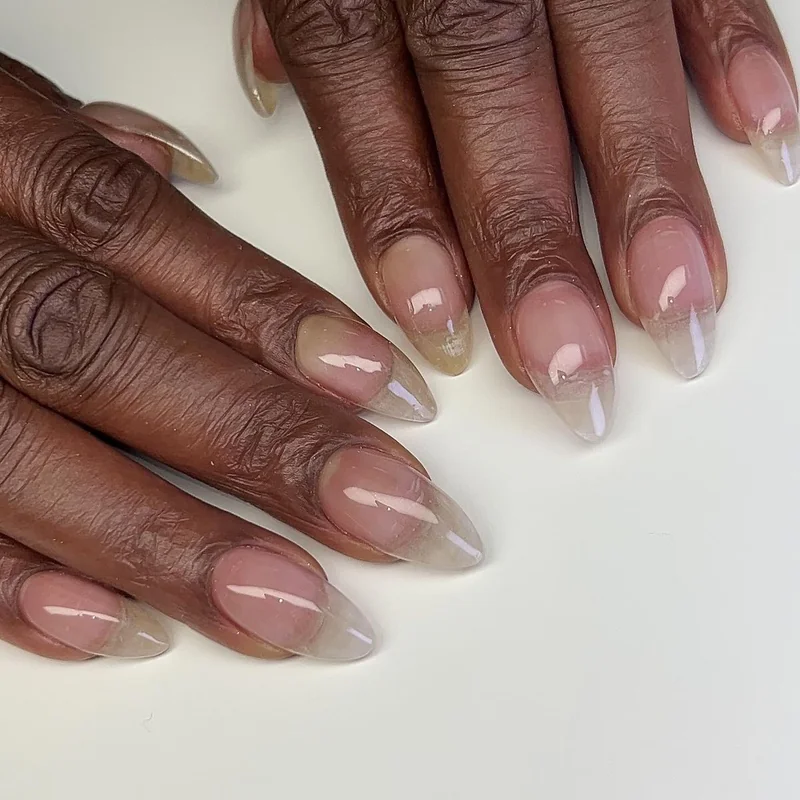
Glass nails that super-glossy, translucent finish trending in 2026 don't require gel systems or professional equipment. You need sheer polish and excellent top coat.
Method: Use sheer pink, nude, or barely-there polish. Apply 2-3 thin coats, waiting between each. The sheerness is crucial opaque polish won't create glass effect. Apply high-shine top coat. For maximum gloss, apply second top coat layer after first dries.
The secret: Glass nails are about finish, not opacity. The barely-visible color with mirror-like shine creates the translucent glass effect.
The Stencil Hack: Office Supplies Edition
Ring reinforcement stickers (used for binder paper) create perfect half-moon manicures and reverse French tips.
Half-moon application: Paint base color on entire nail, dry completely. Place reinforcement sticker at cuticle area, paint contrasting color over nail, remove sticker. Creates perfect semicircle at nail base.
Reverse French: Position reinforcement sticker near tip, paint exposed nail, remove sticker. Creates trendy reverse French look with perfect curves.
Matte Transformation Hacks
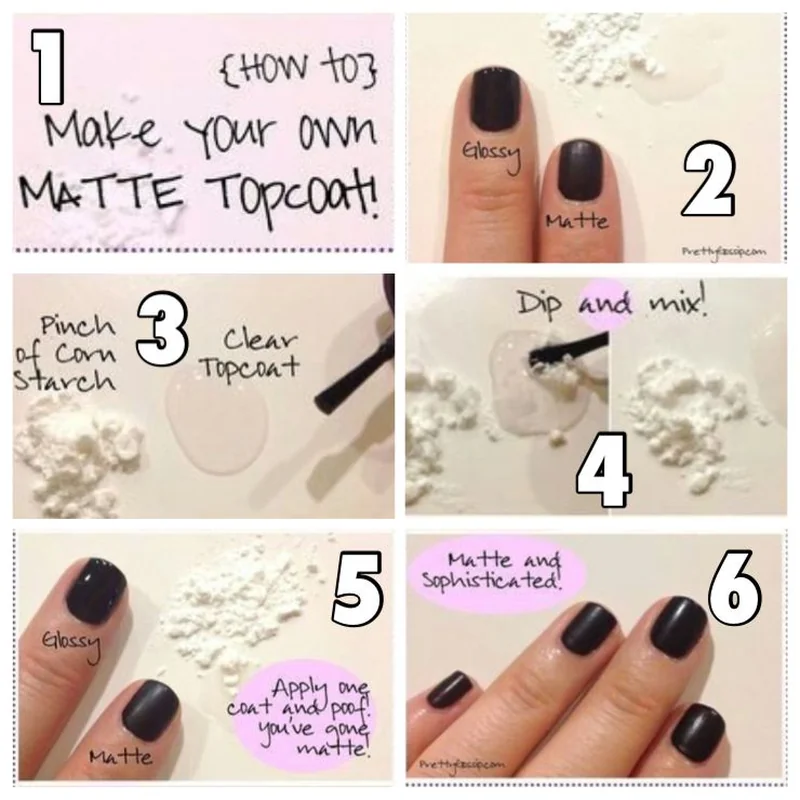
Convert any polish to matte finish without buying matte polish or top coat.
The Cornstarch Method
Add tiny amount of cornstarch to polish bottle, mix with toothpick. The fine powder creates matte finish. Start with very small amount you can always add more.
The Steam Method
Paint nails normally with glossy finish. Boil water, hold painted nails over steam for 10 seconds. The condensation transforms gloss to matte. Works temporarily and can be reverted by buffing.
The Newspaper Transfer Hack
Create text-printed nails without special decals or printing equipment.
Method: Paint nails light gray or white, dry completely. Pour small amount of clear alcohol (vodka or rubbing alcohol) into dish. Dip finger in alcohol briefly, press newsprint firmly onto wet nail for 10 seconds, lift straight off. Text transfers onto nail. Seal immediately with top coat.
Why it works: Alcohol briefly reactivates dried polish surface, allowing ink transfer. Newspaper ink is soy-based and transfers easily.
Glitter Removal Hacks: No More Scrubbing
Glitter polish removal typically requires aggressive scrubbing that damages nails. These hacks dissolve glitter effortlessly.
The Foil Wrap Method
Soak cotton pads in acetone, press onto glitter nails, wrap each finger in foil. Wait 10 minutes. Remove foil and wipe glitter polish dissolves completely without scrubbing.
Why it works: Foil traps acetone against nail, maintaining saturation. The prolonged soaking breaks down glitter bonds thoroughly.
The Peel-Off Base Hack
Before applying glitter polish, use the Elmer's glue base coat method. Glitter polish peels off in one piece when ready, no removal needed.
Quick Fix Hacks: Emergency Solutions
Chip Repair Without Redoing
File away chipped edge gently. Dab tiny amount of matching polish on chip only. Feather edges by tapping with finger before it dries. Apply top coat over entire nail. The patch blends invisibly if done within first 24 hours of chipping.
Smudge Rescue
If you smudge polish before it fully dries, lick your finger (yes, really) and gently smooth the smudge. Saliva's texture and moisture level smooth fresh polish without leaving marks. Follow with another top coat.
The Nail Wrap Repair
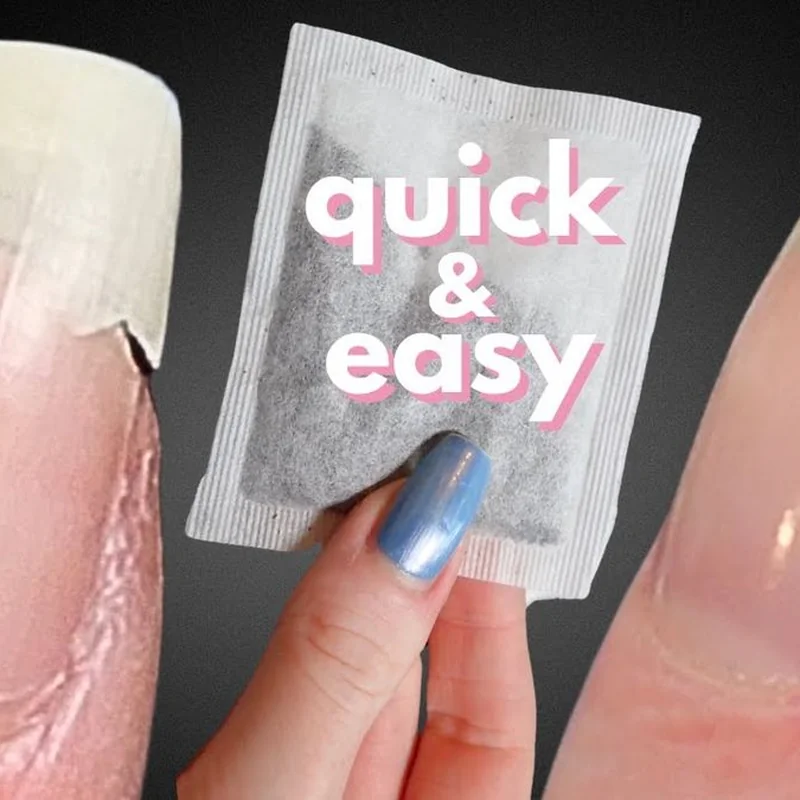
For broken or split nails, cut small piece of tea bag, apply nail glue to break, press tea bag over it, file smooth once dry, paint over. This reinforcement allows nail to grow out without further splitting.
Color Mixing Hacks: Custom Shades
Create custom polish colors by mixing. Always mix on palette first to test before committing.
The Perfect Nude Formula
Mix white polish with tiny drops of brown, pink, or peach until you achieve your exact skin tone match. Creating personalized nude is cheaper than buying multiple bottles searching for the right shade.
Reviving Old Polish
Add 2-3 drops of nail polish thinner (or clear polish as substitute) to thick, goopy polish. Roll bottle between palms to mix. Never use nail polish remover it breaks down polish formula.
The Eyeshadow Custom Color
Crush old eyeshadow into fine powder, mix into clear polish. Creates unique custom colors and textures. Especially effective with shimmery shadows for instant metallic polish.
Stamping Alternative: The Bandaid Method
Nail stamping creates complex patterns but requires expensive plates. Bandaids create geometric patterns for free.
Method: Paint base color, dry. Cut bandaid into desired shapes (triangles, circles, squares). Apply shapes to nail as stencils, paint contrasting color, remove shapes. Creates precise geometric designs without stamping equipment.
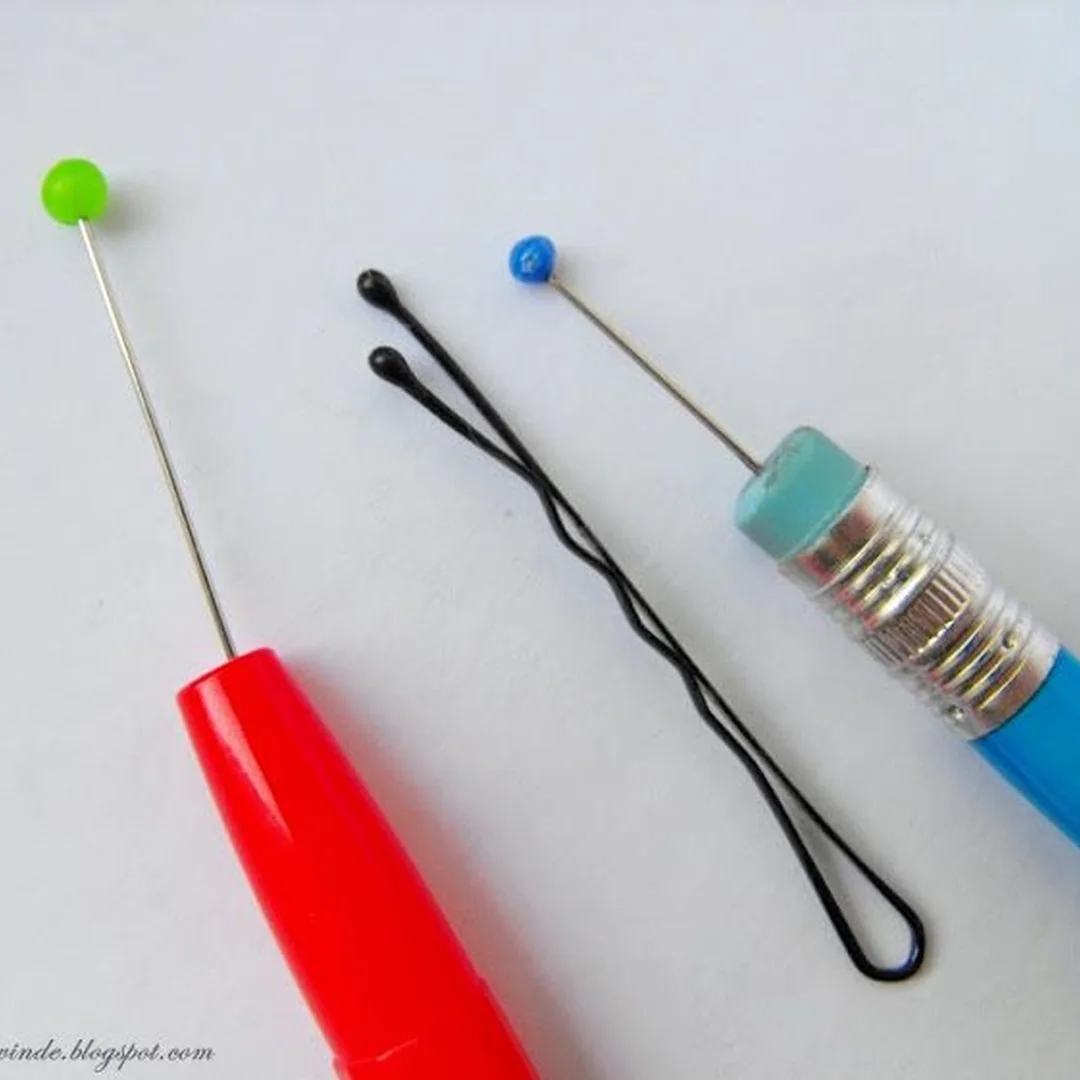
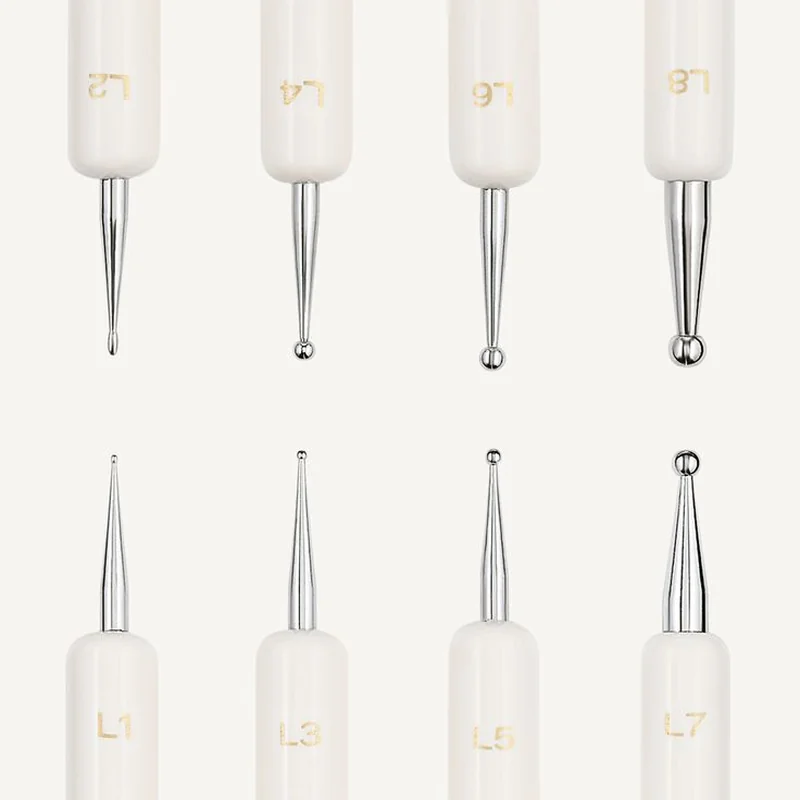
The Dotting Tool Alternatives
Don't own dotting tools? Use these substitutes:
Bobby pin ends: Create perfect uniform dots. Different pin sizes make different dot sizes.
Pencil eraser: New pencil eraser makes large, uniform dots. Dip in polish, press to nail.
Ballpoint pen (dried out): The ball creates smooth, consistent dots without polish absorption.
Straight pin pushed into pencil eraser: Creates micro dots for intricate designs.
The Gradient Sponge Technique Perfected
Achieve flawless ombre without mess.
Setup: Apply base color, dry completely. This prevents sponge from absorbing too much polish.
Application: Paint colors side-by-side on sponge. Dab sponge on paper towel once to remove excess this prevents flooding cuticles. Bounce sponge on nail repeatedly for smooth blend. Work in light layers rather than one heavy application.
Cleanup: Petroleum jelly barrier or quick shower with steam does cleanup work.
Aura Nails at Home
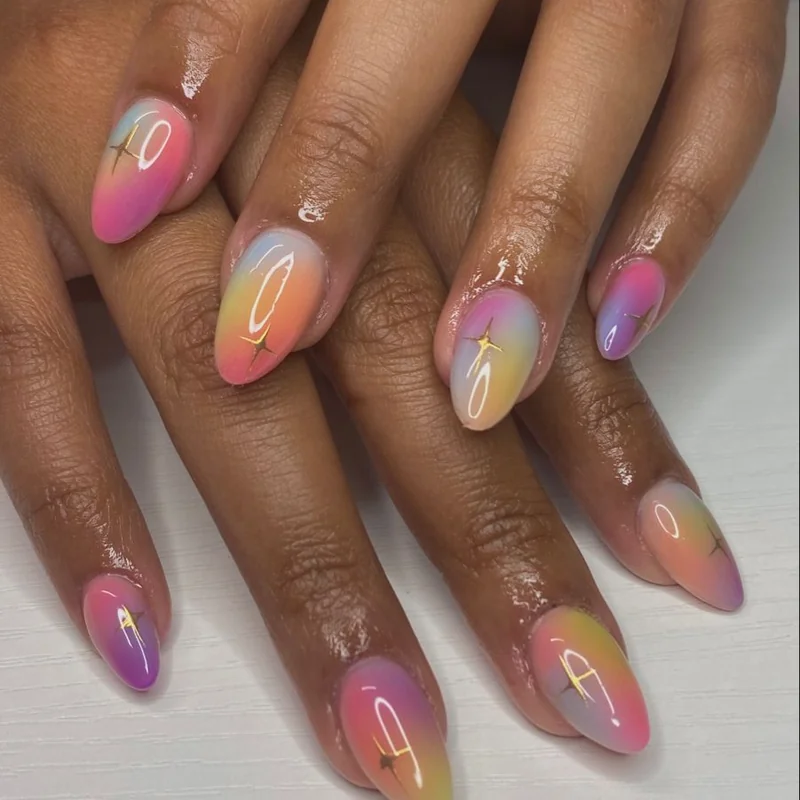
The 2026 aura trend looks complex but requires only sponge and eyeshadow.
Method: Paint white or nude base, dry. Apply colored eyeshadow to makeup sponge. Dab concentrated at cuticle, lighter toward tips. Layer multiple colors for dimension. The powder texture creates natural gradient. Seal with top coat multiple layers prevent eyeshadow from rubbing off.
The Striping Brush Alternative
Don't own striping brush? Use these substitutes:
Old eyeliner brush: Thin eyeliner brushes create precise lines. Clean thoroughly with acetone before switching between makeup and nail polish use.
Sewing thread dipped in polish: Lay thread across wet base color, let dry, peel thread away. Leaves perfect thin line.
Toothpick dragged through wet polish: For ultra-thin lines, drag toothpick tip through wet polish in straight motion.
The Mani Longevity Preparation
Before you paint: Wash hands with dish soap to remove all oils. File and shape nails. Push back cuticles. Lightly buff nail surface to create tooth for polish adhesion. Wipe nails with rubbing alcohol on cotton pad. This prep extends manicure life significantly.
Storage and Organization Hacks
Polish thinner: Add 2-3 drops of polish thinner to thickening polish to restore original consistency. One bottle of thinner maintains your entire collection.
Bottle cleaning: Pour small amount of acetone in old polish bottle, shake vigorously, empty. Repeat until bottle runs clear. Reuse for custom mixes.
Color organization: Store polish bottles upside down so pigments settle toward cap rather than bottom, making formula more consistent.
The Professional Secret: Thin, Multiple Coats
Professional manicures last because technicians apply 3-4 thin coats rather than 1-2 thick coats. Thin layers dry faster, adhere better, and resist chipping longer. Each layer should be semi-transparent opacity comes from layering, not thickness.
Cost Analysis: DIY Versus Salon
Basic salon manicure: $35-50 every 2 weeks = $910-1,300 annually
At-home setup: $40 initial investment (base coat, polish, top coat, household items) + $20 annually for polish replacement = $60 first year, $20 annually after
Annual savings: $850-1,240 using identical techniques professionals use
These hacks don't just save money they provide skill development and creative freedom impossible at salons. You control timing, design complexity, and can experiment without additional cost.
Final Thoughts: Technique Trumps Tools
Professional nail results come from understanding technique, not owning expensive tools. Every salon method has an at-home equivalent using household items. The key is patience: take time for proper prep, allow adequate drying between coats, and don't rush cleanup.
Start with one hack from this guide. Master it. Add another. Within a month, you'll execute multiple techniques confidently. Within three months, friends will ask where you get your nails done. Your home is the answer, and these 73 hacks are your toolkit.