What is Blooming Gel? (And Why Everyone's Obsessed)
Blooming gel is a specially formulated clear gel polish with a thinner consistency than regular gel. This thin viscosity is the magic ingredient it allows gel polish colors to naturally spread, disperse, and "bloom" on top of it before you cure everything under a UV or LED lamp.
Think of it like watercolor painting on wet paper. When you drop gel polish colors onto uncured blooming gel, the colors drift and blend naturally, creating organic patterns you can't replicate with a brush. Each design turns out unique and one-of-a-kind.
The technique originated in professional nail salons but has exploded on social media because it's surprisingly achievable at home with basic gel nail supplies.
How Blooming Gel Works
Blooming gel stays wet and workable longer than regular gel polish. Here's the science part made simple:
Regular gel polish has a thick, sticky consistency that stays exactly where you place it. Blooming gel has a much thinner, almost runny consistency that allows gel colors placed on top to naturally disperse through it before everything cures together.
When you add dots or strokes of colored gel polish onto uncured blooming gel, the color pigments spread outward in organic patterns. You control how much the colors bloom by timing when you cure cure quickly for subtle blooming, wait 20-30 seconds for dramatic watercolor effects.
Blooming Gel vs Regular Gel Polish
Not sure what makes blooming gel different? Here's the breakdown:
Blooming Gel:
- Always clear, never colored
- Super thin, runny consistency
- Designed to stay wet longer
- Allows colors to disperse and spread
- Used as a medium layer between base and colors
- Creates watercolor and marble effects
Regular Gel Polish:
- Available in thousands of colors
- Thicker, sticky consistency
- Sets quickly, doesn't spread
- Colors stay exactly where applied
- Used for solid color manicures
- Creates opaque, even coverage
You need both for blooming gel nail art regular gel polish for your base color and design colors, plus blooming gel as the magic spreading medium between layers.
Let's break down exactly what supplies you'll need before starting your first blooming gel manicure. Good news you probably already have some of these if you do regular gel nails at home.
Essential Tools & Products
Must-Have Products:
- Blooming gel (clear gel with thin viscosity)
- UV or LED nail lamp (LED cures faster at 60 seconds vs 120 for UV)
- Gel base coat (protects natural nails)
- No-wipe gel top coat (seals everything, no sticky layer)
- Gel polish colors in 2-3 shades minimum (your design colors)
- Nail prep dehydrator or rubbing alcohol
- Lint-free wipes or cotton pads
Helpful Tools (Not Required But Make Life Easier):
- Dotting tool set in various sizes
- Nail art brush set with thin detail brushes
- Cuticle pusher
- Nail file and buffer
- Cuticle oil
Total Investment: $45-$80 for complete starter kit, or $15-$25 if you already have gel nail basics
Best Blooming Gel Brands for Beginners
Not all blooming gels perform the same way. Here's my honest take after testing five popular brands:
The GelBottle Inc Blooming Gel
- Price: $18-$25
- Best for: Professional results, consistent blooming
- Viscosity: Perfectly thin, blooms beautifully every time
- Notes: Industry standard used by nail techs, worth the investment
- Where to buy: The GelBottle Inc
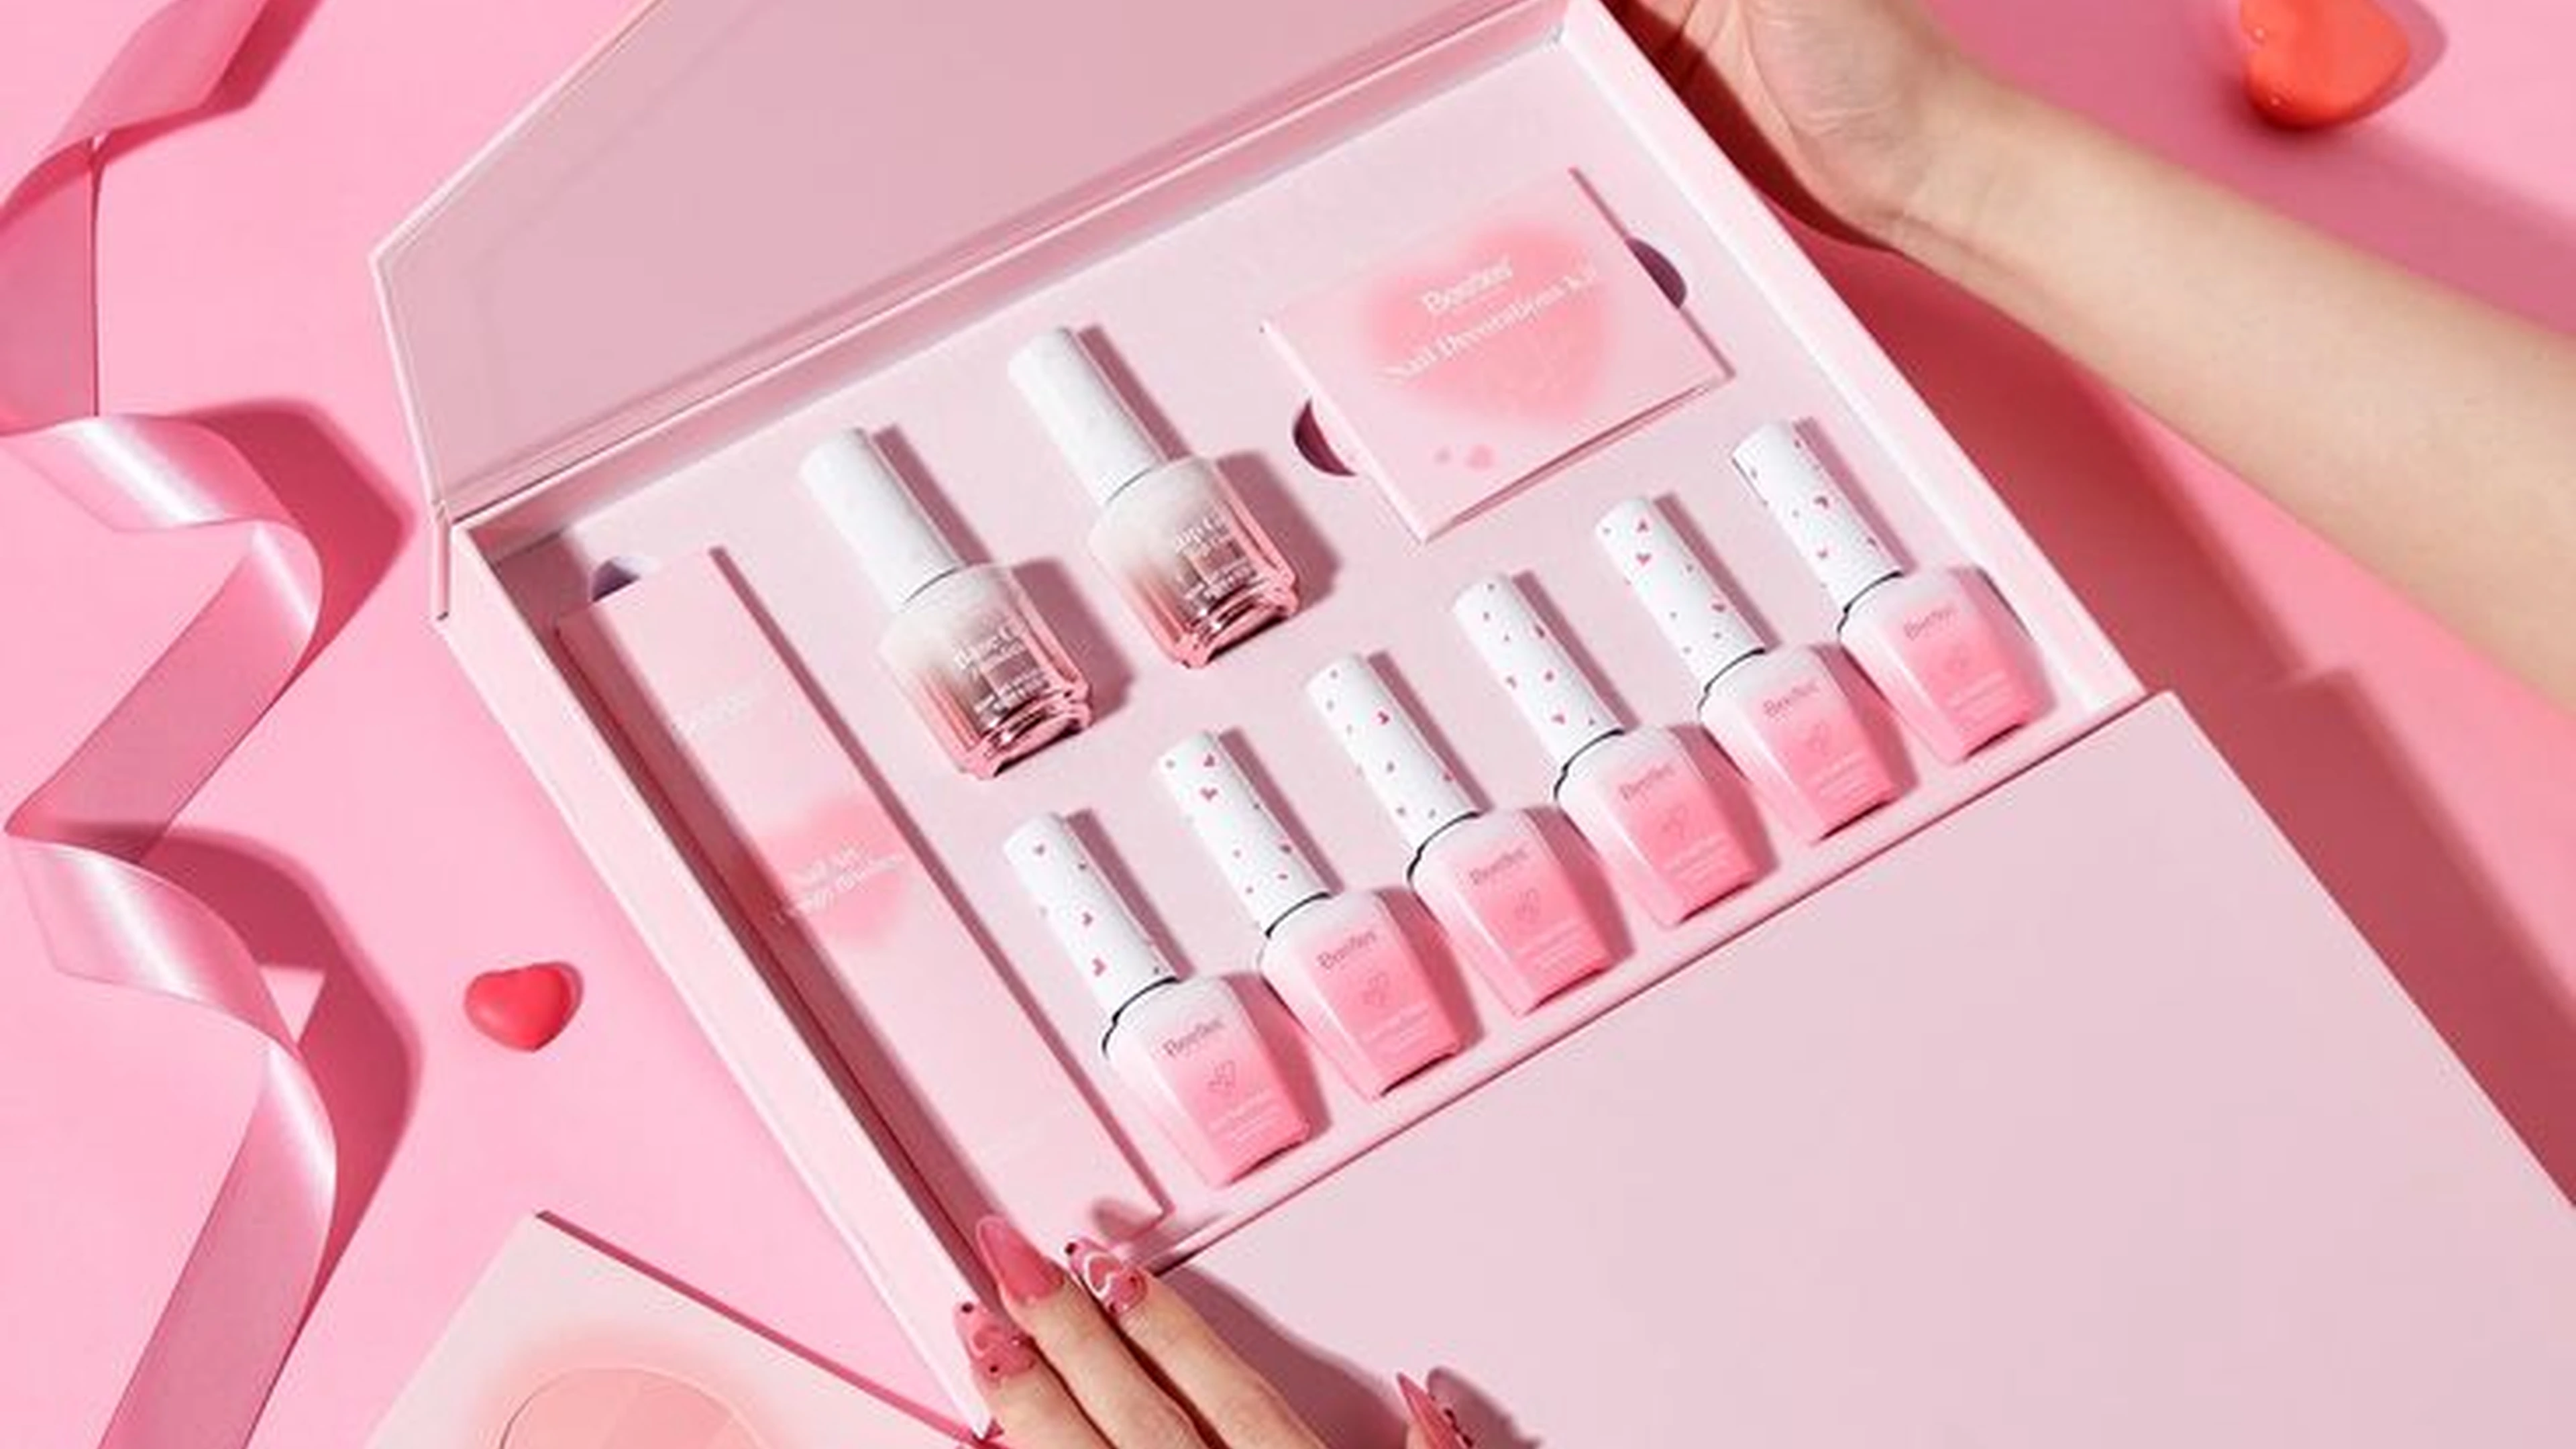
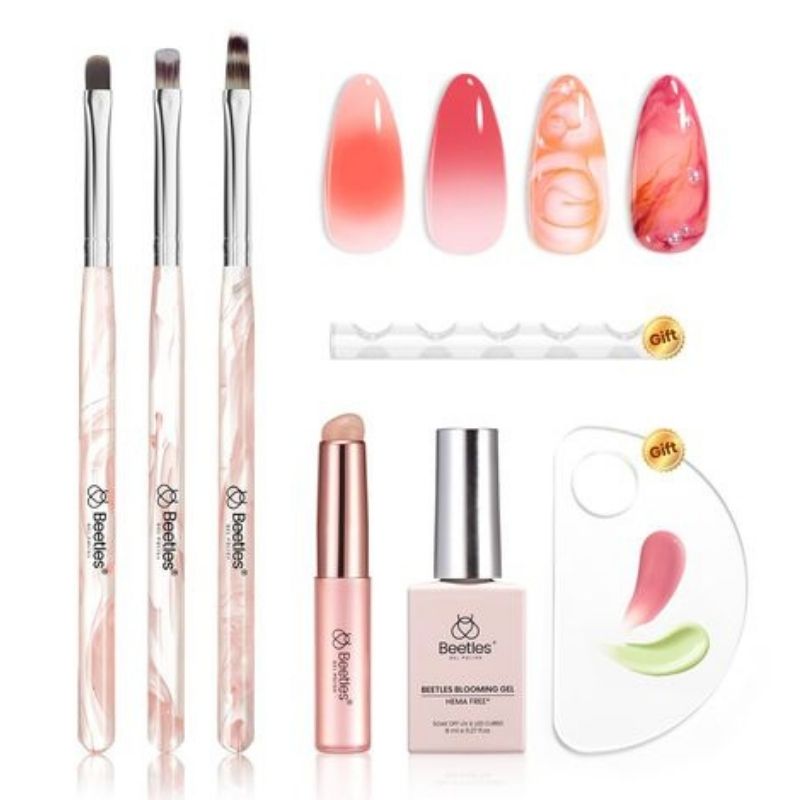
Beetles Blooming Gel
- Price: $8-$12
- Best for: Budget-conscious beginners testing technique
- Viscosity: Slightly thicker than TGB but still works well
- Notes: Best Amazon option, great value, HEMA-free formula
- Where to buy: Amazon (search Beetles Blooming Gel)
Mylee Blooming Gel
- Price: $15-$20
- Best for: UK nail enthusiasts, comes in marble quad kits
- Viscosity: Medium-thin, reliable blooming
- Notes: Excellent kit options with matching gel colors included
- Where to buy: Mylee official site
Makartt Blooming Gel
- Price: $10-$15
- Best for: Mid-range quality without premium price
- Viscosity: Good spreading, occasional inconsistency
- Notes: Solid performer, frequently on sale
- Where to buy: Amazon or Makartt website
Budget Hack: Some base coats work as blooming gel substitutes because they have similar thin viscosity. Not all base coats work this way, but if you're experimenting, try your current base coat before buying dedicated blooming gel. Worst case, it doesn't bloom and you're out five minutes.
Budget Breakdown: How Much Does It Cost?
Absolute Minimum Setup (if you have nothing):
- LED nail lamp: $25-$35
- Beetles blooming gel: $10
- Base coat: $8
- Top coat: $8
- 2 gel polish colors: $12-$16
- Dotting tool set: $6
- Total: $69-$83
If You Already Do Gel Nails (just adding blooming gel):
- Blooming gel: $10-$25
- Optional dotting tools: $6
- Total: $10-$31
Real talk this is a one-time investment that'll last 20-30 manicures. Compare that to $45-$65 per salon visit for gel nails and you'll break even after your second at-home mani.
Step-by-Step Tutorial: How to Do Blooming Gel Nails at Home
Ready to create your first blooming gel nails? This tutorial walks through every single step. Take your time and work on one nail at a time that's the secret to controlling the bloom.
Total Time: 45-60 minutes for full manicure
Active Work: 30-40 minutes
Curing Time: 15-20 minutes total
Before You Start:
- Work in good lighting so you can see colors bloom
- Have all supplies within reach before starting
- Do one nail completely before moving to the next
- Resist touching uncured gel (I know it's tempting)
Step 1: Prep Your Nails (The Foundation)
Nail prep determines how long your blooming gel manicure lasts. Don't skip these steps.
Push back cuticles gently with cuticle pusher. File nails to your preferred shape and smooth any rough edges. Buff the nail surface lightly to remove shine this helps gel adhere better.
Wipe nails with lint-free pad soaked in nail prep dehydrator or rubbing alcohol. This removes oils and moisture. Let nails air dry for 30 seconds.
Visual Checkpoint: Nails should look matte, not shiny, with no visible oils or moisture.
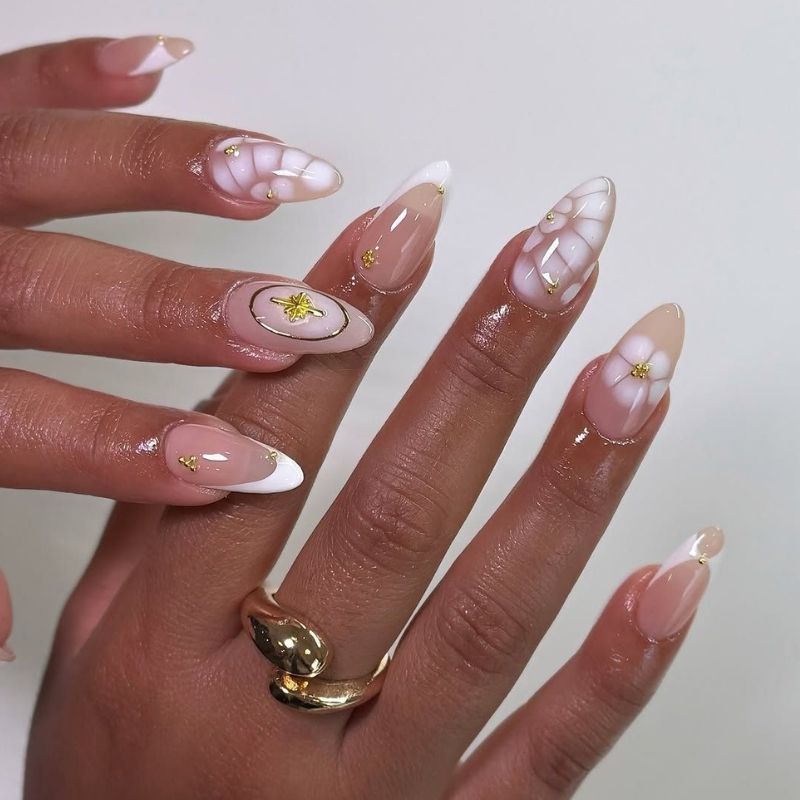
Step 2: Apply Base Coat & Base Color
Apply thin layer of gel base coat to all nails. Cap the free edge by running brush along nail tip. Avoid getting base coat on skin or cuticles this causes lifting.
Cure under LED lamp for 60 seconds or UV lamp for 120 seconds.
Apply your chosen base color gel polish in thin, even coat. If color looks streaky, apply second thin coat after curing first layer. Always cure between coats.
Pro Tip: Most blooming gel designs look best on lighter base colors like white, nude, pink, or pastel shades. Dark bases can work but make it harder to see the blooming effect clearly.
Visual Checkpoint: Base color should be fully opaque and glossy after curing, with no bare spots or streaks.
Step 3: Apply Blooming Gel (DON'T Cure Yet!)
This is the critical step where beginners make mistakes. Pay attention to the order here.
Apply thin layer of blooming gel over your fully cured base color. Use brush to spread gel evenly across entire nail surface. Thin application is key if you apply blooming gel too thick, colors won't bloom correctly and design looks clumpy.
IMPORTANT: Do NOT cure the blooming gel yet. Leave it wet and uncured.
Work on only one nail at a time. Seriously, one nail. If you apply blooming gel to all five nails before adding colors, the first nails will over-bloom by the time you reach the last nail.
Visual Checkpoint: Blooming gel should look glossy and wet on the nail, similar to how base coat looks fresh out of the bottle.
Step 4: Add Your Design Colors
Now for the fun part. Grab your dotting tool or nail art brush and your chosen gel polish colors.
Place small dots, strokes, or swirls of colored gel polish directly onto the wet, uncured blooming gel. The colors will immediately start spreading and blooming outward.
For simple watercolor swirls, place 2-3 dots of different colors randomly on the nail. For flowers, place 5-6 dots in a circle for petals. For marble, add thin lines that you gently swirl with a brush.
Timing is everything: Watch the colors bloom for 10-30 seconds. When the design looks good to you, immediately move to the next step. Don't wait too long or colors will over-spread into muddy mess.
Visual Checkpoint: Colors should be actively dispersing and creating soft, blended edges. If colors aren't moving at all, your blooming gel might be too thick or starting to cure.
Step 5: Watch It Bloom & Cure
This step is mostly observation. Watch your design bloom and spread naturally. You'll see colors drift and blend in real time it's honestly satisfying to watch.
When you're happy with how the bloom looks, cure the nail immediately under LED lamp for 60 seconds or UV lamp for 120 seconds. This stops the blooming process and hardens everything.
If you want more intense color or a second layer of design, repeat steps 3-5: apply another thin blooming gel layer over the cured first design, add more colors, watch bloom, cure again.
Visual Checkpoint: After curing, design should be completely hardened with no wet or sticky areas (unless you used a regular top coat with sticky layer, which you'll remove in next step).
Step 6: Seal with Top Coat
Apply thin layer of no-wipe gel top coat over your finished design. Cap the free edge just like you did with base coat.
Cure under LED lamp for 60 seconds or UV lamp for 120 seconds.
If you used regular gel top coat with sticky layer: Wipe nails with lint-free pad soaked in rubbing alcohol to remove sticky residue. Your nails should now be completely smooth and glossy.
Apply cuticle oil around nail edges and massage in. This keeps cuticles healthy and prevents dryness.
Visual Checkpoint: Finished nails should be completely smooth, glossy, and dry to touch with no sticky residue. Design should be clearly visible through top coat without any cloudiness.
That's it you just created blooming gel nails at home. See? Not as scary as it looked on TikTok.
8 Stunning Blooming Gel Nail Designs (From Easiest to Advanced)
Ready to try different blooming gel looks? These eight designs are rated by difficulty so you can start simple and level up as you get comfortable with the technique.
Each design includes difficulty rating, time estimate, colors needed, and step-by-step instructions.
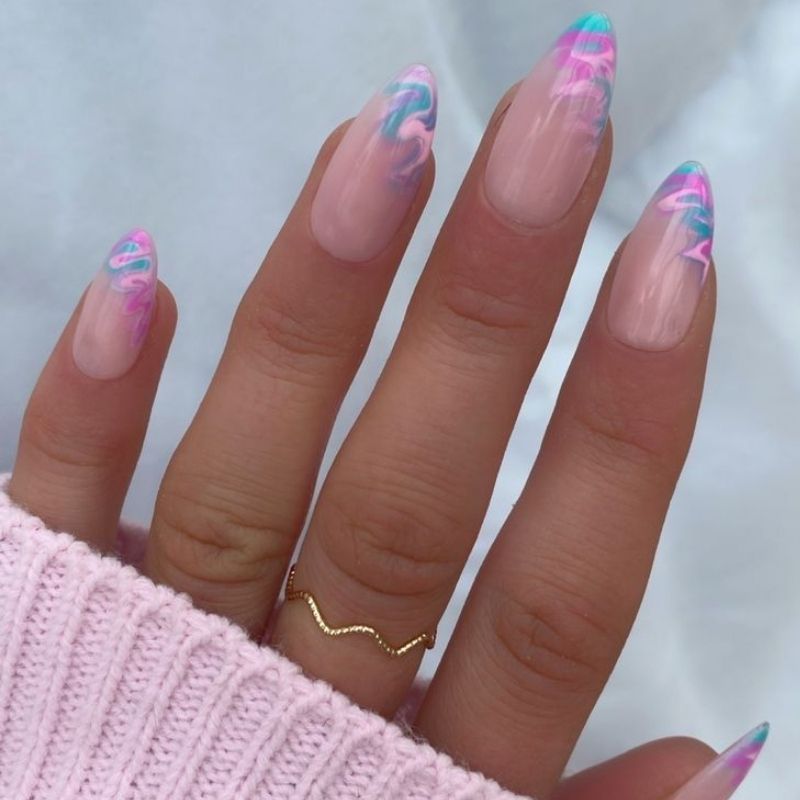
1. Simple Watercolor Swirls (Easiest - Perfect for Beginners)
Difficulty: 1/5 (Easiest)
Time: 30 minutes for full set
Colors Needed: White or nude base + any 2-3 colors you like
Tools: Just your gel polish brush, no special tools needed
This is where everyone should start. Random color swirls are forgiving because there's no right or wrong pattern everything looks intentional.
Apply white or nude base color and cure. Apply thin blooming gel to one nail. Drop 2-3 small dots of different gel colors randomly on the nail. Watch colors naturally swirl and blend for 15-20 seconds. Cure immediately. Repeat on remaining nails one at a time.
Why This Works for Beginners: No precision required, every nail looks unique, impossible to mess up the pattern.
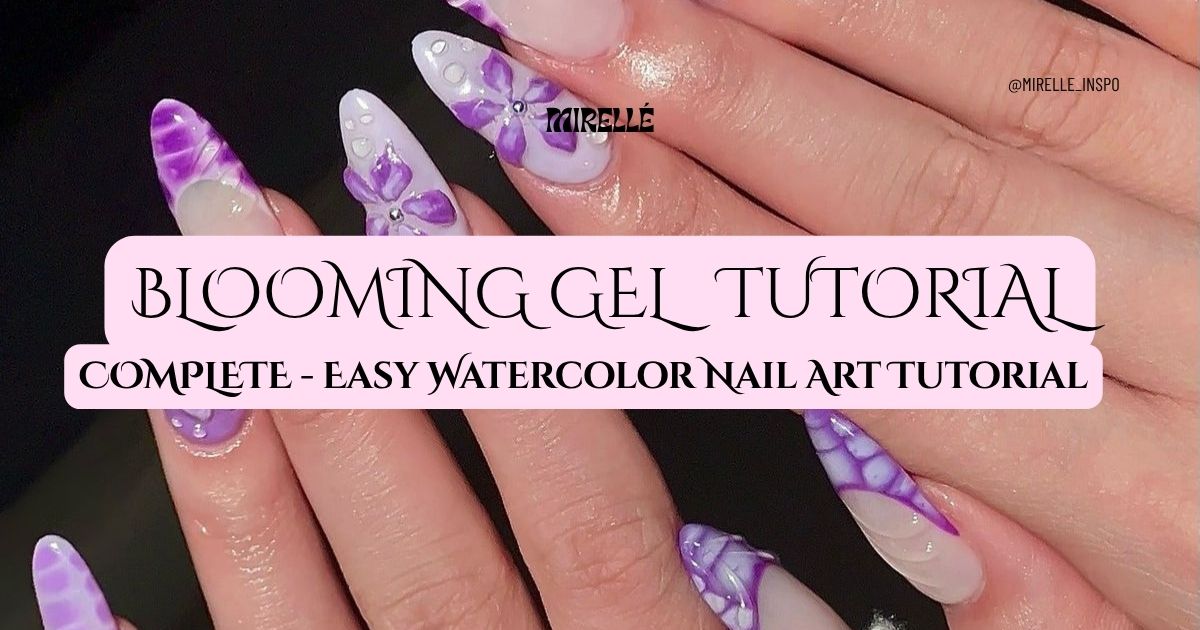
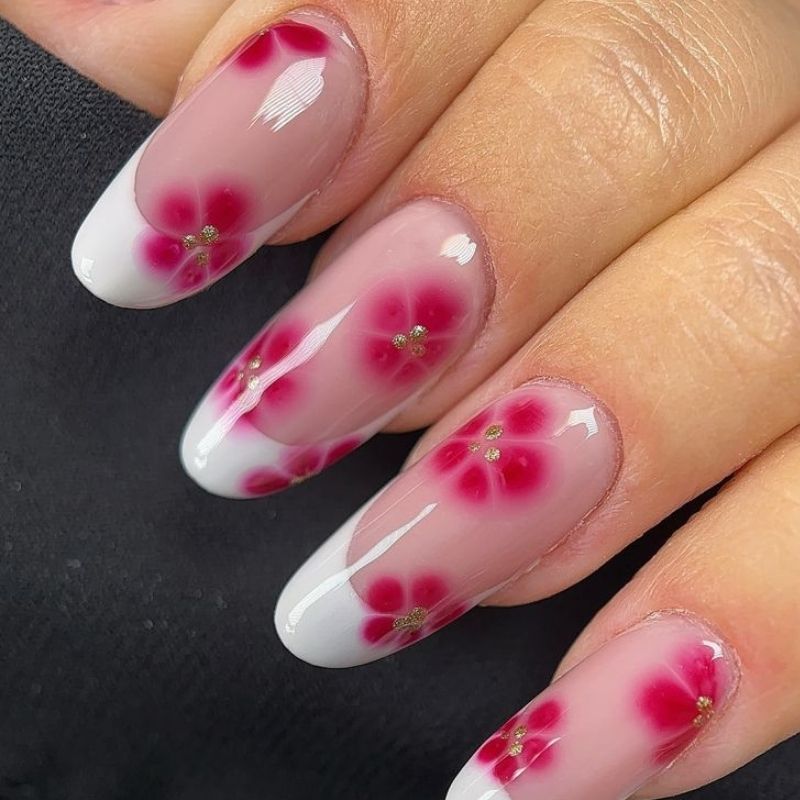
2. Floral Blooms (Easy - Classic Look)
Difficulty: 2/5 (Easy)
Time: 35-40 minutes for full set
Colors Needed: Light base + 2 colors for flowers + optional glitter or contrasting color for centers
Tools: Dotting tool (or toothpick works)
Blooming gel flowers look way more complicated than they actually are. The blooming effect does most of the work for you.
Apply light-colored base and cure. Apply thin blooming gel to one nail. Use dotting tool to place 5-6 small dots in a circle for flower petals. Watch petals bloom and blend slightly. Before curing, add tiny dot of contrasting color or glitter in flower center. Cure. Repeat on other nails.
Pro Tip: Leave a tiny bit of space between petal dots so they bloom into each other naturally rather than merging into one blob.
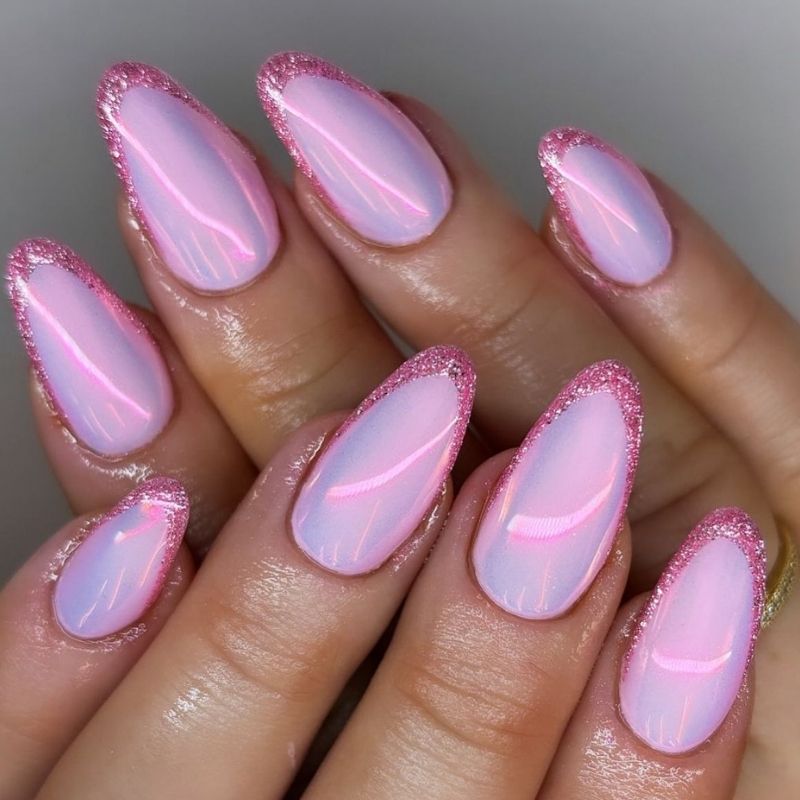
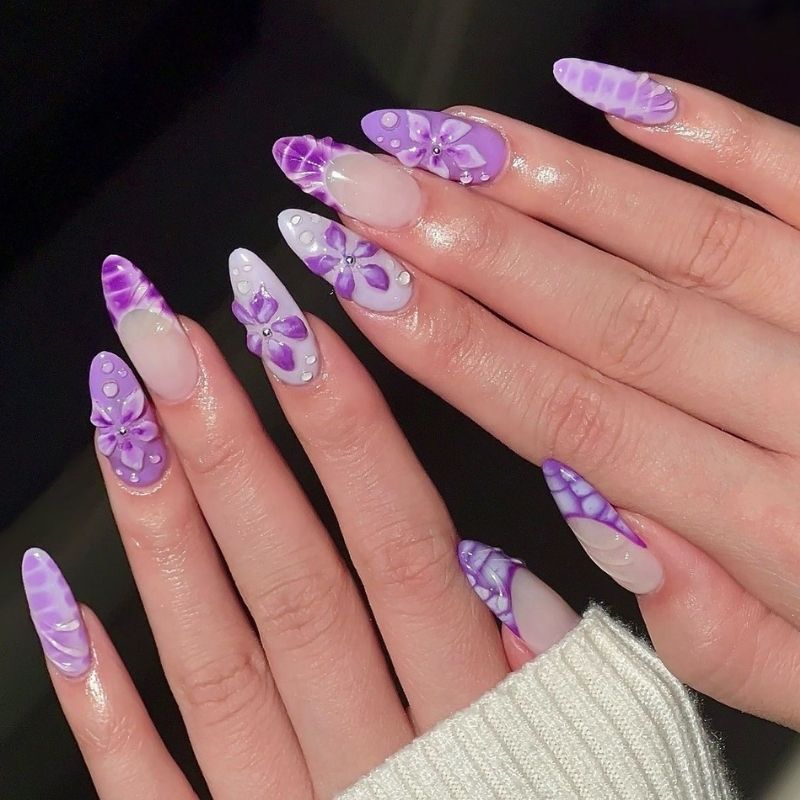
3. Aura Nails (Easy - Trendy Gradient)
Difficulty: 2/5 (Easy)
Time: 40 minutes for full set
Colors Needed: White or light base + 2-3 colors in same color family (like pink to purple to blue)
Tools: Small dotting tool or detail brush
Aura nails are having a major moment right now. The blooming gel technique creates that signature soft, glowy gradient naturally.
Apply white base and cure. Apply thin blooming gel to one nail. Place a dot of your lightest color in the center of the nail. Add a ring of your medium color around it. Add a ring of your darkest color around that. Watch colors bloom and blend into gradient. Cure when you like the fade. Repeat on other nails.
Styling Tip: Aura nails look especially good with shimmer or holographic gel polish for that ethereal vibe everyone loves.
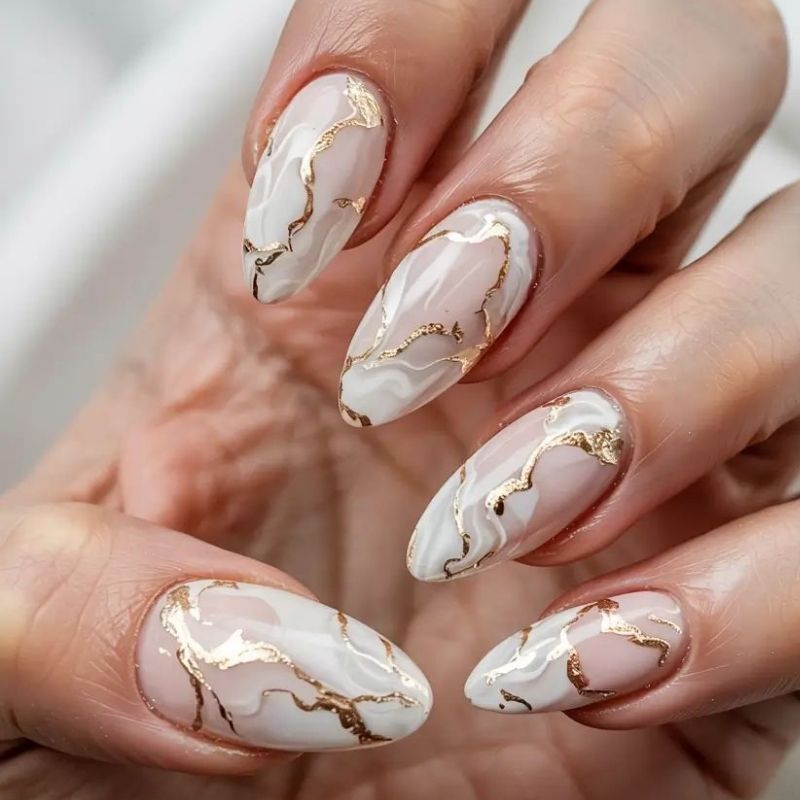
4. Marble Nails (Medium - Elegant Effect)
Difficulty: 3/5 (Medium)
Time: 45-50 minutes for full set
Colors Needed: White or light base + 2-3 colors (white, gray, and gold is classic marble)
Tools: Thin detail brush or toothpick
Marble nails look expensive and high-end. Blooming gel creates realistic veining that's hard to achieve with regular polish.
Apply light base and cure. Apply thin blooming gel to one nail. Use thin brush to draw irregular veining lines across nail in your darkest color. Add a few lines in your medium color. Let bloom slightly for 10 seconds. Use clean brush or toothpick to gently drag through some lines to create marble texture. Cure before colors over-spread. Repeat on other nails.
Common Mistake: Adding too many veining lines creates busy, unrealistic marble. Real marble has sparse veining with lots of negative space.
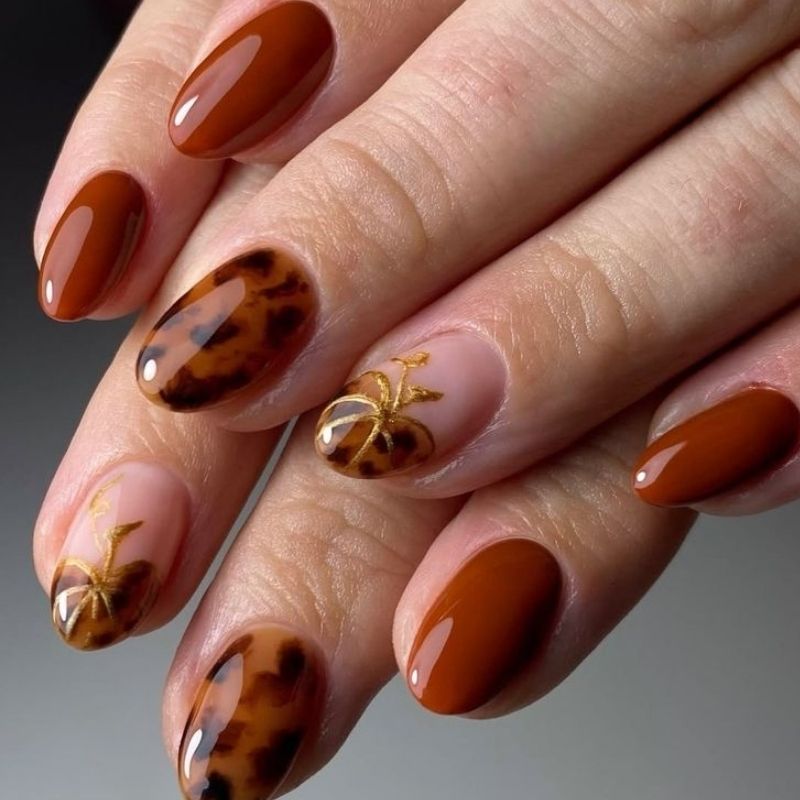
5. Tortoiseshell Nails (Medium - Autumn Favorite)
Difficulty: 3/5 (Medium)
Time: 50 minutes for full set
Colors Needed: Nude or sheer pink base + brown, burnt orange, cream, black
Tools: Dotting tool and detail brush
Tortoiseshell nails are huge in fall and winter. The blooming gel technique creates those organic tortoiseshell patterns naturally.
Apply nude or sheer pink base and cure. Apply thin blooming gel to one nail. Place random irregular blobs of brown and burnt orange across nail using dotting tool. Add tiny touches of cream and black in between. Let bloom for 20 seconds to create organic pattern. Cure when colors blend into tortoiseshell effect. Repeat on other nails.
Design Variation: Try tortoiseshell on just accent nails with solid brown or nude on other fingers for a sophisticated look.
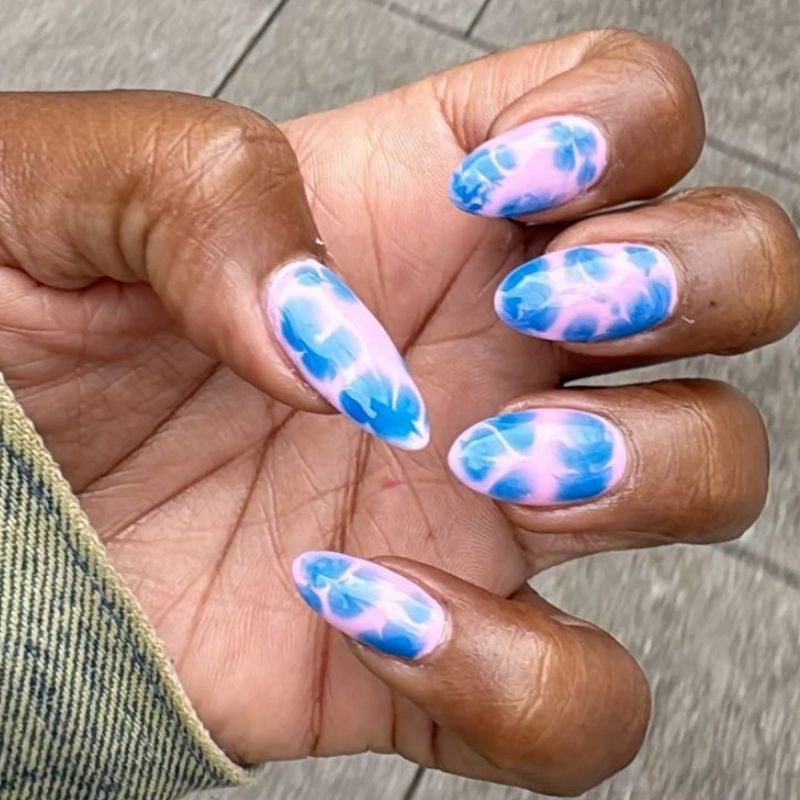
6. Tie-Dye Nails (Medium - Fun & Colorful)
Difficulty: 3/5 (Medium)
Time: 45 minutes for full set
Colors Needed: White base + 3-5 bright colors
Tools: Multiple dotting tools or detail brushes
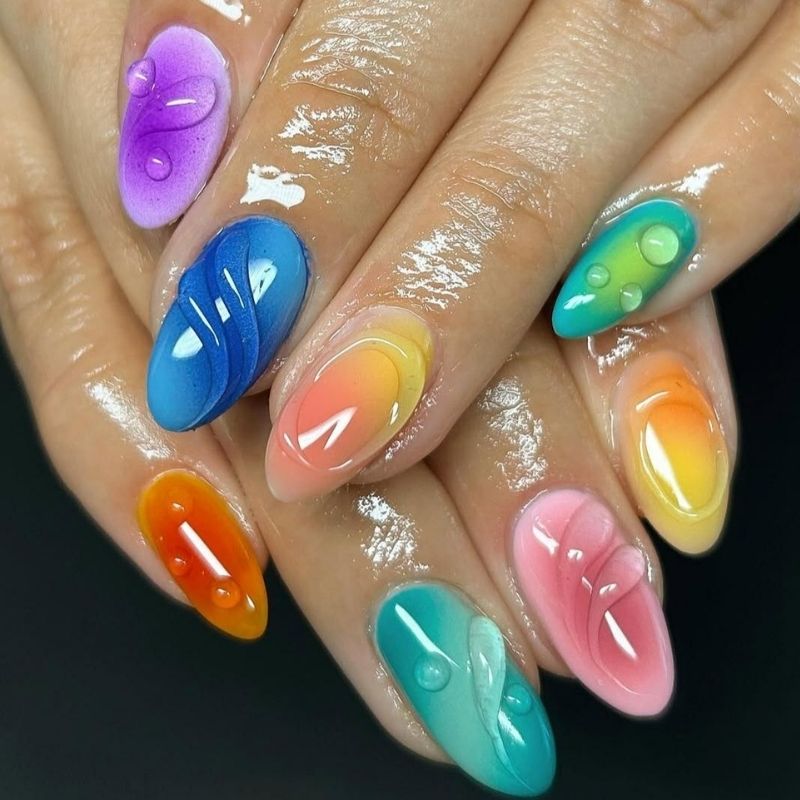
Tie-dye nails bring major retro summer vibes. This design works best when you embrace the chaos and let colors blend freely.
Apply white base and cure. Apply thin blooming gel to one nail. Place dots of 3-5 different bright colors randomly across nail. Don't overthink placement. Watch colors bloom and blend for 15-20 seconds creating tie-dye swirls. Cure when colors look vibrant and blended. Repeat on other nails with different color placement for variety.
Color Combo Ideas: Classic rainbow, sunset shades, ocean blues and greens, or neon brights for festival season.
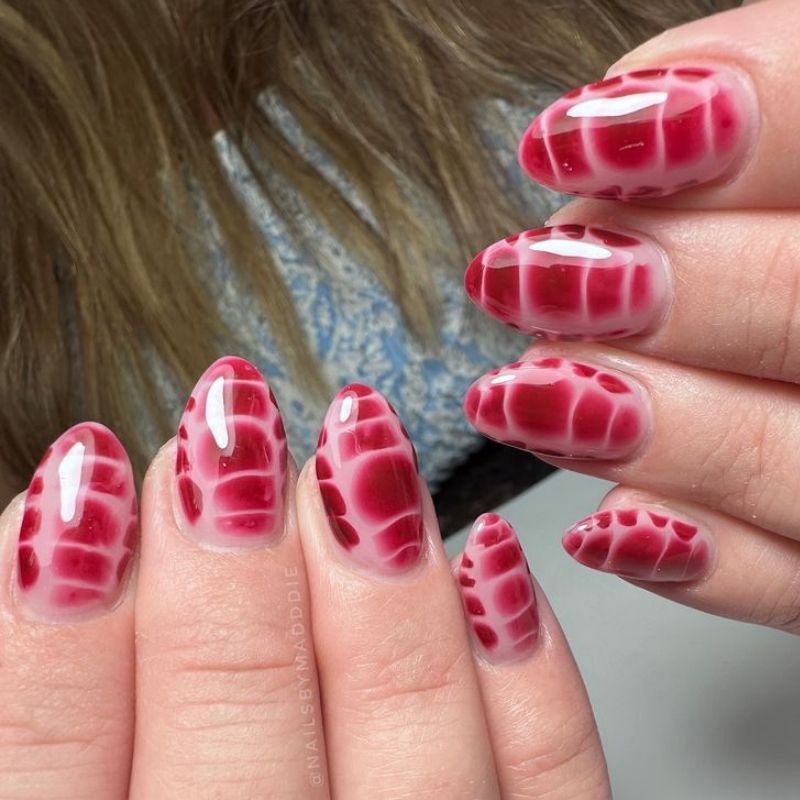
7. Crocodile Print Nails (Advanced - Statement Look)
Difficulty: 4/5 (Advanced)
Time: 60 minutes for full set
Colors Needed: Nude or green base + dark brown or black + metallic gold
Tools: Very thin detail brush essential for this design
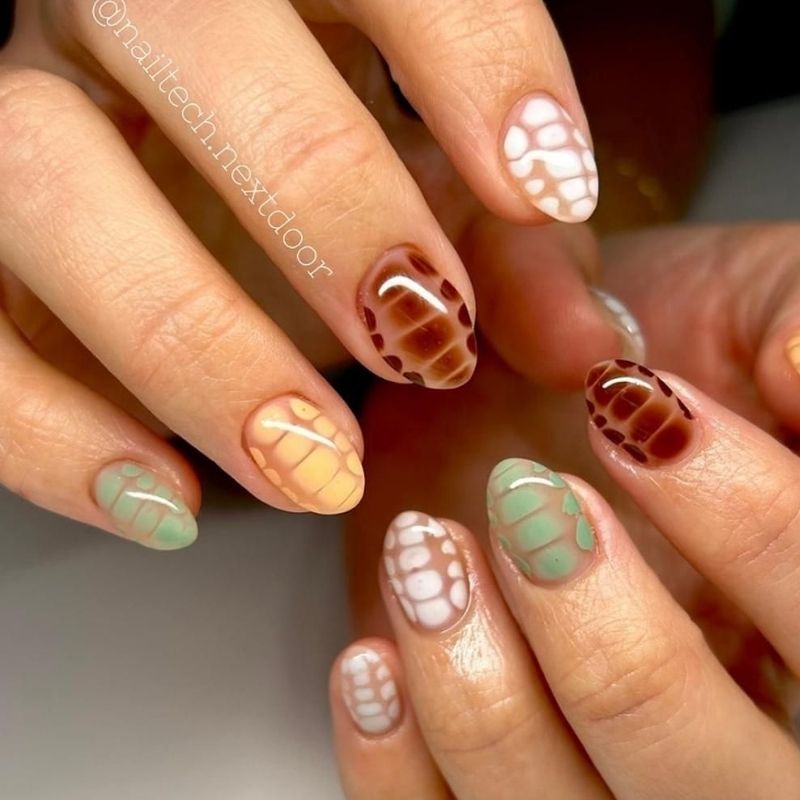
Crocodile print requires more control and precision but creates seriously impressive results. This one takes practice.
Apply base color and cure. Apply thin blooming gel to one nail. Use thin brush to paint irregular cracked pattern across nail in dark brown or black. These are your scales. Let bloom slightly. Add tiny touches of metallic gold in random scales for dimension. Cure before pattern over-spreads. Repeat on other nails.
Advanced Tip: Reference actual crocodile leather photos to see how scales naturally cluster and crack. This makes your design more realistic.
8. Abstract Art Nails (Advanced - Unique Every Time)
Difficulty: 4/5 (Advanced)
Time: 60+ minutes for full set
Colors Needed: Any base + 4-6 colors in complementary palette
Tools: Multiple brush sizes and dotting tools
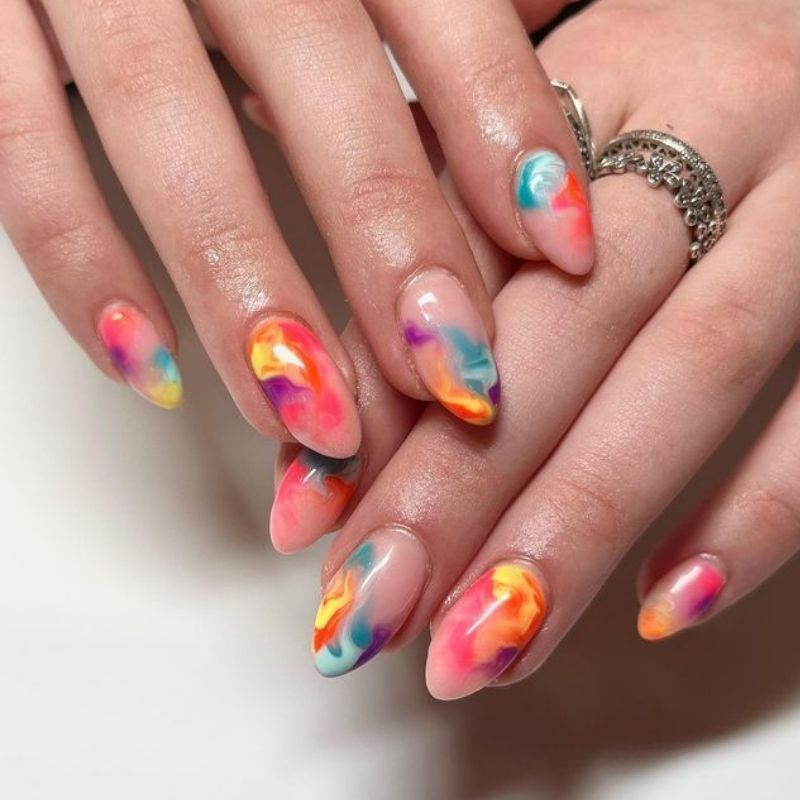
Abstract art nails give you total creative freedom. The goal is intentional randomness that looks artistic rather than messy.
Apply base color and cure. Apply thin blooming gel to one nail. Layer dots, lines, swirls, and dabs of multiple colors building up design. Work in sections letting each area bloom before adding more. Create negative space intentionally. Cure when composition feels balanced. Repeat on other nails with completely different designs.
Design Philosophy: Think about color balance and composition. Not every nail needs every color. Some nails should be busier, some simpler.
Let's address the top five mistakes beginners make with blooming gel. If you've tried this technique and ended up frustrated, you probably ran into one of these issues.
Mistake #1: Applying Blooming Gel Too Thick
What Happens: Colors don't spread properly, design looks clumpy and raised, blooming effect doesn't work at all.
Why It Happens: When blooming gel layer is too thick, gel polish colors sit on top rather than dispersing through it. The thick layer also takes longer to cure which can cause other problems.
The Fix: Apply blooming gel in thin layer just like you would apply base coat. You want even coverage but not heavy application. Less is more with blooming gel.
Prevention: Wipe excess gel off brush before applying to nail. One thin coat is always better than one thick glob.
Mistake #2: Curing at the Wrong Time
What Happens: Either (A) you cure blooming gel before adding colors and nothing blooms at all, or (B) you wait too long after adding colors and everything over-spreads into muddy mess.
Why It Happens: Timing confusion is the number one beginner struggle. The blooming gel layer must stay wet for colors to bloom, but you need to cure as soon as bloom looks good.
The Fix:
- Never cure blooming gel before adding your design colors
- Watch the bloom actively and cure the second it looks good to you
- If colors over-spread, cure immediately to stop further blooming
Prevention: Work on one nail at a time so you can cure each nail at its perfect bloom moment.
Mistake #3: Working on All Nails at Once
What Happens: By the time you finish adding colors to all five nails, the first nails have over-bloomed into muddy blobs while the last nails look perfect.
Why It Happens: Blooming gel starts working the moment you add colors. If you apply blooming gel to all nails first, then add colors nail by nail, the timing gets out of control.
The Fix: Complete one nail fully before moving to the next. Apply blooming gel to nail one, add colors, watch bloom, cure. Then move to nail two and repeat.
Prevention: I know it feels efficient to do all nails at once, but resist that urge. One nail at a time is the only way to control bloom timing.
Mistake #4: Using Thick Gel Polish
What Happens: Gel polish colors sit on top of blooming gel without dispersing, or they blob and clump instead of creating smooth bloom.
Why It Happens: Not all gel polishes have the right consistency for blooming. Very thick, heavily pigmented, or old gel polishes don't spread well.
The Fix: Use fresh gel polish with medium to thin consistency. If your gel polish is thick, try mixing it with a tiny drop of clear gel polish to thin it slightly.
Prevention: Test your gel polish colors on a practice nail or nail wheel before committing to full manicure. Some colors from same brand might bloom beautifully while others don't.
Mistake #5: Not Waiting Long Enough for the Bloom
What Happens: You cure too quickly and barely see any blooming effect, making the whole technique feel pointless.
Why It Happens: Beginners get nervous watching colors spread and cure too fast thinking they'll ruin it. Then the bloom never develops.
The Fix: Give colors 10-15 seconds minimum to bloom before curing. Watch actively but don't panic. Most blooming looks better after 20-30 seconds of spreading time.
Prevention: Do a test nail first to see how your specific blooming gel and colors bloom together. This helps you learn the timing without pressure.
Pro Tips to Avoid Frustration
Here's what I wish someone had told me before my first blooming gel attempt:
Your first try will probably look messy. That's completely normal. My first attempt looked like a toddler painted my nails. By try three, I got the hang of it.
Start with simple designs. Don't attempt crocodile print on your first go. Do simple watercolor swirls to learn timing and technique first.
Use a practice nail wheel. Test your blooming gel and colors on a wheel before working on your actual nails. This saves frustration and product.
Thin layers of everything. Thin blooming gel, thin color layers, thin top coat. Thick application is the enemy of good blooming gel nails.
Work in good lighting. You need to see the bloom happening to know when to cure. Natural light or bright desk lamp makes a huge difference.
Keep rubbing alcohol nearby. If you completely mess up before curing, you can wipe off the uncured gel and start over on that nail.
Frequently Asked Questions: Your Questions Answered
What is blooming gel nail polish?
Blooming gel is a specially formulated clear gel polish with thin viscosity that allows gel colors to naturally disperse and spread on top of it, creating watercolor, marble, and abstract effects. Unlike regular gel polish, it stays wet longer before curing, giving colors time to bloom.
How do you use blooming gel step by step?
Apply and cure your base color first. Apply thin layer of blooming gel but do not cure it. Immediately add gel polish dots or strokes on the uncured blooming gel. Wait 10 to 30 seconds as colors naturally disperse. Cure under UV or LED lamp for 60 seconds. Seal with top coat and cure again.
Do you cure blooming gel before or after adding color?
Never cure blooming gel before adding colors. Apply blooming gel over cured base color, leave it uncured, add your design colors on top, watch them bloom, then cure everything together. Curing blooming gel too early prevents the blooming effect from working.
What is the difference between blooming gel and regular gel polish?
Blooming gel has much thinner viscosity than regular gel polish, allowing colors placed on top to spread and disperse naturally. Regular gel polish is thicker and stays in place. Blooming gel is always clear while regular gel comes in colors.
Can you use regular nail polish with blooming gel?
No, blooming gel only works with gel polish, not regular lacquer. Regular nail polish cannot be cured under UV or LED lamps and will not create the watercolor blooming effect. You must use gel polish for both the blooming gel layer and color layers.
How long does blooming gel take to bloom?
Blooming gel disperses colors in 10 to 30 seconds after application. Thinner blooming gel application blooms faster, while thicker layers take longer. You control the effect by watching the bloom and curing when you like the result before colors over-spread.
What are the best brands of blooming gel?
Top blooming gel brands include The GelBottle Inc for professional quality, Beetles for budget-friendly Amazon option, Mylee for UK availability, and Makartt for mid-range quality. Some nail artists also use regular base coat as blooming gel substitute with similar spreading effects.
How long do blooming gel nails last?
Blooming gel nails last 2 to 4 weeks when properly applied with correct prep, base coat, and top coat. Longevity matches regular gel manicures. Proper nail prep including dehydrator and avoiding cuticle contact prevents premature lifting.
Why is my blooming gel not spreading?
Common causes include blooming gel applied too thick blocking dispersion, using gel polish that is too thick or old to spread properly, working too slowly allowing blooming gel to start curing before adding colors, or accidentally curing blooming gel layer before adding design.
Can you use blooming gel without a UV or LED lamp?
No, blooming gel requires UV or LED lamp to cure and harden properly. It will remain sticky and uncured without proper lamp curing. Budget LED lamps work fine and cure in 60 seconds compared to 120 seconds for UV lamps.
Is blooming gel safe for natural nails?
Yes, blooming gel is safe for natural nails when used correctly with proper prep and removal. Choose HEMA-free formulas if you have sensitivities. Always use nail dehydrator before application and soak off gel properly with acetone to prevent damage.
Can beginners do blooming gel nails at home?
Yes, blooming gel is beginner-friendly with practice. Start with simple designs like watercolor swirls or basic flowers requiring just dotting tool and 2 to 3 colors. First attempts may look messy, but technique improves quickly with each try.
What tools do you need for blooming gel nail art?
Essential tools include UV or LED nail lamp, blooming gel bottle, gel polish colors in 2 to 3 shades, base coat, and no-wipe top coat. Helpful tools include dotting tool set, nail art brushes, cuticle pusher, nail file, and lint-free wipes.
How do you fix blooming gel that spread too much?
If colors over-spread into muddy mess, cure immediately to stop blooming, then apply another thin blooming gel layer and re-do design working faster this time. Prevention works better, so work one nail at a time and cure as soon as bloom looks good.
Can you layer blooming gel multiple times?
Yes, you can layer blooming gel for multi-dimensional designs. Cure first blooming gel layer completely, apply second thin blooming gel layer, add new colors, and cure again. This creates depth and prevents color mixing between layers.