Mismatched Valentine nails operate within a framework of controlled asymmetry. The technique demands precision rather than randomness. Mismatched Valentine nails achieve visual harmony through deliberate color relationships and strategic distribution across ten nails. What appears spontaneous requires calculated execution. The result: mismatched Valentine nails that read as intentional rather than indecisive.
The appeal lies in multiplicity. Valentine's Day presents numerous romantic elements hearts, roses, lace, metallic accents that resist confinement to uniform application. Valentine nail designs expand beyond single-concept execution when asymmetry enters the composition. Design inspiration suggests the trend gained momentum through celebrity adoption. Taylor Swift's Era-specific manicures and Hailey Bieber's glazed variations demonstrated that asymmetric nail art aligns with understated luxury movements rather than juvenile experimentation.
Consider the coordination challenge. Ten nails offer ten canvases. The question becomes not whether to vary designs but how to maintain cohesion while introducing difference. Color theory provides the framework. Technical execution determines success.
What Distinguishes Mismatched Valentine Nails
Asymmetric nail art differs from Skittles nails through intentionality. Skittles nails apply rainbow spectrum without coordination rules. Mismatched Valentine designs operate within deliberate parameters color families, tonal consistency, or unified finishes that create visual dialogue between nails rather than isolated statements.
The technique emerged from nail art communities seeking creative expression beyond single-design limitations. Pinterest trend data reveals 125 percent growth in searches for different nails each hand terminology. The shift reflects broader aesthetic movements favoring more is more approaches. Gen Z and millennial users drive adoption, viewing mix-match manicure execution as self-expression medium rather than beauty mistake.
From a design perspective, multi-design Valentine nails succeed when grounded by unifying elements. These elements include: restricted color palette, consistent finish application, or repeated motif appearing across multiple nails. Without grounding components, asymmetry reads as chaotic rather than curated.
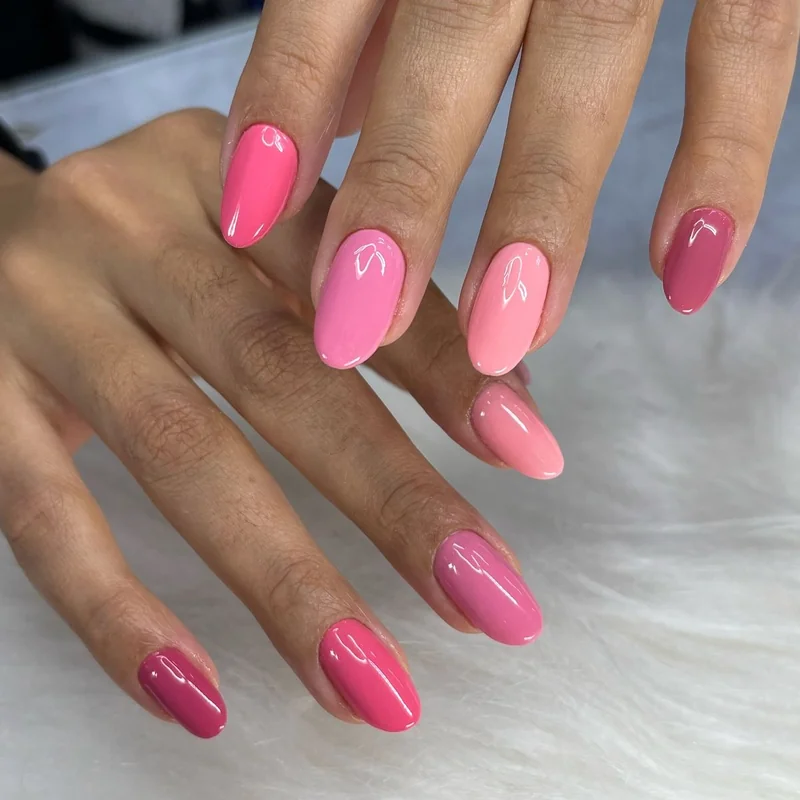
Analogous colors provide the most accessible entry point. These hues sit adjacent on the color wheel pink transitioning to coral transitioning to red. The eye perceives natural gradient progression even when designs vary per nail. Application: allocate three shades across ten nails using strategic distribution. Two nails carry the lightest tone, five nails display the mid-range shade, three nails anchor with the deepest hue.
Complementary pairing introduces higher contrast. Red and green occupy opposite color wheel positions. For Valentine context, substitute green with cream or nude bases to maintain romantic positioning while achieving complementary tension. The approach works when one color dominates seven nails in red variations, three nails in neutral contrast.

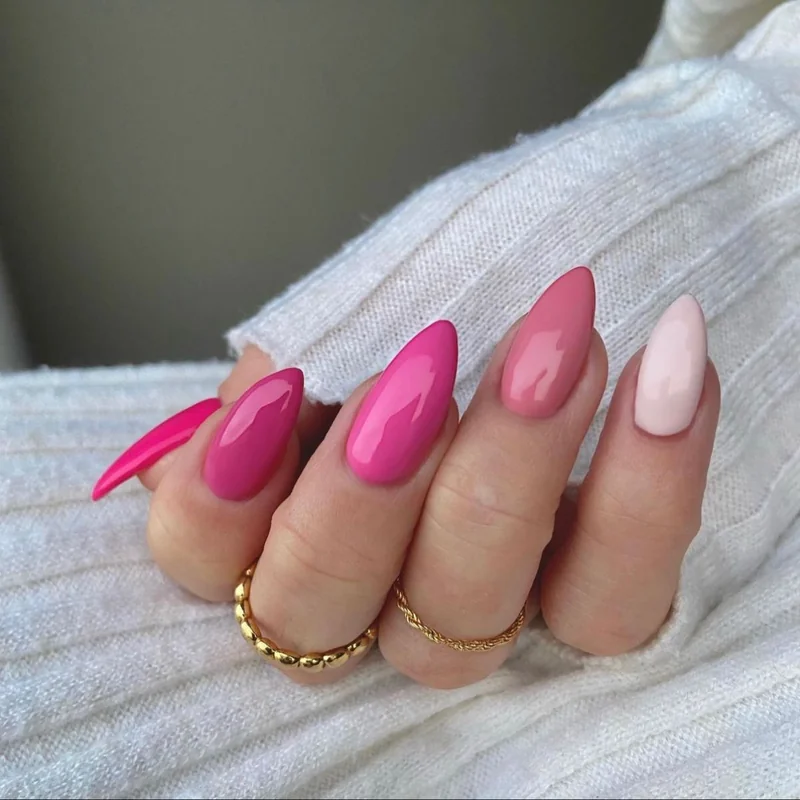
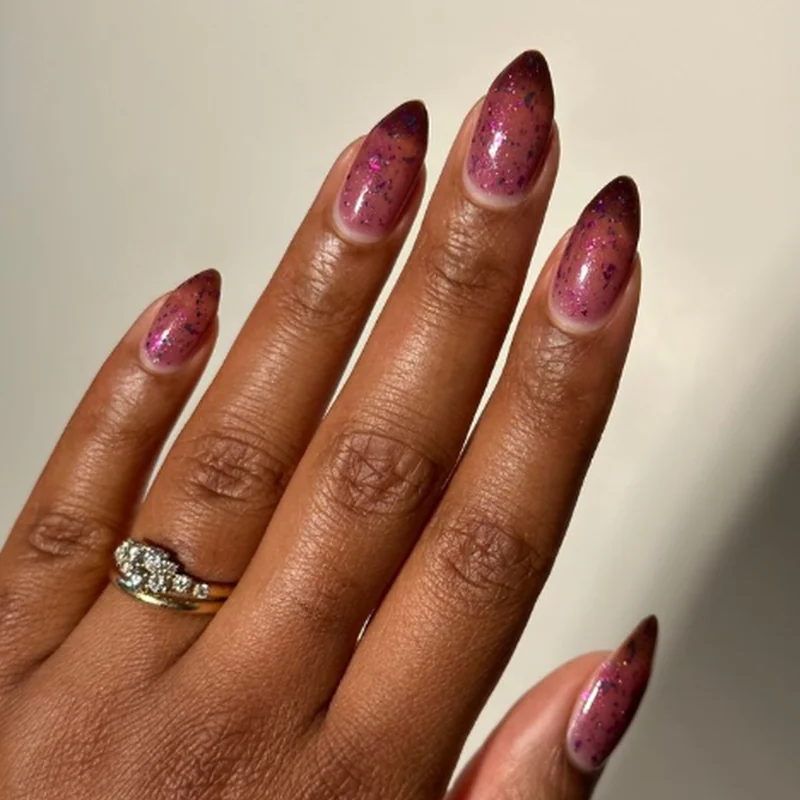
Monochromatic gradients eliminate color selection anxiety. Select single hue burgundy, for instance then vary saturation and opacity across nails. Technique produces cohesive palette automatically. Combine with aura techniques for diffused transitions between tonal shifts.
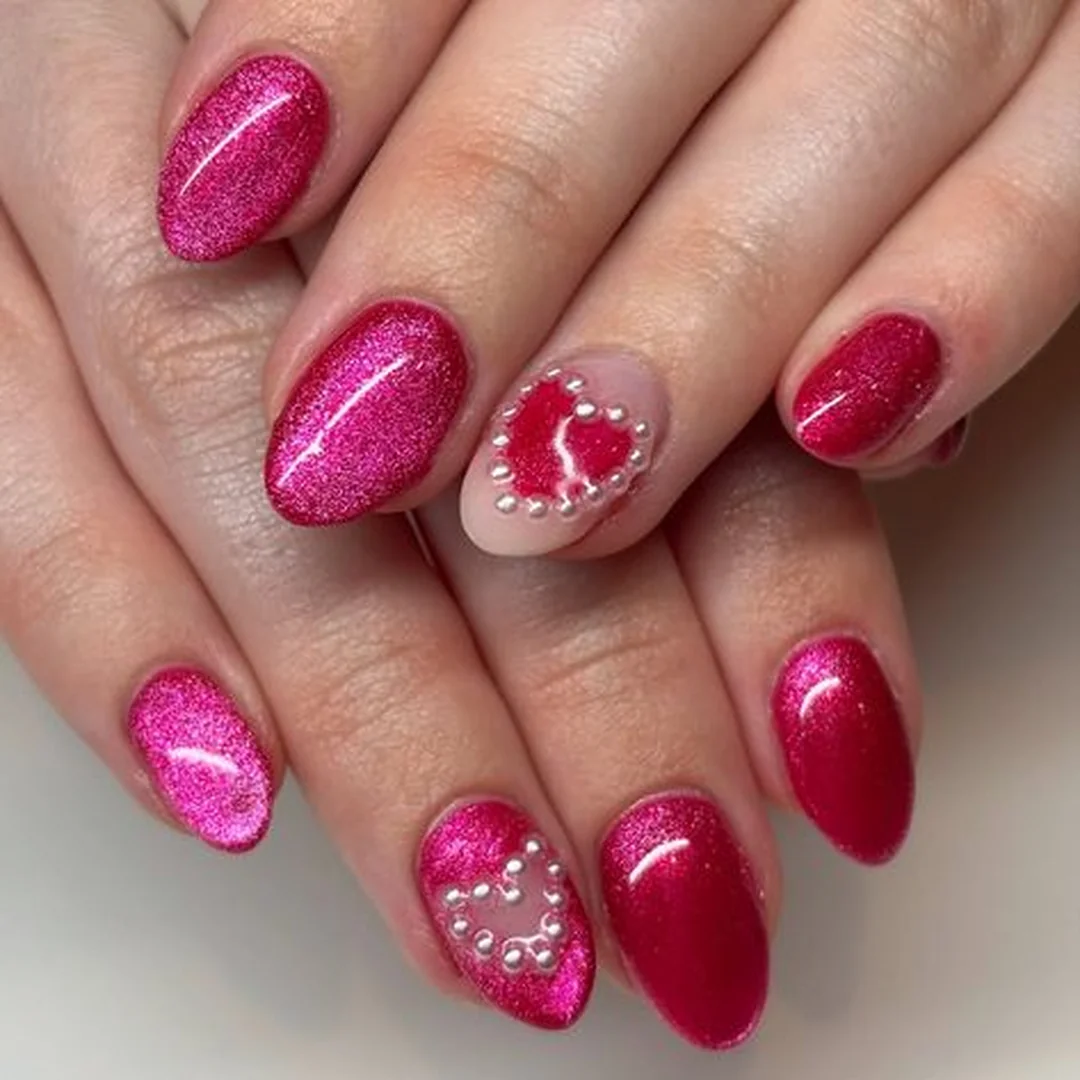
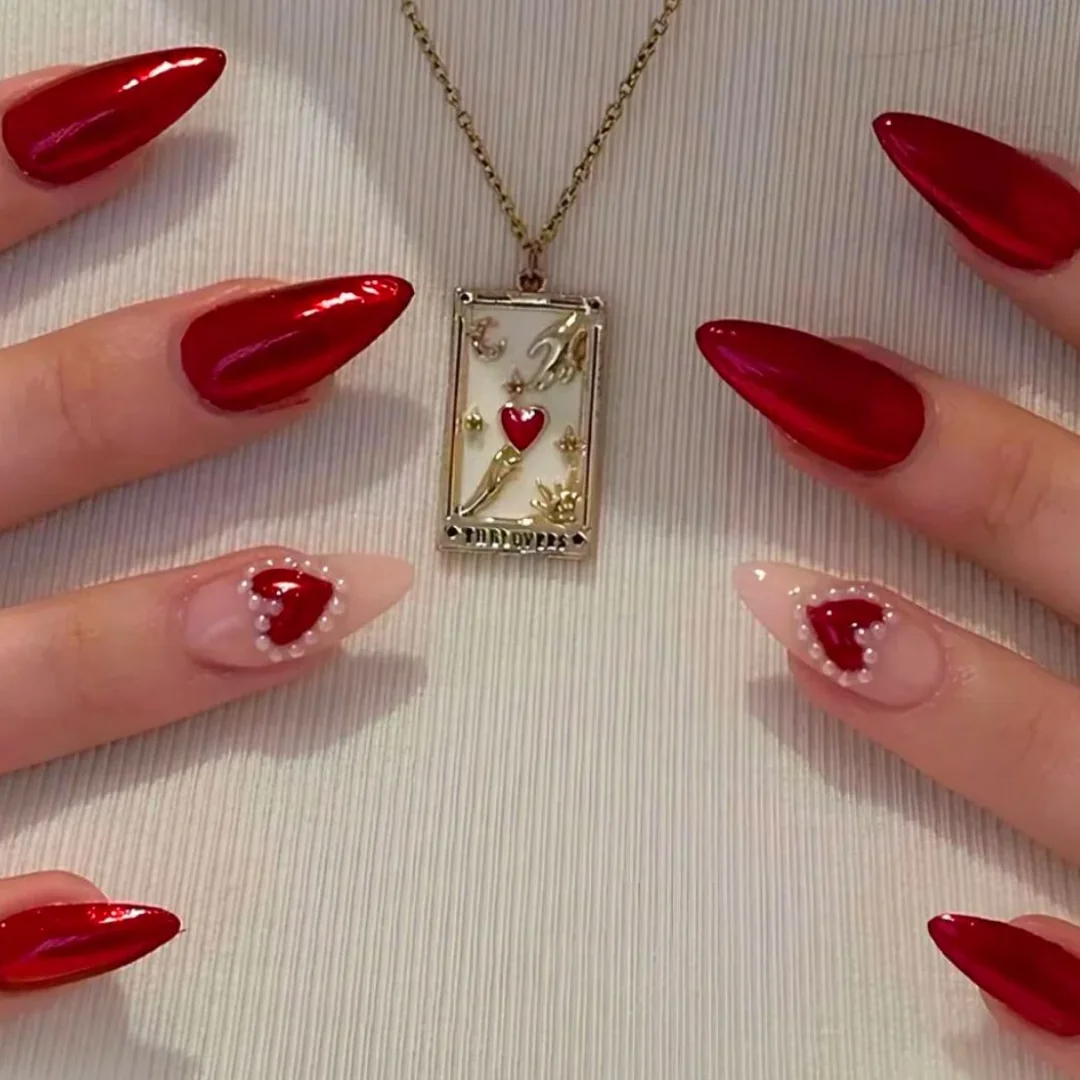
Grounding with neutral anchors offers fail-safe strategy. Designate three to four nails as nude or sheer pink bases. Remaining nails carry bold designs chrome accents, heart details, or color theory principles demonstrate how limited focal points prevent visual overload while maintaining Valentine relevance.
Four Approaches to Asymmetric Design
Approach One: Monochrome Mismatch. Different tones within same color family. Execution: Select red as base family. Apply crimson to thumbs, scarlet to index fingers, burgundy to middle fingers, coral-red to ring fingers, tomato red to pinkies. Vary opacity some nails receive two coats for depth, others single coat for translucency. Result: chromatic depth without pattern complexity.
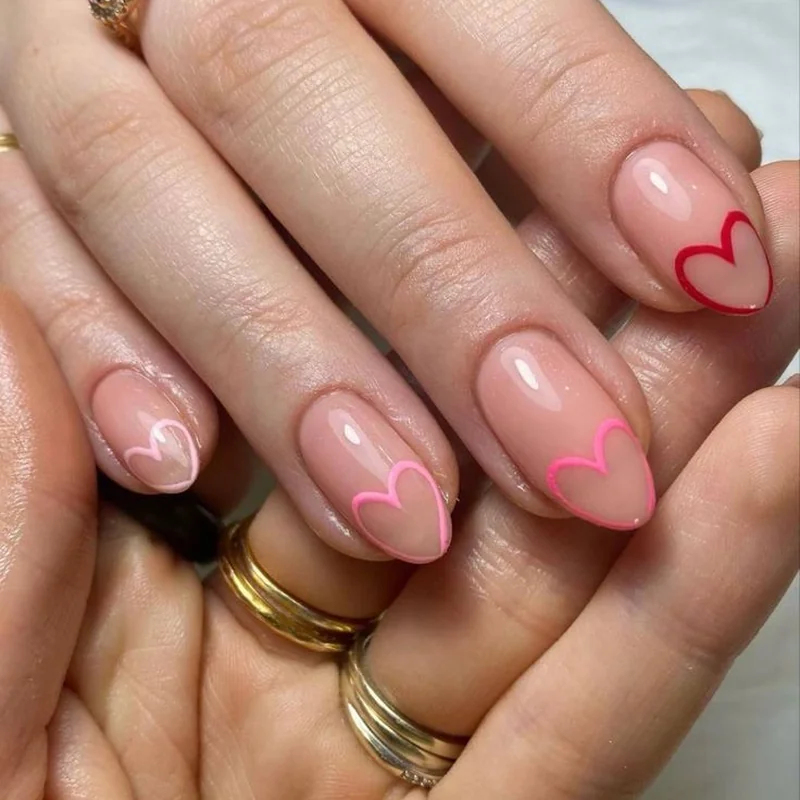
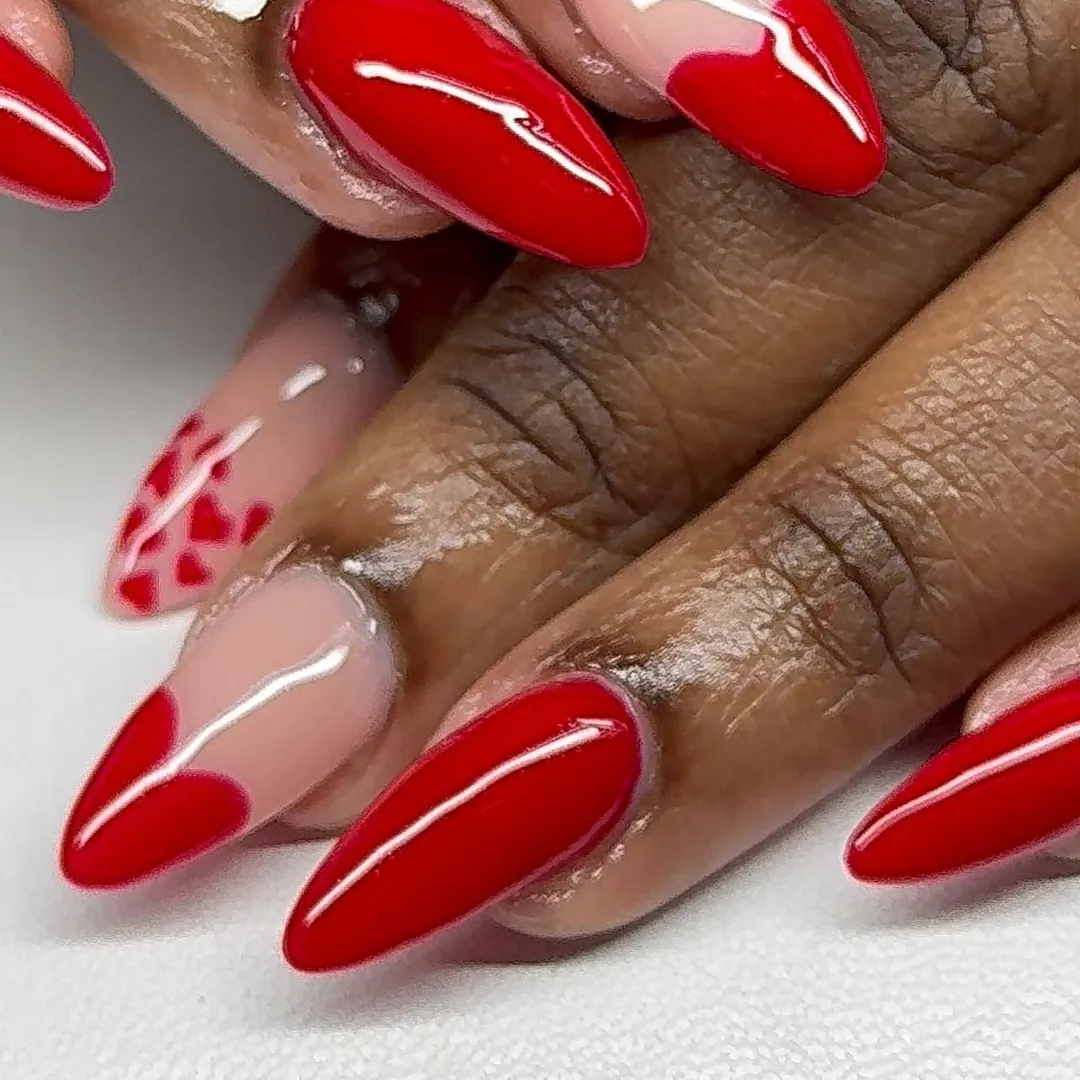
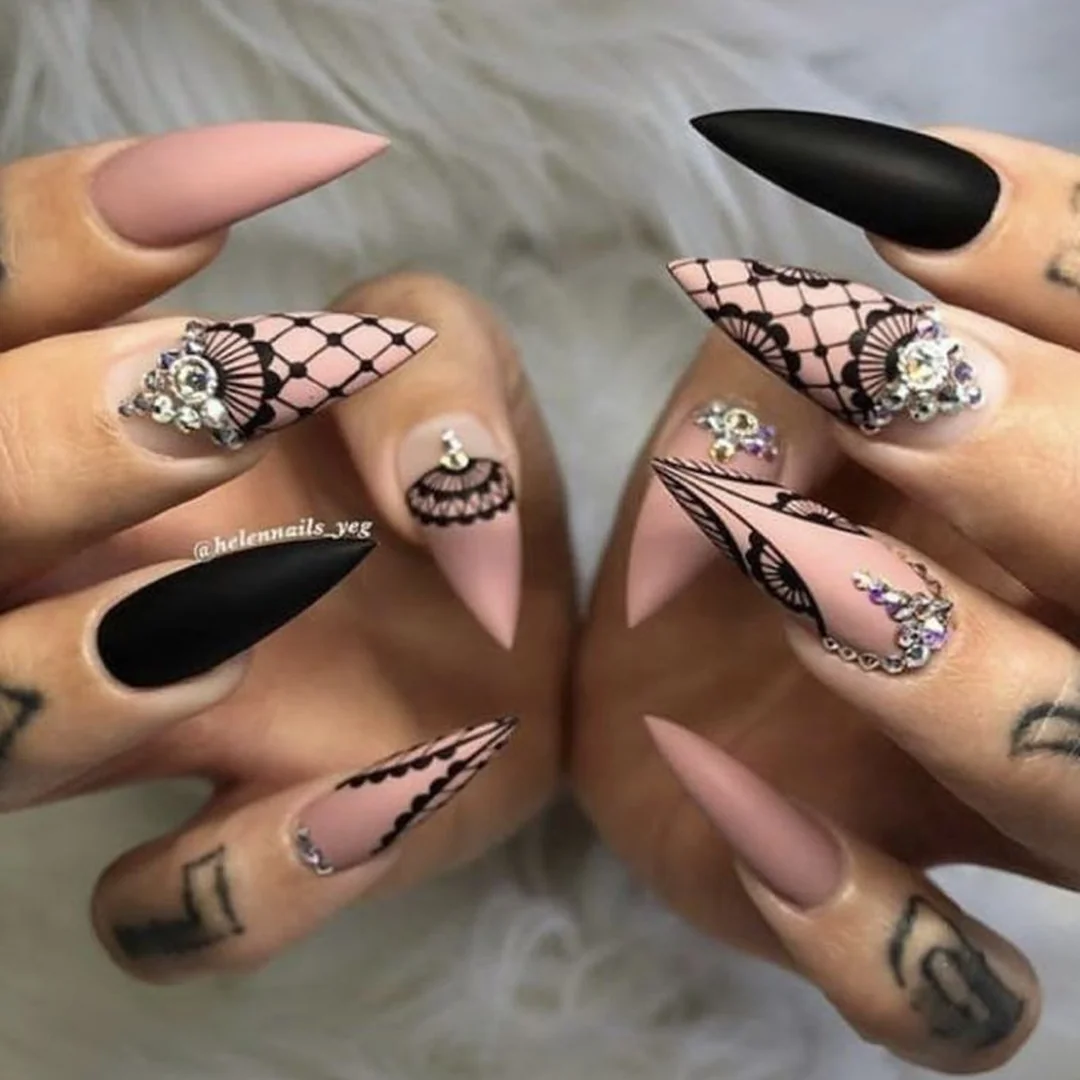
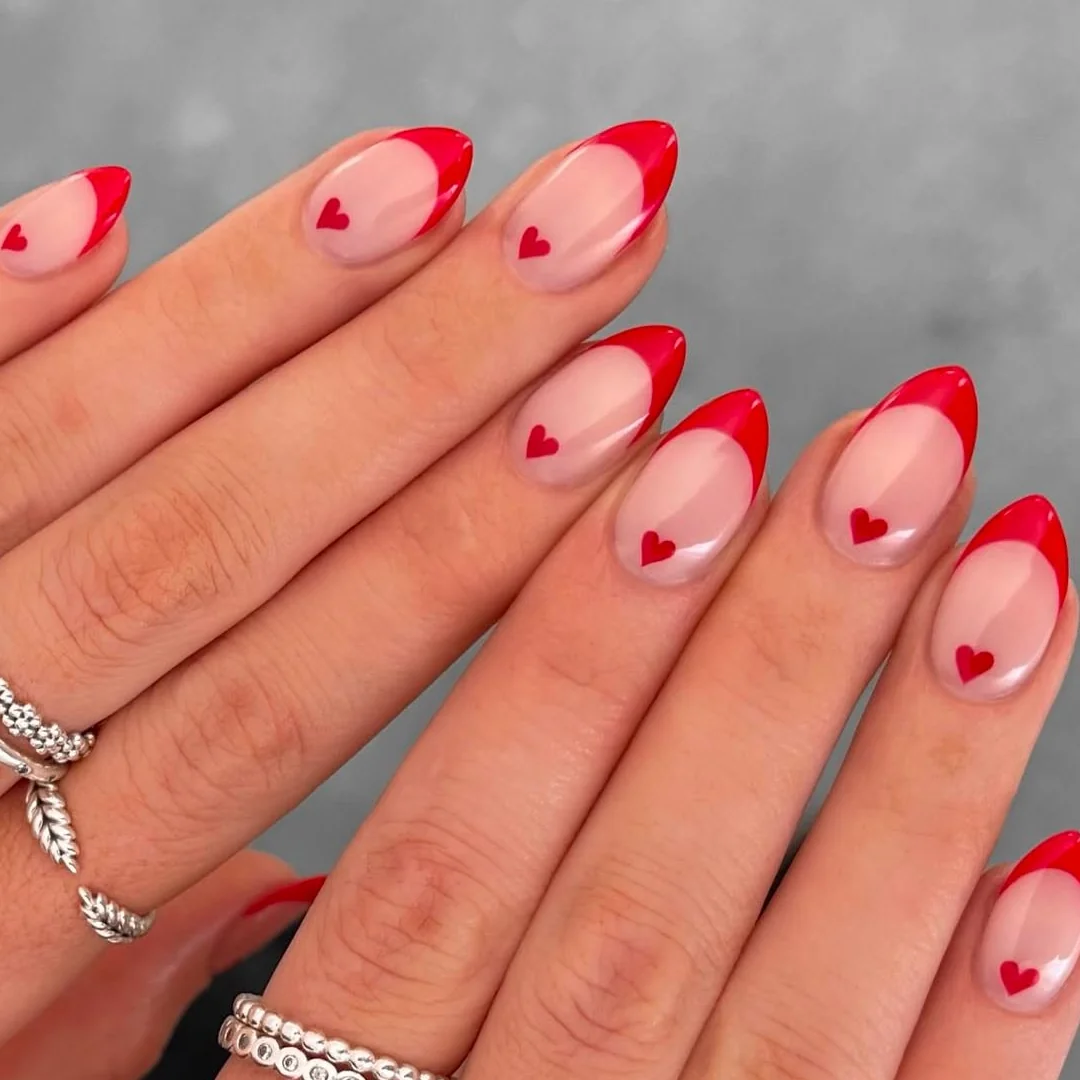
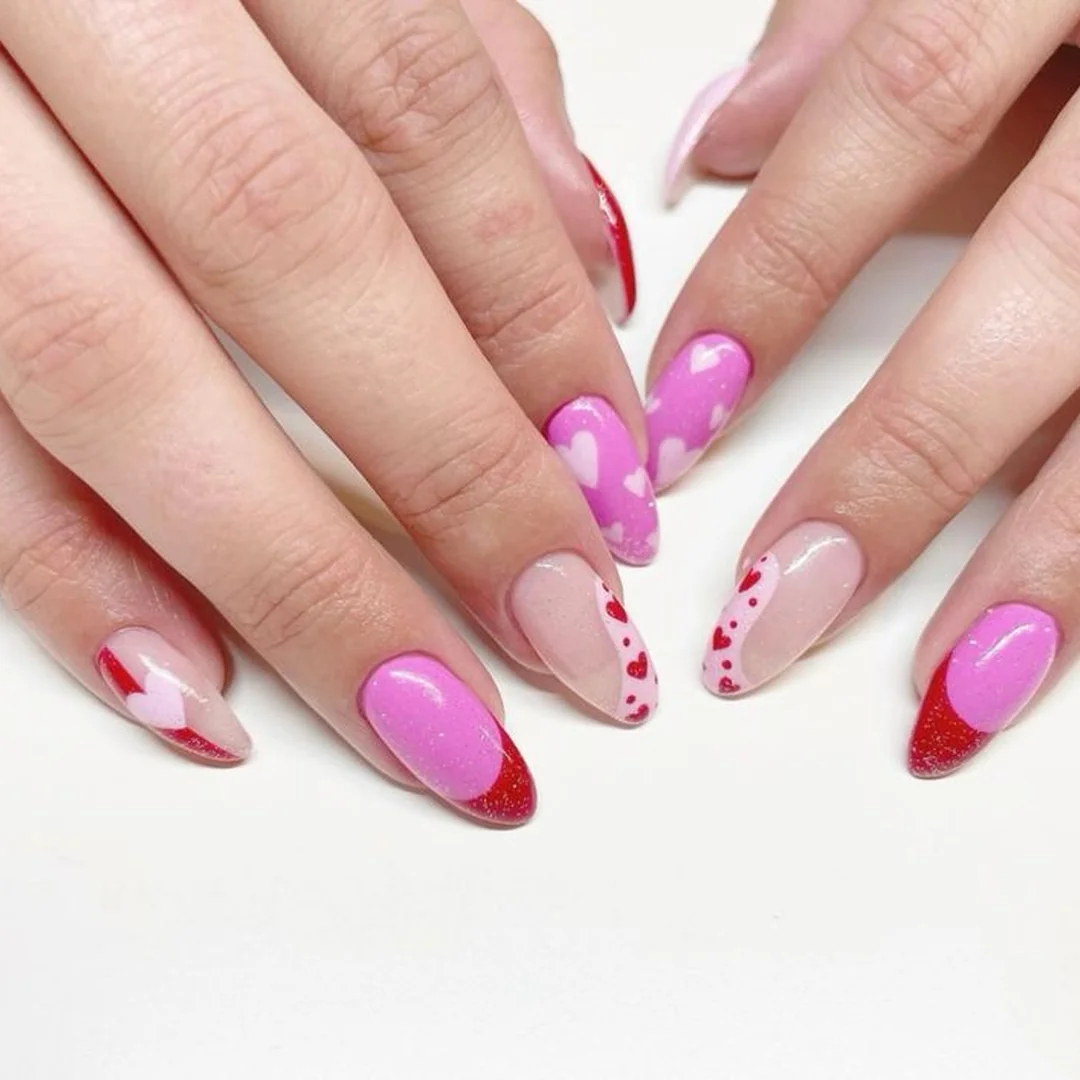
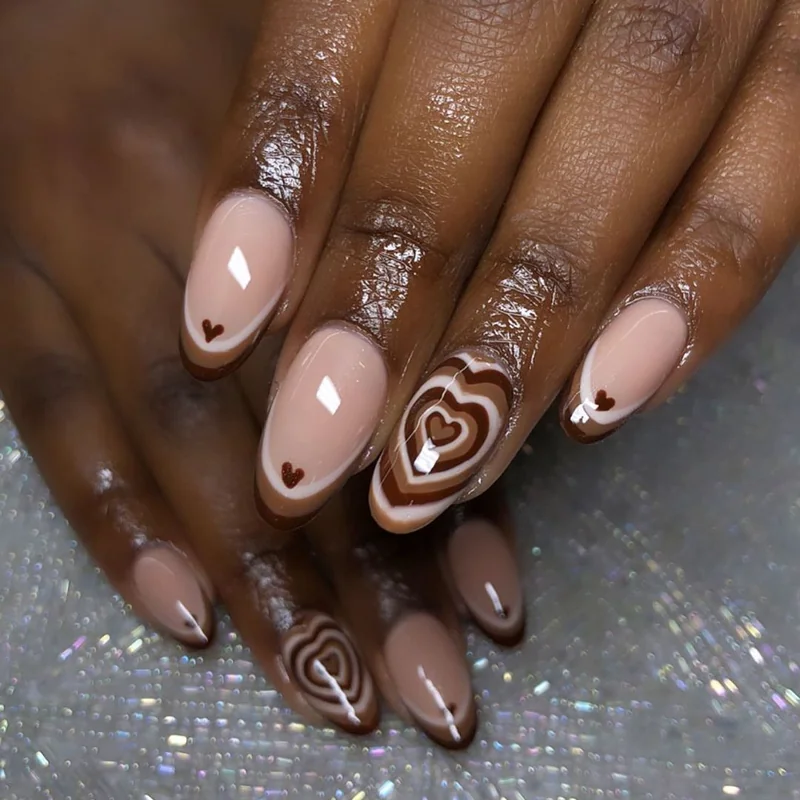
Approach Two: Pattern Play. Same palette, different designs per nail. Execution: Establish three-color foundation nude, dusty pink, crimson. Apply nude base to all nails. Thumb receives hand-painted hearts in crimson. Index finger displays lace overlay in dusty pink. Middle finger remains solid crimson. Ring finger features French tip variation with pink smile line. Pinky returns to nude with single crimson accent dot. The palette consistency unifies disparate patterns.
Approach Three: Texture Contrast. Chrome versus matte versus jelly on coordinated colors. Chrome finishes provide reflective contrast when paired with matte bases. Execution: Apply matte burgundy to six nails. Add chrome burgundy to three nails for light-play variation. Final nail receives jelly burgundy for translucent depth. The finish variation creates visual interest while maintaining color consistency.
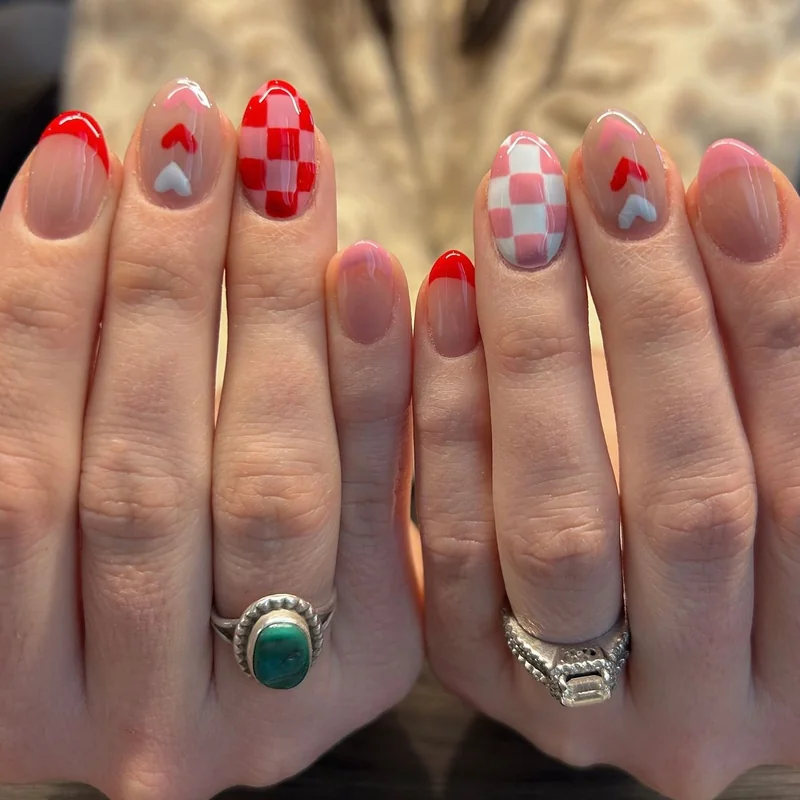
Approach Four: Skittles Spectrum. Full rainbow with strategic placement. Technique demands disciplined color distribution to avoid children's craft aesthetic. Execution: Select five Valentine-appropriate hues crimson, coral, dusty rose, cream, burgundy. Apply one color per finger, repeat pattern on opposite hand. Maintain identical placement both thumbs crimson, both index fingers coral. Symmetry between hands grounds the spectrum approach.
The 60-30-10 rule applies to nail composition as interior design principle. Sixty percent of nails carry base or neutral tones. Thirty percent display mid-level detail single accent elements or subtle patterns. Ten percent receive bold focal points intricate designs or maximum contrast.
Translated to ten nails: six nails maintain simple execution, three nails add moderate complexity, one nail serves as statement piece. This distribution prevents visual competition. Each nail occupies designated hierarchy position rather than demanding equal attention.
Anchor finger strategy determines which nails carry bold designs. Ring fingers traditionally receive primary focus due to gesture prominence. Allocate intricate details three-dimensional elements, chrome accents, or detailed illustrations to ring fingers first. Distribute remaining complexity to thumbs as secondary focal points visible during hand positioning.
Symmetry versus asymmetry between hands presents final consideration. Mirror placement identical designs on corresponding fingers across both hands creates structured asymmetry. Opposite placement bold right thumb paired with simple left thumb produces true asymmetry. Neither approach supersedes the other. Selection depends on personal tolerance for visual tension.
Application Technique for Cohesive Execution
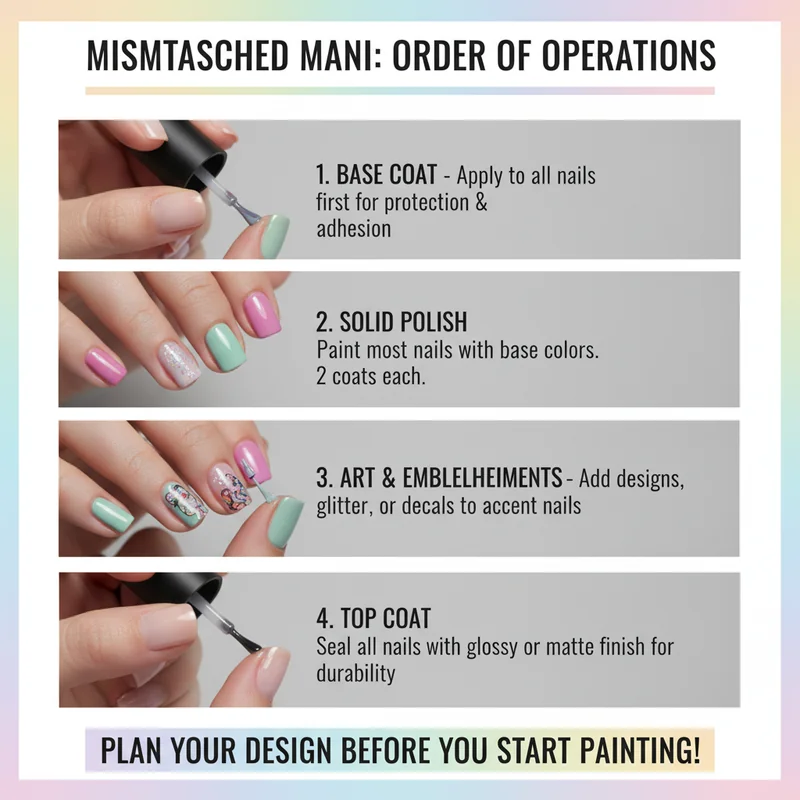
Prep and base coat uniformity establish foundation. Apply identical base coat to all ten nails regardless of subsequent color variation. The uniform base ensures consistent adhesion and prevents streaking across different polish formulas. Proper preparation determines whether asymmetric designs read as intentional or hasty.
Order of operations affects clean execution. Apply all base colors first. Allow complete drying minimum two hours or use quick-dry drops. Return for detail work only after base layers cure fully. This sequence prevents smudging and allows precise accent placement without disturbing foundation colors.
Finish consistency requires deliberate choice. All matte or all glossy unless intentional contrast serves design purpose. Mixed finishes without strategy create disjointed appearance. When combining finishes, maintain pattern alternate nails receive matte while remaining nails carry gloss, or isolate single finish type to accent nails only.
Tools for clean asymmetry include dotting tools for precise heart placement, striping tape for geometric boundaries, and stencils for repeated motifs. Freehand execution demands steady hand and practice. Consider starting with simpler asymmetric approaches color blocking or finish variation before attempting intricate pattern mixing.