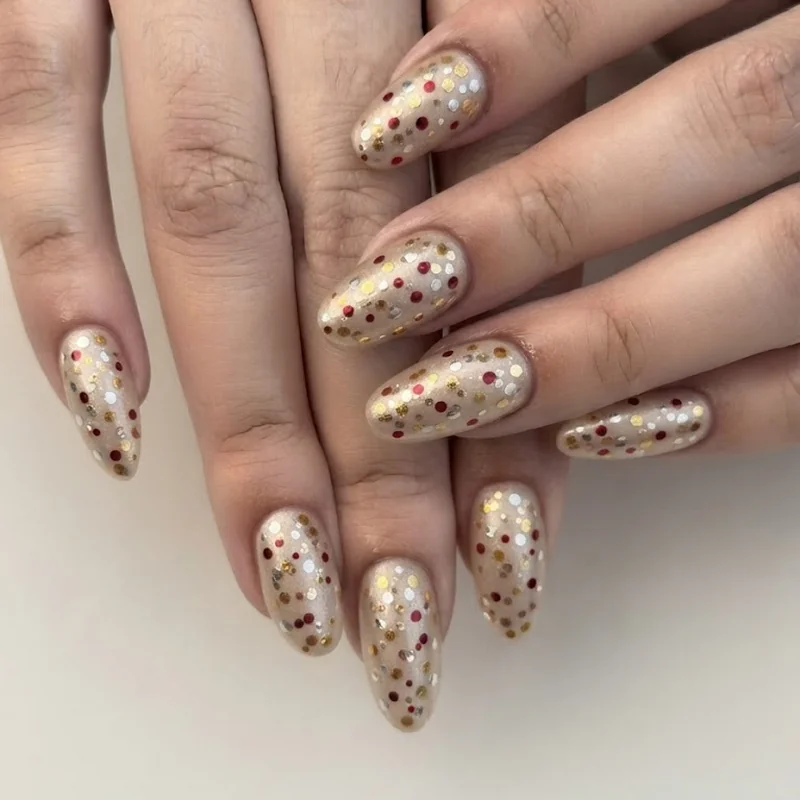
Confetti Dot Nails - The Easiest Design to Start With
Confetti dots are the easiest of the five, because there's technically no way to mess them up. Dip a toothpick into two or three polish colors and scatter dots across a dry base coat in random sizes and spacing. Every version reads as intentional.
That randomness is the whole trick. A design that would look sloppy if symmetrical looks deliberate the moment it's uneven, because confetti doesn't fall in neat rows. Paint a solid base color first, whatever shade feels festive, and let it dry completely. A rushed base is the only real way to derail this design, since wet polish drags when the toothpick touches down.
Once dry, dip the toothpick tip into a small drop of polish on foil or the back of a hand, and press dots onto the nail in a loose, scattered pattern. Vary pressure for different dot sizes. Switch colors, wipe the toothpick, repeat. Champagne gold, deep red, and metallic silver read as celebratory without fighting each other. Let the dots dry fully, then seal with top coat.
Fifteen minutes, start to finish, including dry time. That's a real number, not a marketing one, and it's the reason this design opens the list.
Star Accent Nails Without Stickers
Store-bought star stickers work, but they peel at the edges within hours and cost money for a one-night design. Tape does the same job for free and holds a cleaner edge, using what's called the negative space technique: blocking out an unpainted section of the nail with tape so the shape that forms is the bare nail or base coat showing through, rather than something painted on top.
Cut two small strips of tape and cross them into an X over a dry base coat, pressing the edges down firmly so polish can't seep underneath. Paint a contrasting color over and around the tape, then peel it away while still slightly tacky, not fully dry. The star-shaped negative space left behind is crisp, geometric, and entirely tape-made.
The edges come out sharper than most freehand attempts, since sticker edges rarely sit flat against a curved nail. Peeling too early smudges the line, too late can lift the base coat with it, so aim for that window when the polish looks set but still has slight give when touched.
Simple Gold Foil Accent Nails
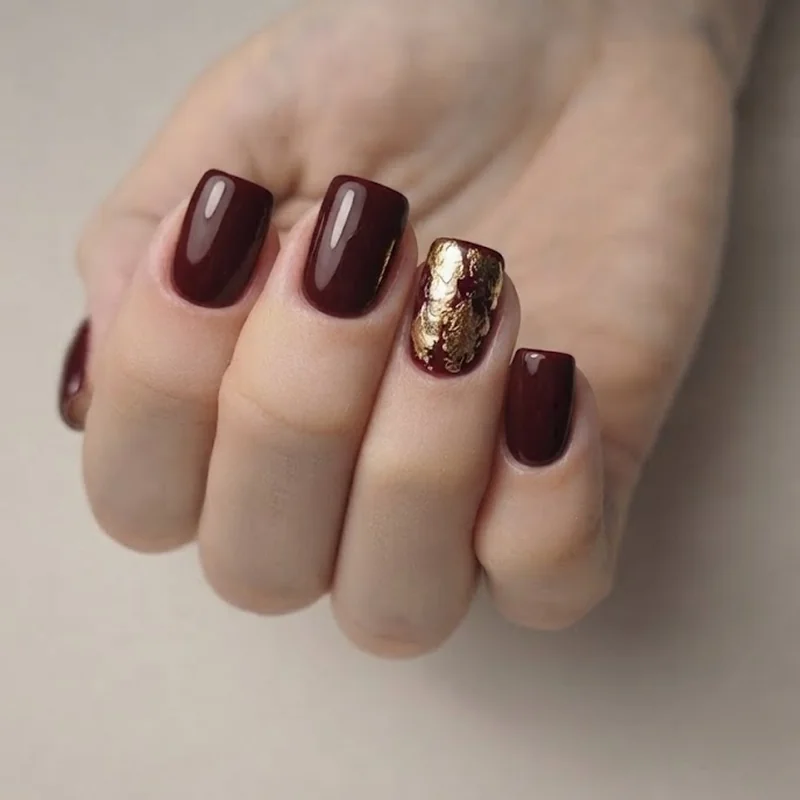
A single gold foil accent nail delivers more visual payoff for less effort than almost anything else in this post. One accent nail, a thin layer of foil adhesive, and a sheet of gold transfer foil turn a plain manicure into a party-ready one in under five minutes of active work.
Paint a dark or nude base as the main look for most nails, then apply foil adhesive to just the accent nail and let it dry to a tacky, not wet, finish, usually eight to ten minutes. Press the gold foil sheet shiny-side up onto the tacky adhesive, rub firmly with a finger or cotton swab, then peel the backing away. The metallic pattern transfers cleanly.
The dark or nude base matters more than it seems. Gold foil against black or deep burgundy reads as high-contrast and intentional, while the same foil over a pale pastel tends to wash out. One accent nail, placed against the right base, does more than five matching foil nails would.
Sponge Gradient Nails for a Soft Sparkle Look
A slightly uneven blend is what makes a sponge gradient look handmade rather than airbrushed, and that's a feature here, not a flaw to correct. The sponge does the actual blending work, which means a perfectly smooth hand isn't a requirement for this design the way it would be for a freehand gradient.
Apply two polish shades in horizontal stripes onto a makeup sponge, close together but not overlapping completely. Dab the sponge onto the nail with a light, repeated patting motion rather than a swipe, moving slightly with each dab to soften the line where colors meet. Two to three light coats build real color without streaking. Add a glitter top coat once the gradient dries fully.
Silver into white, or a champagne gold into a barely-there pink, both keep the transition subtle enough that any unevenness in the blend disappears once the glitter top coat goes on. Anyone who wants a fuller sparkle-forward look beyond this single gradient can find more in this collection of glitter NYE nail ideas.