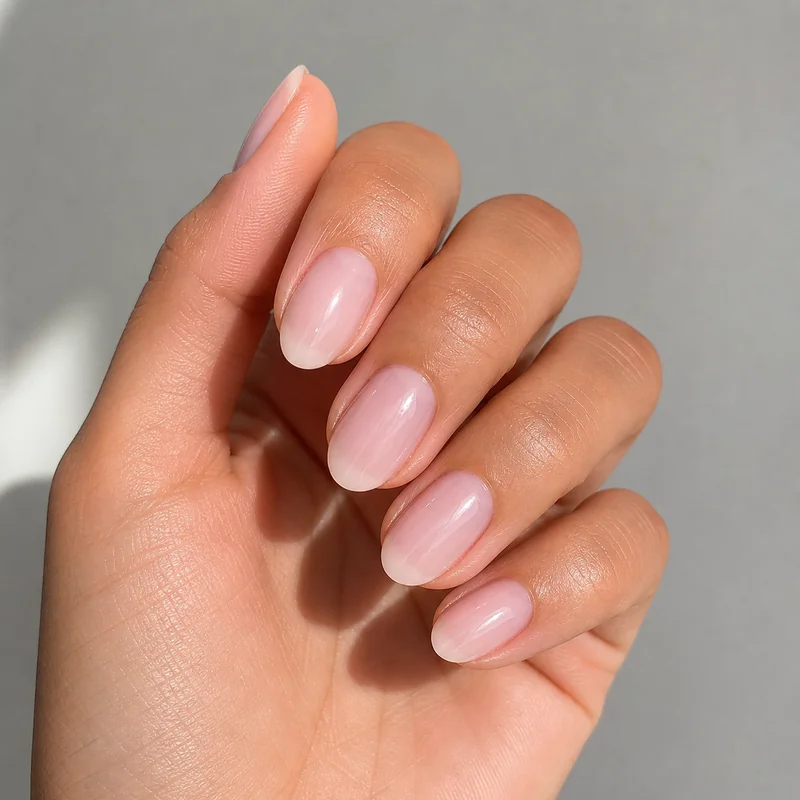
The most common assumption about almond nails on short natural nails is that short means impossible. It does not. What it means is that you need to check your length first, then choose the right path, because there are three, and most tutorials skip all of them. If you are brand new to the shape entirely, start with the beginner's guide to almond nails before coming back here.
Short almond nails on short natural nails is one of 2026's most-searched looks precisely because it works on real hands. Soft, tapered, wearable. And achievable at home.
Do You Have Enough Nail Length for Almond Shape? Here's How to Check
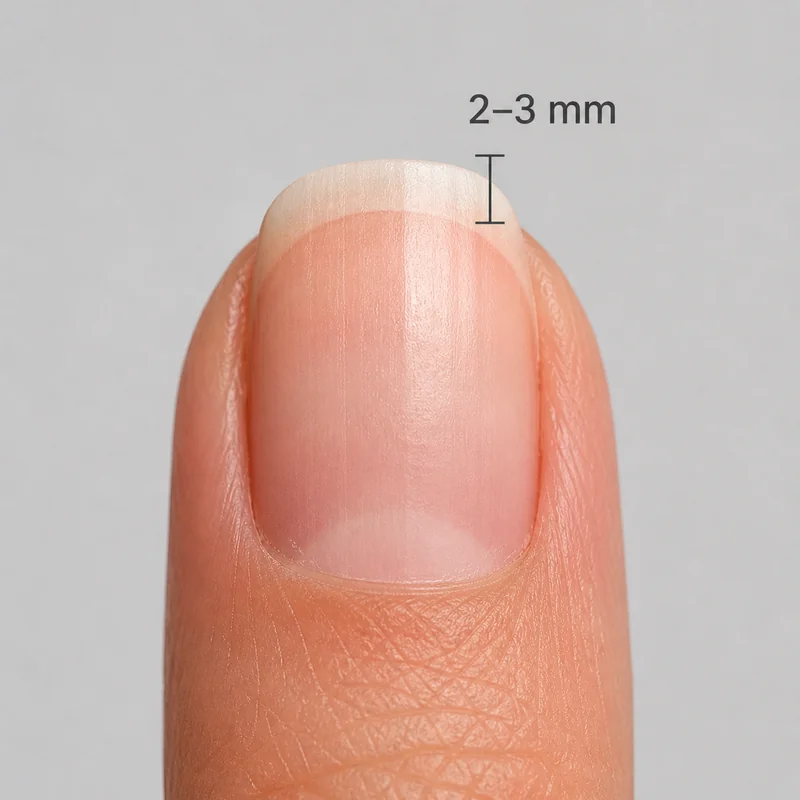
Before you pick up a file, check your free edge, the part of the nail that extends past your fingertip. You need roughly 2–3mm to create an almond taper on short natural nails. That is not much. Less than a quarter-inch. But it matters.
Press your fingertip gently against a flat surface. If the nail edge clears the skin by even a small amount, you likely have enough to work with. If the nail sits flush with or below your fingertip, natural shaping alone will not give you the almond point. You will lose too much structure in the process.
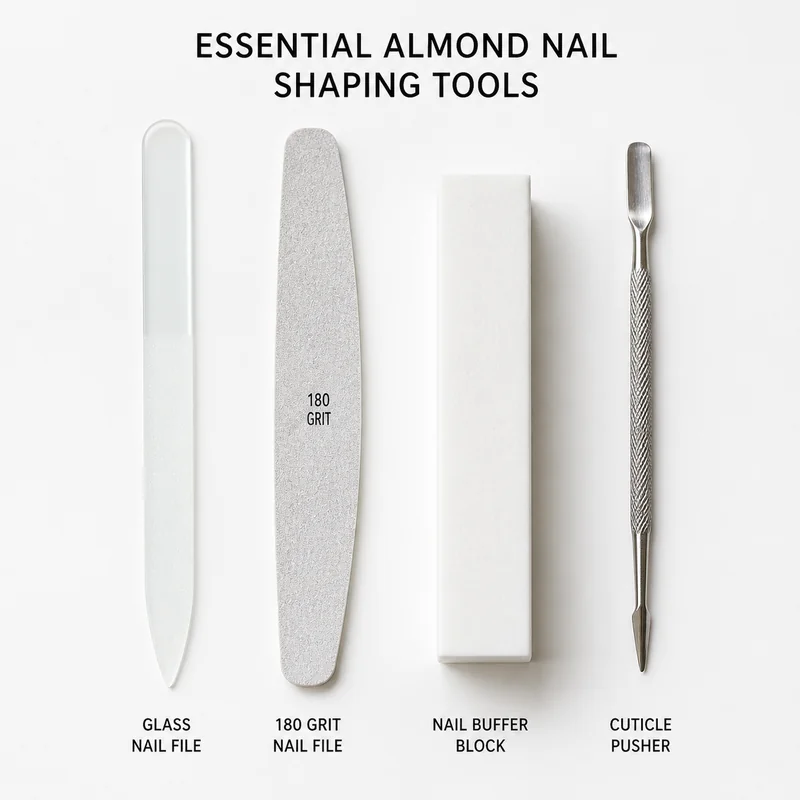
What Tools You Actually Need to Shape Almond Nails at Home
Short list. None of it exotic.
A glass nail file or 180 grit file is the non-negotiable. Glass files seal the keratin layers as they cut rather than tearing them, which matters enormously on short nails where splitting at the tip can undo a week of growth. How glass files help prevent nail splitting is worth reading before you buy anything else.
A 240 grit file for refining the tip once the shape is in. A nail buffer to smooth any rough edges. A cuticle pusher (push only, never cut) to tidy the base before you start. And an alcohol pad to clean the nail plate before filing. Oils or residue on the surface make it harder to see exactly where you are filing. Why glass files are better for natural nails, via NAILS Magazine, covers this in detail.
Prep Your Nails Before You File (Skip This and the Shape Will Not Hold)
Dry nails only. This is the rule that most people ignore and then wonder why their tip frays. Wet nails, even slightly damp from washing your hands, tear rather than cut cleanly when filed.
Remove any existing polish. Push your cuticles back gently with the cuticle pusher. Wipe each nail with an alcohol pad and let it dry fully. The dermatologist-recommended nail care guidance from the AAD confirms that filing direction and prep directly affect how long a shape holds. Clip any uneven length first, then file.
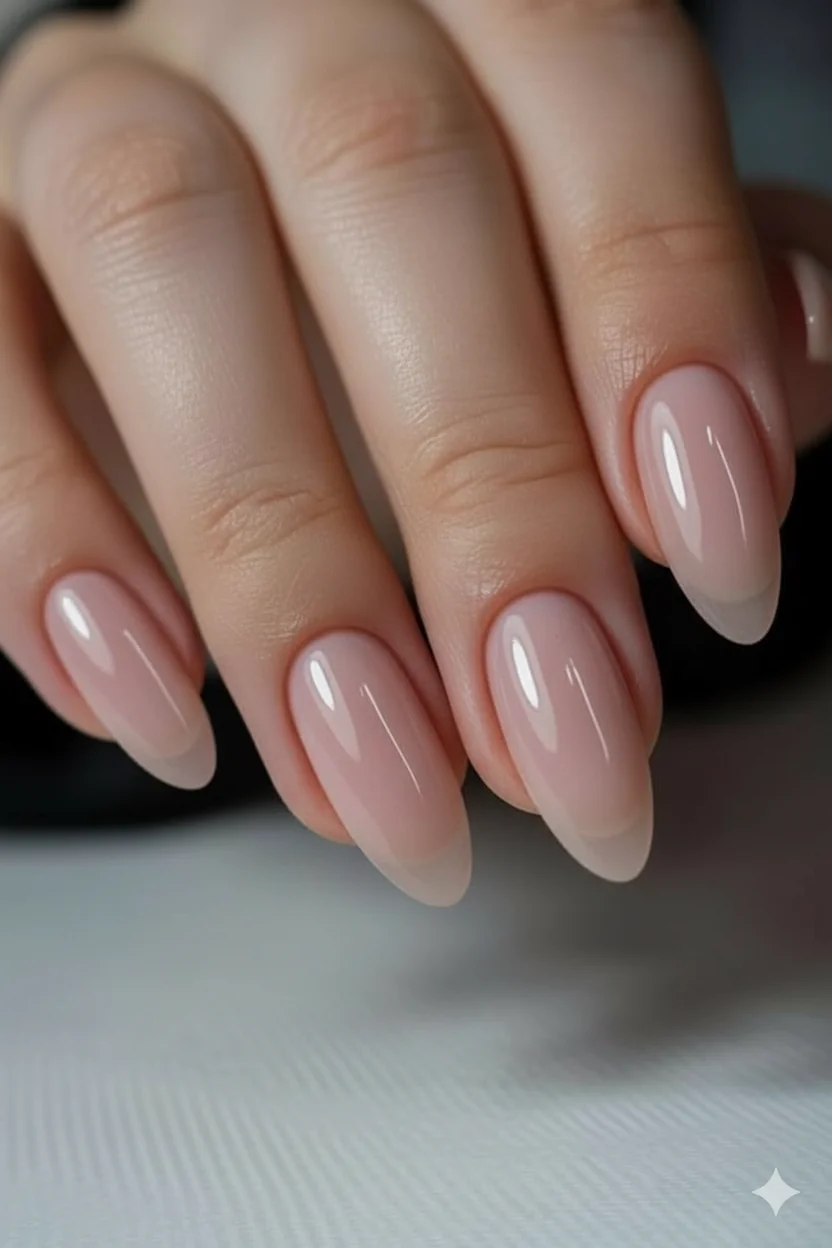
How to Shape Almond Nails on Short Natural Nails: Step by Step
This is where most tutorials lose people. They describe the finished shape without explaining the motion that creates it.
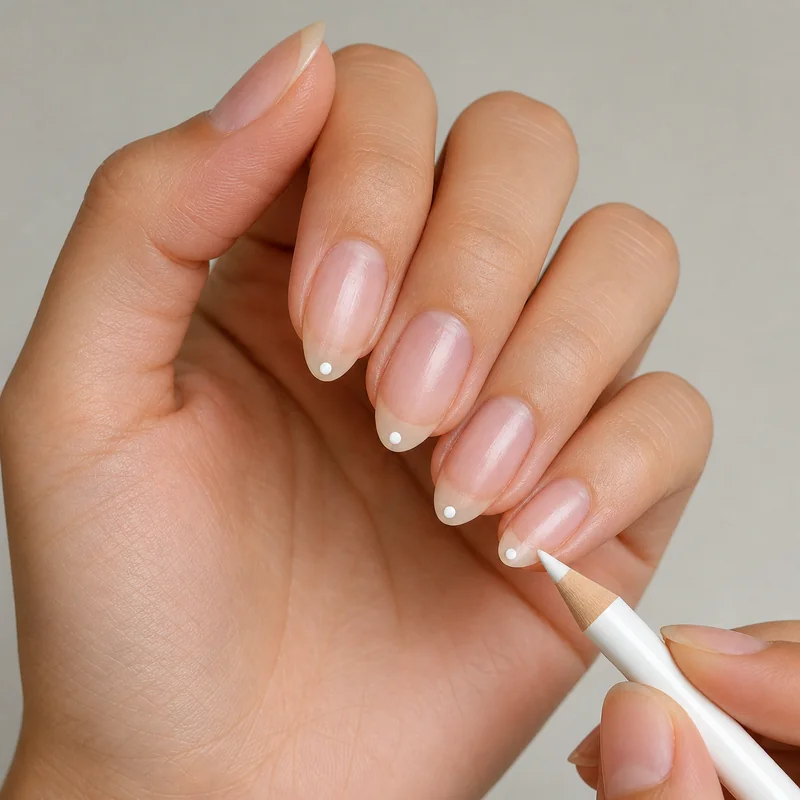
Mark the centre point. With a fine-tip white or nude eyeliner pencil, or even a toothpick dipped in polish, place a small dot at the very tip of the nail, centred over the nail bed. This is your target. Everything you file is aimed at this point.
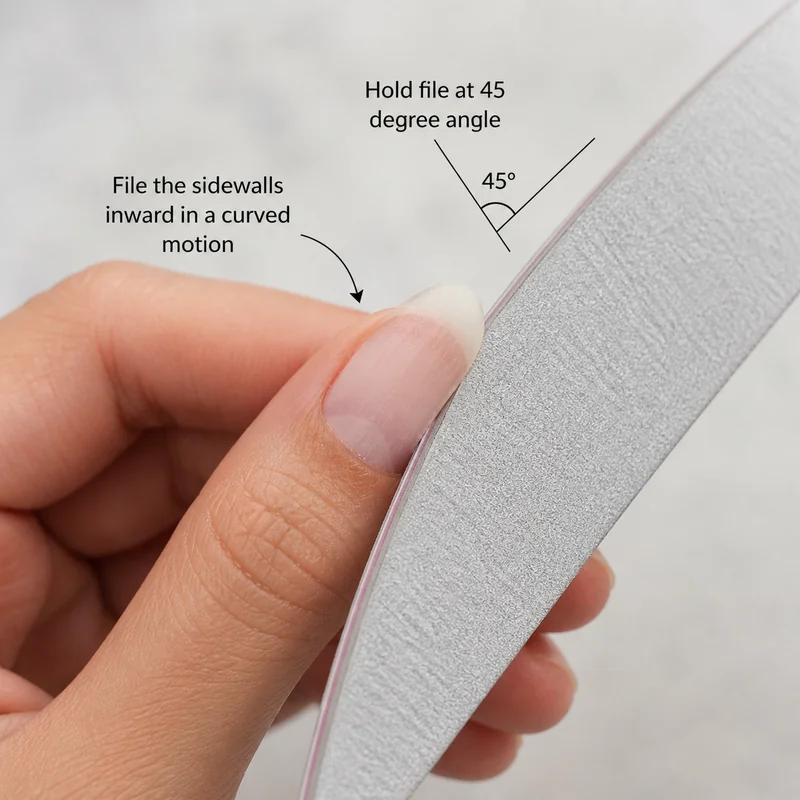
File the sides, not the tip. Hold the file at roughly a 45-degree angle to the sidewall and file from the corner of the nail inward toward that centre mark. Use a curved, sweeping motion, never back-and-forth. Always file in one direction only.
Three to four strokes per side, then switch. Alternate between left and right so you are not over-tapering one side. Four strokes on the left, four on the right, check, repeat.
Check from the side view. Hold the finger at eye level, horizontally. The tip should sit centred, rising to a soft point with both sides curving in evenly. If one side drops lower, file that side slightly more.
Soften the tip. Once the taper is set, use the 240 grit file lightly across the very tip, just enough to take off any sharp edge and leave a soft, rounded point. Almond is not stiletto.
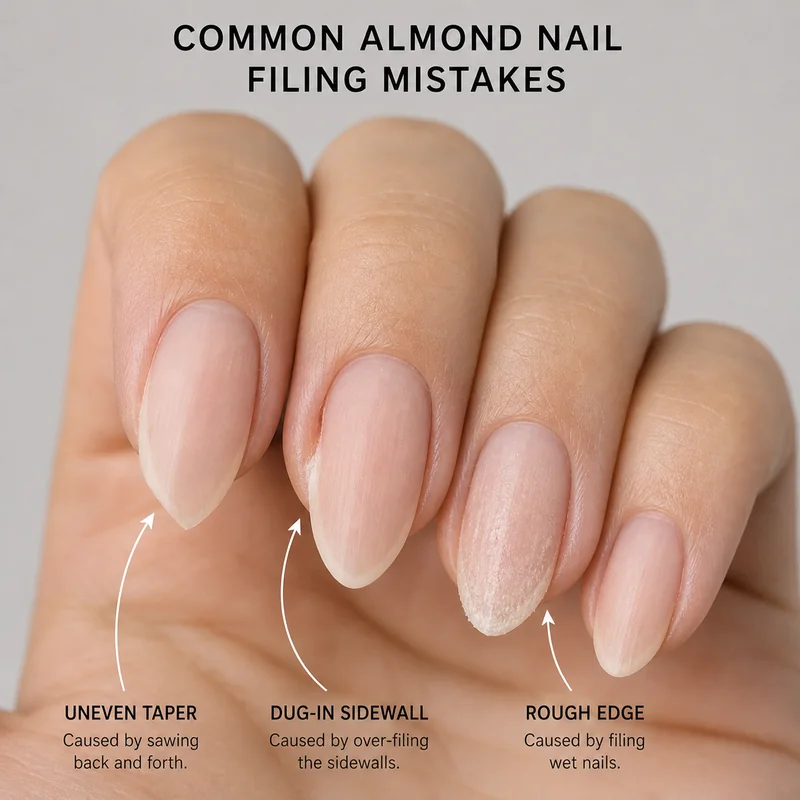
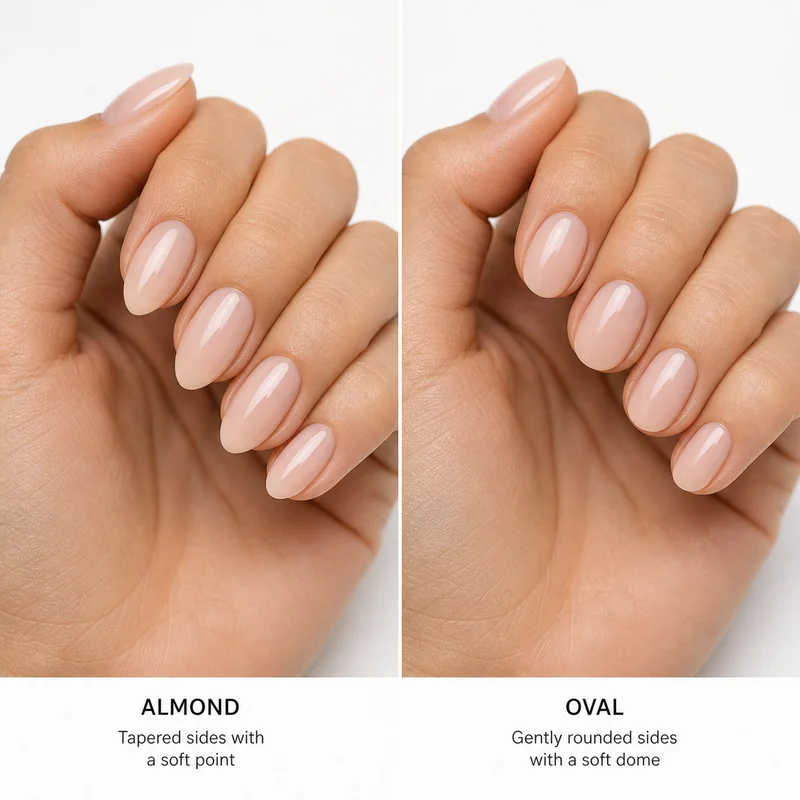
Why Your Almond Nails Keep Looking Like Ovals (And How to Fix It)
The most common result of a first attempt: a perfectly nice oval. Disappointing if you were going for almond.
The difference is in the sides. An oval nail curves naturally from a wide base to a rounded tip. An almond nail has sides that taper inward before they meet the tip. The silhouette narrows as it rises. The point is a consequence of the side taper, not something you create at the tip itself.
If your nails look oval, the fix is always more taper on the sides. Not a sharper tip. Sharpen the tip and you get stiletto. Taper the sides and you get almond. Go back to step two and take a few more strokes from each sidewall toward the centre mark. Check the side view on what makes almond nails different from oval for visual reference.
What to Do If Your Nails Are Too Short for a Natural Almond Shape
Three paths. Choose the one that fits where you actually are.
Grow them out. The most obvious option, and often underestimated. Even 2–3 weeks of protected growth can take a nail from "too short to shape" to workable. How to grow your nails long enough for almond shape covers what to do in the meantime.
Add a soft gel tip. A short soft gel tip bonded over your natural nail gives you the extra free edge without a full set of extensions. You shape the tip into an almond after application, and the result lasts 2–3 weeks. Not sure which product to use? Gel vs acrylic almond nails breaks it down.
Use a press-on. Modern press-ons with adhesive tabs last 2–4 weeks and need no UV lamp, no skill, no salon.
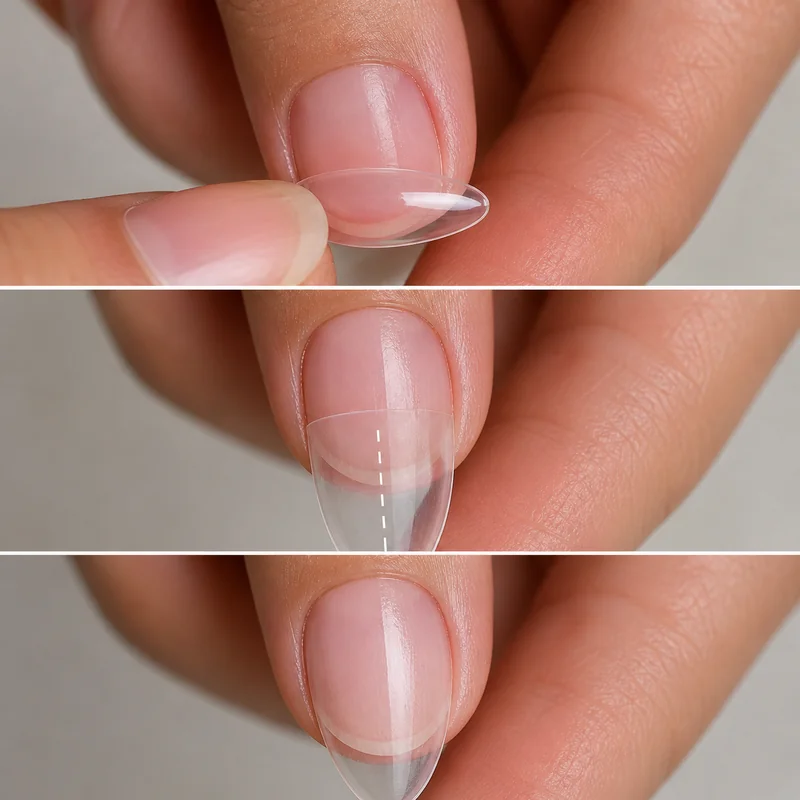
How to Add a Nail Tip to Get Almond Shape When Your Nails Are Very Short
Soft gel tips are sized, usually ten per kit, one per finger. Spend time on sizing. A tip that is even slightly too wide will lift at the sides; too narrow and it looks unnatural. Press the tip against your nail bed before applying: it should sit flush across the full width of your nail plate.
Once sized, buff the natural nail surface lightly, apply the adhesive or gel, press flat, and cure under a UV lamp. Then shape as normal: centre mark, side taper, side-view check. The soft gel material files exactly like a natural nail extension.
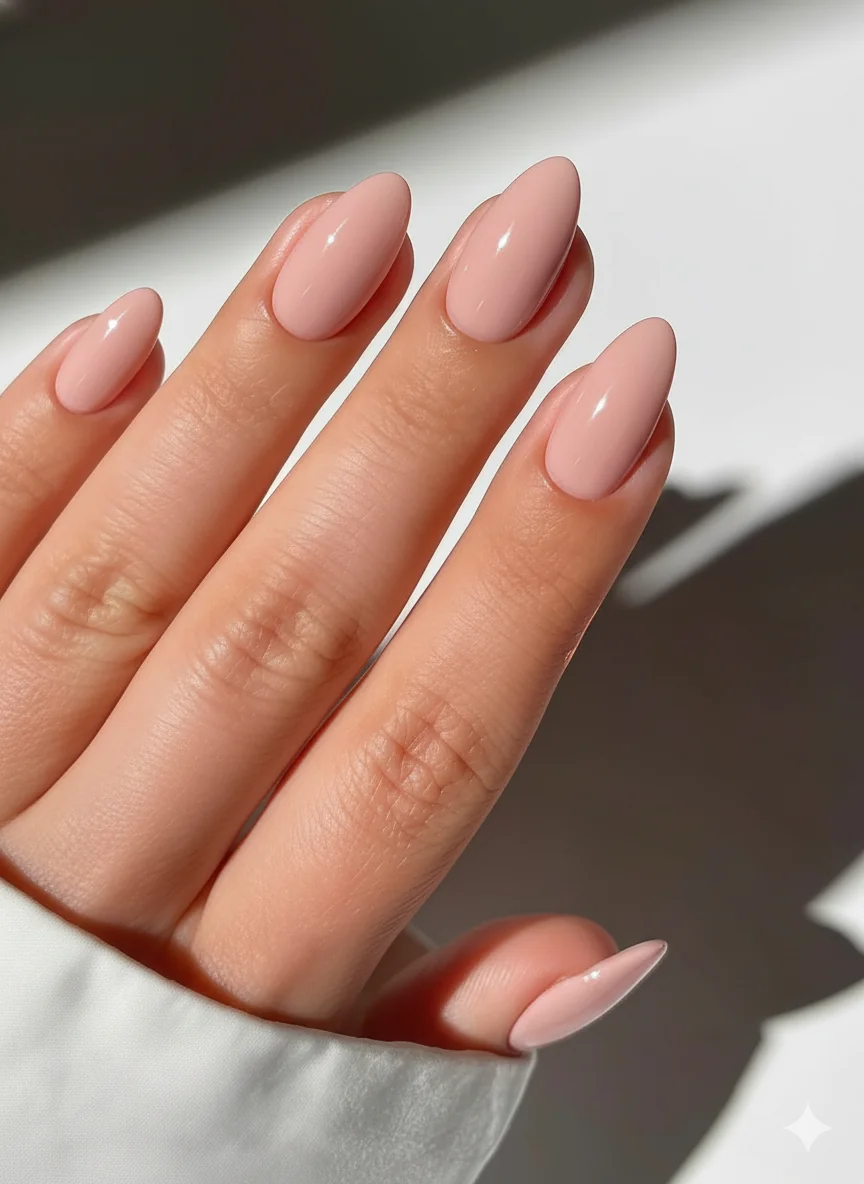
The Fastest Option: Press-On Almond Nails for Short Fingers
Press-ons have earned their reputation back. The generation that came through 2024 to 2026, particularly from brands like Glamnetic and imPRESS, are a different product from the brittle plastic sets of ten years ago. Applied correctly over a clean, dry, oil-free nail, adhesive-tab press-ons last two to four weeks.
Prep is the same: clean, dry, alcohol-wiped nail plate. Size-match carefully. Press down firmly from the cuticle end toward the tip, holding for 30–60 seconds per nail. Avoid water for an hour after application.
For short fingers, a shorter almond press-on looks proportional and wearable. Wondering if almond even works for your hand shape? That guide answers it by finger type.