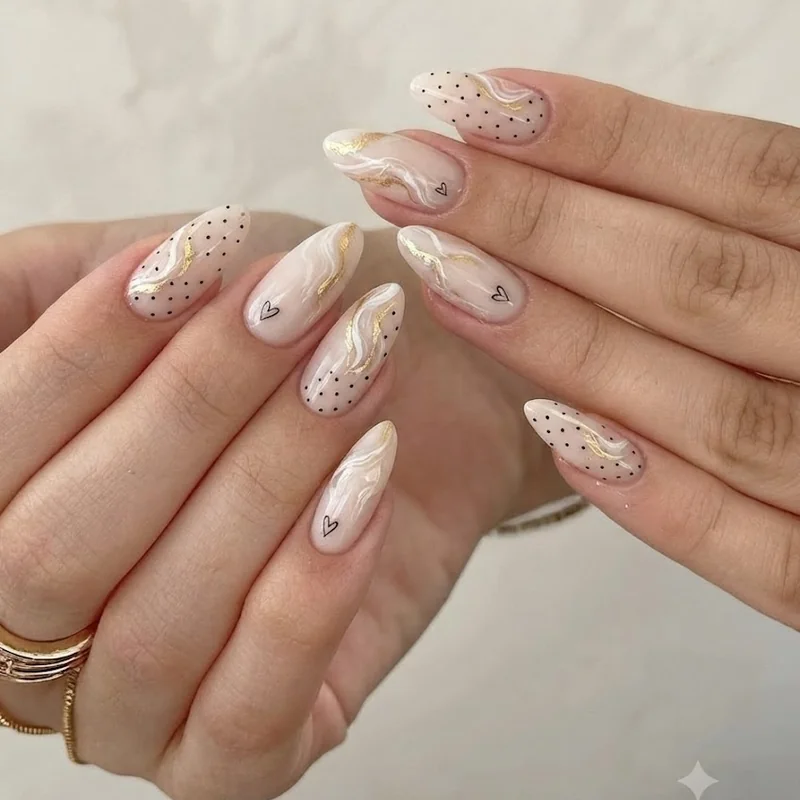
Polka Dot and Dot Flower Designs
Line up your polishes, uncap the base colour, and let it set for a minute before touching the toothpick to it. Dots are where every toothpick technique starts, because the motion, dip and press, is the same motion every other design in this guide is built from.
Dip the toothpick tip into your accent polish, just the tip, and press it straight down onto the nail without dragging. Lift straight up. That single motion is the entire dot technique. Repeat in a scattered pattern, a straight line, or clustered in threes for a confetti effect. For a dot flower, place one dot in the centre, then five smaller dots around it in a ring, each one touching the centre dot while it's still slightly wet so the petals blend softly into the middle. Easy nail art with a toothpick rarely gets more forgiving than this: uneven dot sizes read as intentional texture rather than a mistake.
Blooming gel, a specialised top coat that makes polish spread and diffuse into a soft, watercolour-like bloom, is worth knowing about if the dot-flower look appeals to you, though it isn't required here since a plain toothpick dot flower already gives a similar layered effect without an extra product. Practice on a few nails before committing to all ten. Dot spacing gets more even with repetition, and the second hand is always steadier than the first.
Once the dot work feels natural, how to paint cherry and fruit nail art at home uses the same dotting motion to build out small fruit shapes, a natural next step. For more floral direction using this exact tool, more toothpick daisy and floral nail art tutorials walks through petal shaping in detail.
Simple Heart Nail Art
A heart is not two separate shapes stitched together. It is one continuous motion split into two matching halves, and once that clicks, the design takes under thirty seconds per nail.
Start with two dots placed side by side near the top centre of the nail, close enough that they'll eventually meet. While the polish is still wet, drag the toothpick from the outer edge of each dot downward and inward, curving slightly so each dot pulls into a rounded teardrop shape. The two teardrops meet at the bottom in a point, and the rounded tops naturally form the dip at the top of the heart. No freehand outline drawing required, the dragging motion does the shaping for you.
Keep the two starting dots small and evenly sized, since mismatched dot sizes are the most common reason a heart ends up lopsided. If the first attempt looks a little uneven, that's genuinely part of the charm here: hand-drawn hearts read as intentional in a way a printed decal never does. A single heart works as an accent on the ring finger, or scatter three or four smaller ones across one nail for a confetti heart look.
Toothpick Marble Nails
Can you make marble nails with just a toothpick? Yes, and there are two distinct ways to do it. Drag marble works dry, straight on the nail, while water marble uses a cup of water as the canvas before the pattern transfers across. Both rely entirely on the toothpick for the swirling motion.
For drag marble, apply your base colour and let it dry fully. While the surface is still tacky rather than fully cured, drop two or three small dots of contrasting polish onto the nail, close together. Immediately drag the toothpick through the wet dots in a single S-curve or loose zigzag, pulling colour through colour rather than stirring in circles. Water marble technique is a related but separate method: it involves dropping polish onto the surface of room-temperature water, swirling the floating colours into a pattern with a toothpick, then pressing the nail directly into the marbled surface to transfer the design. Both methods depend on working fast, since nail polish begins to skin over the moment it hits air or water.
For water marble specifically, drop one colour into the water, let it spread into a thin ring, then drop a second colour into the centre of that ring, and repeat two or three times to build concentric rings. Drag the toothpick through the rings in straight lines from the centre outward to create a spiral or feathered pattern. Work within about fifteen seconds of the final drop, because the polish stops moving cleanly once it starts to set on the water's surface. Press the nail in at an angle, roll it through the pattern, then lift straight out. Clean up the excess polish left on the surrounding skin with a clean, damp cotton swab dipped in acetone once the design has had a moment to set.
Marble is the one technique in this guide where speed genuinely matters more than precision. A slightly imperfect swirl still reads as marble. A slow, careful one often ends up muddy because the colours had time to blend into grey before the pattern set. Of the five techniques covered here, this is the one that proves easy nail art with a toothpick can rival a proper nail art kit rather than just imitate one.
Abstract and Leopard Print Designs
Uncap a base colour, a mid-tone, and a dark accent, because leopard print and abstract prints both rely on layering three shades in quick succession rather than any single precise motion.
For leopard print, dot small, irregular blobs of your mid-tone across the nail in a loose, scattered pattern, no two the same size or spacing. While those are still slightly wet, use the toothpick to draw two or three short, curved dark lines around one edge of each blob, like a broken crescent rather than a full circle. Leave gaps in the outline on purpose. Real leopard print reads as irregular, and a perfectly symmetrical ring around each spot looks more like a cartoon than a print. For a looser abstract print with no animal reference at all, skip the outline step entirely and just drag the toothpick through wet dots in short, varied strokes, some straight, some curved, to build an organic, painterly pattern.
This technique pairs naturally with a negative space approach, leaving bare, unpolished sections of nail between the printed areas rather than covering the whole surface. For more direction on where to leave that bare space intentionally, negative space nail ideas covers the placement logic in more depth. Nail artists frequently point to the toothpick's fine control as the reason these looser, print-based designs translate so well from a nail art brush to a household substitute, since the tapered point handles both the blob shapes and the fine crescent detailing without swapping tools mid-design.