The 10-Minute Fix: One Accent Nail, Zero Skill Required
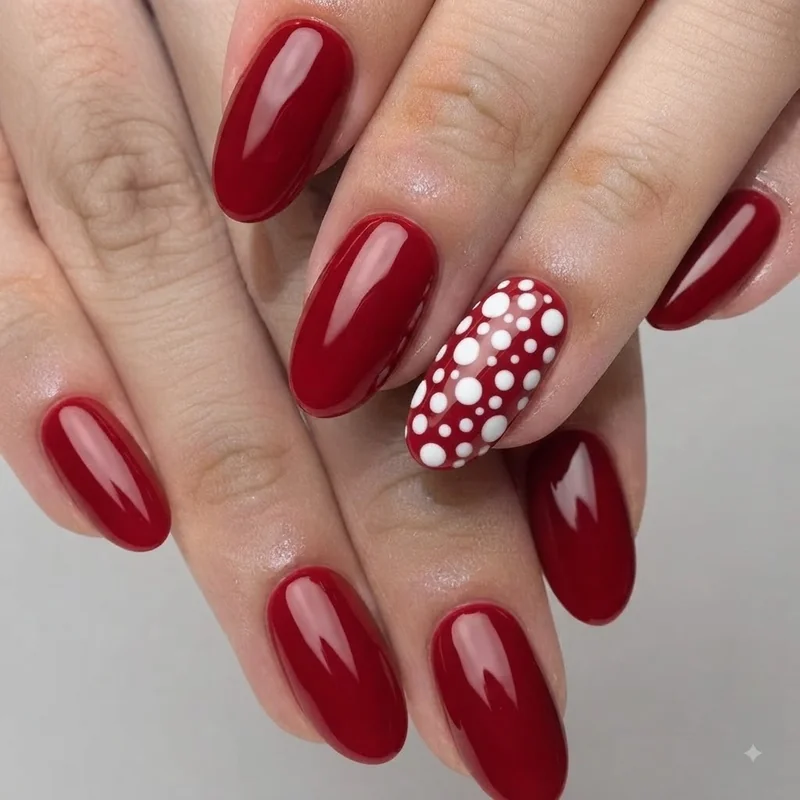
Paint four nails a plain red, green, or white. Paint the ring finger differently. That is the entire technique, and it is the fastest route to a finished, festive set in this guide.
An accent nail is a single nail within a manicure that carries a different colour, finish, or design from the rest of the set, used to add interest without requiring the same detail across all ten nails. It is the single most efficient tool for a time-crunched Christmas manicure, because ninety percent of the visible design work happens on one finger instead of ten.
Choose your base first. A warm red or a deep forest green both read instantly as festive without needing anything layered on top. Two thin coats, letting the first go slightly tacky before the second, gives cleaner coverage than one thick coat and dries faster overall. Do this on nine nails.
On the tenth, the ring finger by convention but any finger works, add the moment. A few white dots in a loose cluster reads as snow. A thin painted stripe near the cuticle in gold or white reads as a wrapped gift. Even a plain contrasting colour on that single nail, no pattern at all, creates enough visual break to stop the set looking like an afterthought.
Dotting tools help but are not required. The rounded end of a bobby pin, a toothpick, or the cap of a pen all make a passable dot with a little practice on paper first. Load a small amount of polish, touch lightly, lift straight up. Two attempts is usually enough to find the pressure that works.
Top coat every nail once the accent is dry to the touch, roughly two to three minutes after the last dot. This is the step people skip when they are rushing, and it is the step that determines whether the set survives contact with a coat sleeve later tonight.
If you are linking this to a wider plan, the same time-tiered logic runs through our 5-minute nail art ideas, which is worth bookmarking for the next time a deadline sneaks up on you outside of December.
The 20-Minute Option: Candy Cane Stripes and Simple French Tips
Twenty minutes buys a full set with an actual pattern, and candy cane stripes are the most forgiving one to attempt with shaky, rushed hands.
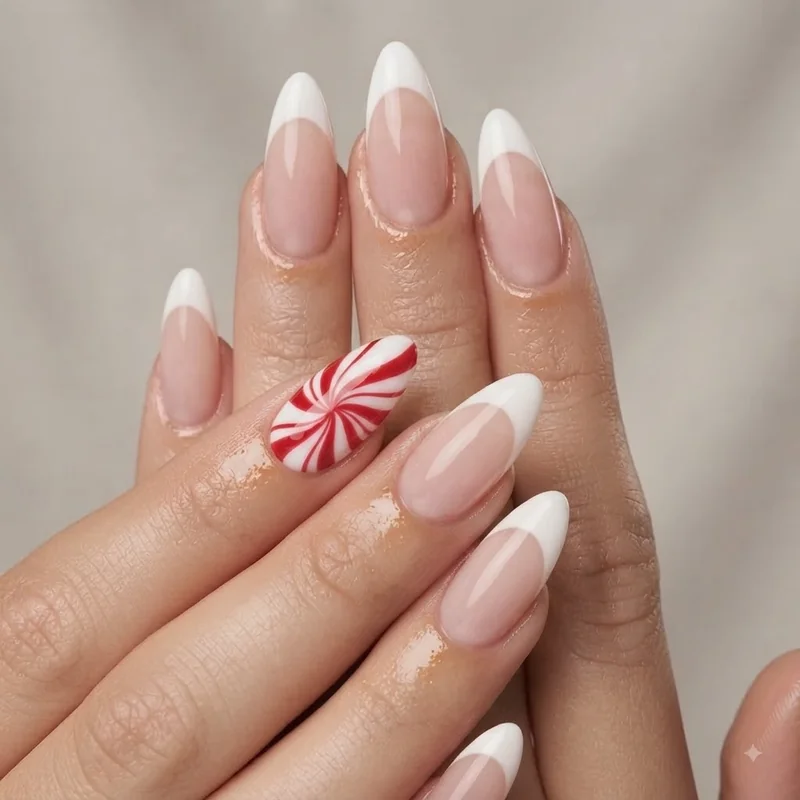
Candy cane stripes are diagonal red and white bands painted across the nail tip, typically two to three stripes per nail, designed to mimic the twist of a peppermint stick without requiring symmetry or precision. Because the stripes are meant to look slightly imperfect and hand-drawn, this design tolerates wobble better than almost anything else in a Christmas nail rotation.
Base every nail in white first, two thin coats. While that dries, load a thin brush, an old liner brush works fine, with red polish. Once the white is dry to the touch, drag two or three diagonal lines across each nail at a loose angle, leaving gaps of white between them. Uneven spacing between nails is fine. Uneven spacing within a single nail reads as the twist of an actual candy cane, so resist the urge to fix it.
A French tip is the second option in this window and takes even less brush control. Paint a sheer pink or nude base, then use striping tape or a folded piece of tape as a guide to paint a straight white line across the tip of each nail. Peel the tape while the polish is still slightly wet for the cleanest edge. Add a thin red line just above the white tip on one or two nails for a Christmas-specific version, rather than the plain white classic.
Both designs share a dry-time consideration. Because there are two colours involved, the base needs to be genuinely dry before the second colour goes on, or the colours drag into each other and blur the line you were trying to keep clean. Two minutes of patience here saves five minutes of correcting a smudged line later.
For the same time-tiered thinking applied to a completely different holiday, the same twenty-minute logic works for last-minute Halloween nail art ideas, using swapped colours and the same stripe or accent technique.
Polish or Press-On: Which Is Actually Faster Right Now?
Press-ons are faster whenever your total available time is under fifteen minutes, because there is no dry time built into the process at all. Polish is faster, and cheaper, when you already own the colours and have twenty minutes or more, since you skip the sizing and trimming step press-ons require.
The trade-off comes down to what you already have on hand versus how much time you have left. Press-ons need a pre-owned kit, correctly sized nail tabs or glue, and a few minutes of trimming to match your natural nail width, front-loaded before any actual application begins. Once sized, application itself takes under five minutes for a full set. Polish needs no pre-purchase beyond what is already in your bathroom drawer, but every layer, base, colour, and top coat, adds real drying minutes you cannot skip past.
If tonight is genuinely under ten minutes, press-ons win by default, assuming you have a set already in the house. Buying one at this hour is not realistic, so this only applies if a kit already exists somewhere in a drawer.
If you have fifteen to twenty minutes and own polish in a Christmas-appropriate shade, polish wins on cost and on the fact that it never looks like it was applied in a rush the way an ill-fitted press-on tab sometimes can.
There is a middle path worth knowing about: nail decals and stickers. Apply them over one coat of dry base colour, seal with top coat, and they need no drying time of their own once sealed. This sits between the other two options, faster than hand-painted detail, more customisable than a full press-on set.
Whichever route you choose tonight, the same decision framework applies to New Year's Eve nails you can do in 10 minutes, since the same three-minute-versus-twenty-minute maths carries straight through to the next holiday on the calendar.
How to Stop It Smudging Before Morning
Nail polish will not smudge overnight if you give it a genuine hour of stillness after the final top coat before you get into bed. The surface feels dry within twenty minutes for most formulas, but full hardening takes considerably longer, and that gap is exactly where accidental smudges happen.
Surface-dry and fully cured are not the same state. A standard polish set feels touch-dry within ten to twenty minutes, but the layers underneath stay soft for closer to an hour or two, which is the window where a stray brush against a pillowcase leaves a dent. Gel polish behaves differently: it cures under a UV or LED lamp in roughly thirty to sixty seconds per coat and is genuinely hardened the moment that light switches off, which is why gel is the safer overnight bet if you own a lamp.
The tap test is a quick way to check whether a manicure is safe to sleep on: press a nail lightly against a soft fabric surface, like the inside of a sleeve, and check whether any polish transfers or drags. No transfer means the surface is set enough for careful movement. Some drag or a visible mark means give it more time before doing anything with your hands.
A few habits protect the set through the night specifically. Avoid a hot shower right before bed, since heat and moisture soften polish and slow full hardening. Sleep with your hands resting flat rather than curled under a pillow, where friction against fabric is highest. If your top coat is a quick-dry formula, apply it as the very last step, since it forms a harder outer shell faster than a standard top coat and buys real protection during that vulnerable first hour.
Ice water speeds up surface drying if you are genuinely down to the wire. A bowl of cold water with a few ice cubes, hands submerged for roughly five minutes after the final coat, sets the surface layer noticeably faster than air alone. It does not replace the full hardening window, but it buys enough surface protection to get through getting undressed and into bed without a disaster.