The Easiest Pumpkin Nail Art Tutorial (Beginner Technique)
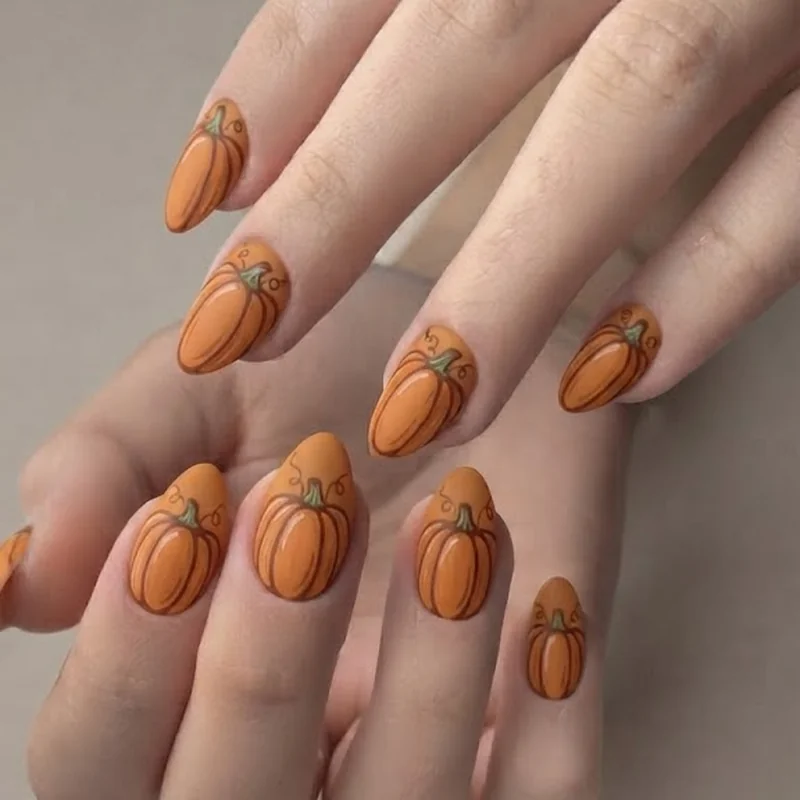
A pumpkin nail is painted by building the shape from a wide, rounded orange base rather than drawing it in one freehand stroke. Add two to three short vertical lines down each side to suggest the pumpkin's ridges, then finish with a small brown stem and a curled green tendril at the top. The shape comes from layering simple marks, not from steady freehand control.
That reframe matters more than it sounds like it should. "Freehand" makes people picture an artist sketching from nothing, and that's not what's happening here. This technique is closer to building with blocks: dot, connect, repeat.
Start with two thin coats of orange polish and let it dry fully, two to three minutes, until it's genuinely matte to the touch, not just dry on the surface. Rushing this step is where most smudged lines come from. Once set, use the liner brush or a toothpick dipped in brown or black polish to draw two to three short curved lines running vertically down each side of the nail, spaced evenly, not touching the edges.
Add a small rectangle in brown at the top center for the stem, then a thin curled line beside it in green for the tendril. Both should sit just below the free edge, not centered on the nail. Let everything cure or dry fully, then seal with top coat.
For readers going gel, cure each colored layer under the UV lamp for the manufacturer's recommended time before adding the next detail. Skipping a cure cycle is the gel equivalent of painting over wet polish, and it drags every line that follows.
How to Do a Jack-O'-Lantern Face Pumpkin
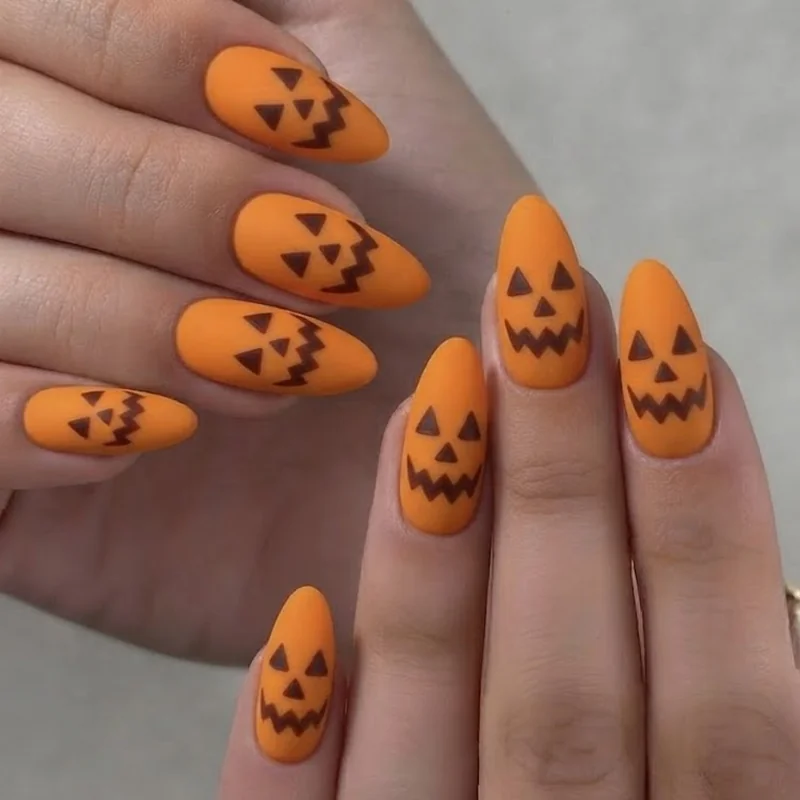
Adding a jack-o'-lantern face means layering a simple triangle-eyes, triangle-nose, jagged-mouth combination on top of the classic pumpkin shape once the base is fully dry. It's the same pumpkin outline from the previous technique, with three or four small black shapes added over the front third of the nail.
Once the base pumpkin shape and stem are dry, work in miniature. Use the dotting tool's fine end or a toothpick to place two small black triangles for eyes, spaced evenly and angled slightly inward toward the center. A single black triangle below and between them forms the nose. The mouth is the part that reads as "carved" rather than "drawn": three or four short jagged lines connected in a rough zigzag, wider at the base than the eyes.
Keep every shape small. On a standard nail, each triangle should be roughly the size of a grain of rice. Oversized features are the fastest way to tip a jack-o'-lantern into looking cartoonish rather than carved. If a line goes wrong, a clean cotton swab dipped in acetone lifts just that mark without disturbing the orange base underneath, since the base has already cured or dried by this stage.
Seal the whole design with top coat once the face details are fully set. A slightly glossy top coat over a matte base actually reads better here than an all-over matte finish, since it gives the carved lines a bit of visual depth against the orange.
Pumpkin French Tip Tutorial
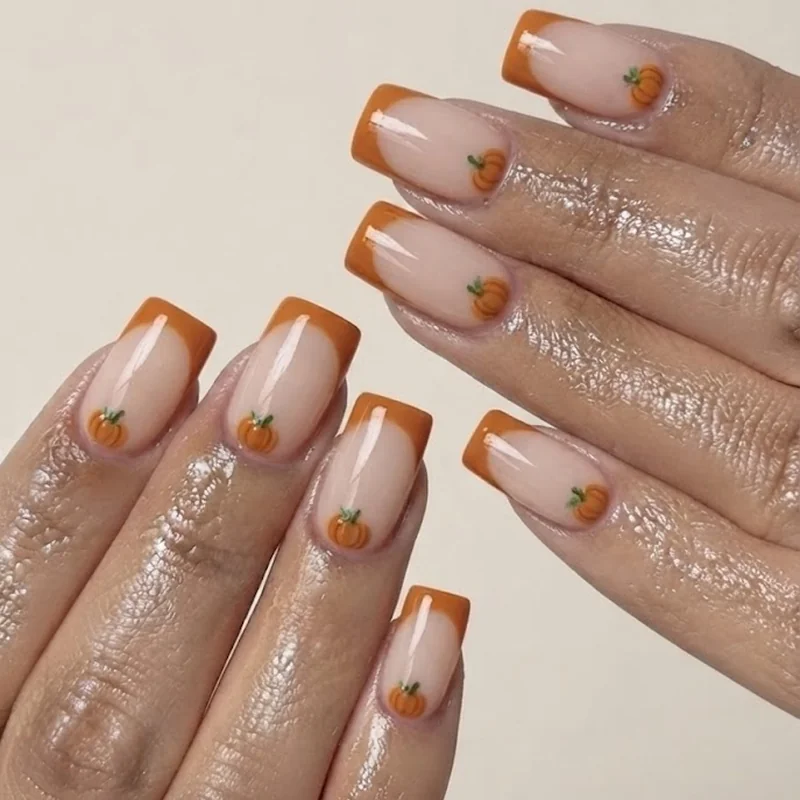
A pumpkin nail art tutorial variation built entirely around the tip removes freehand shape drawing altogether. A pumpkin French tip is a manicure where the traditional white French tip is replaced with an orange tip shaped like the top curve of a pumpkin, with a small brown stem painted where the tip meets the nail bed.
This is the option for anyone who read the first two techniques and still felt nervous about drawing a full pumpkin. There's no shape to build here, no proportions to get wrong beyond a curved line near the tip, the same motion behind any classic French manicure.
Paint a sheer nude or soft pink base and let it dry completely. Using the liner brush, sweep a curved orange line across the tip of the nail, following the natural smile line of the nail rather than a straight edge, since a straight tip line reads as generic French manicure rather than pumpkin-specific. Fill the tip solid once the outline is placed. While that dries, add one small brown rectangle stem centered right where the orange tip meets the bare nail below it, and a thin green tendril curling off to one side.
Readers who've already tried candy corn nails tutorial will recognize the tip-only approach: same low-freehand logic, different seasonal palette. Once the stem is dry, seal the whole nail with top coat.
Pumpkin Nail Art on Short Nails
Pumpkin nail art works on short nails, and it can look cleaner than it does on long ones. The fix is scale: shrink the pumpkin shape to fill roughly two-thirds of the nail's surface instead of stretching it edge to edge, and drop the outline count from three vertical lines to two.
Short nails often get skipped in nail art tutorials because a full-size design was built for a canvas that isn't there, and it ends up looking cramped or overcrowded. The workaround isn't a different technique, it's a smaller, more deliberate version of the same one.
Center the pumpkin shape slightly lower on the nail, closer to the cuticle than the free edge, which leaves visual breathing room at the tip instead of crowding the design against it. Keep the stem proportionally smaller too. A stem sized for a long nail looks oversized once the whole canvas shrinks. If a full pumpkin still feels tight, the French tip technique scales down naturally without any adjustment at all, since a curved tip line works at any nail length.
For a longer look at scaling seasonal designs to shorter nails specifically, the short october nails roundup covers more length-specific options beyond pumpkins alone.